|
Contents
- 1 Purpose
- 2 Trade
Contracts
- 3 Individual
Builds
- 3.1
A/E Green Farmer [PvE]
- 3.2 A/Me Fever Outbreak
[PvE, AB]
- 3.3 A/any Critical Fox
[PvE, AB, PvE hero]
- 3.4 A/any Death Blossom
[PvE]
- 3.5 E/Me UW Tank
[PvE]
- 3.6 N/Mo Aataxe/Grasping
Darkness Farmer [PvE]
- 3.7 N/any BiP
[PvE]
- 3.8 N/any Minion Master
[PvE, Hero, AB, CM]
- 3.9 P/W Party Support
[PvE, Hero]
- 3.10 Mo/any Holy Haste LoD
healer [PvE]
- 3.11 Mo/any 55 HP
[PvE]
- 3.12 Mo/any WoH
[PvE]
- 3.13 R/Mo Basic Runner
[PvE]
- 3.14 R/any General Barrage
[PvE]
- 3.15 Attributes and
skills
- 3.16 R/any Needler
[PvE]
- 3.17 Rt/Mo Burst Healer
[PvE]
- 3.18 Rt/any Ritual Lord
[PvE, TA]
- 3.19 Rt/any Spiritual
Assassin [AB, CM, RA]
- 3.20
W/N The Quiverer [PvE]
- 3.21 W/Rt AoE Splinter
[PvE]
- 4 Team Builds
- 4.1 Shadow Flame
[PvE]
- 4.2 DoA Balanced
Team [PvE]
- 4.3 Steel Wall Deep
[PvE]
- 4.3.1 Overview
- 4.3.2 Membership
- 4.3.3 Usage
- 4.3.3.1 Division of labor,
the first 5 rooms
- 4.3.3.2 Room 5,
Aspect of Pain
- 4.3.3.3 Room 6, Aspect of
Lethargy
- 4.3.3.4 Room 7, Aspect of
Depletion
- 4.3.3.5 Room 8,
Aspect of Failure
- 4.3.3.6 Room 9,
Aspect of Shadows
- 4.3.3.7 Room 10,
Scorpion Aspect
- 4.3.3.8 Room 11,
Aspect of Fear
- 4.3.3.9 Room 12, Aspect of
Depletion
- 4.3.3.10 Room 13,
Aspect of Decay
- 4.3.3.11 Room 14, Aspect
of Torment
- 4.3.3.12 Kanaxai's
Chamber
- 4.4 Barrage/Pet Tomb of
Primeval Kings [PvE]
|
[edit] Purpose
This is simply a personal archive of what I find personally
useful/find interesting/would like to play with.
[edit] Trade Contracts
I decided the
link list of trade contract quests took an awful lot of effort to
see which quests were done and what was even required. So, I
created this handy checklist. Feel free to swipe it for your own
page.
[edit] Trade Contract Checklist
 Rally the Princes [2
awarded] Rally the Princes [2
awarded]
Requirements:
Obtained From:
- Kuwame in Wehhan Terraces
Interception
Requirements:
Obtained From:
- Commander Tamnod in Dzagonur
Bastion
Population
Control
Requirements:
Obtained From:
- Prince Ahmtur the Mighty in the Citadel
of Dzagon (Wilderness of Bahdza)
Guard Rescue
Requirements:
Obtained From:
- Prince Ahmtur the Mighty in the Citadel
of Dzagon (Wilderness of Bahdza)
Extinction
Requirements:
Obtained From:
- Lieutenant Murunda in Dzagonur
Bastion
A Sound of Ancient
Horns
Requirements:
- Dasha Vestibule (Mission) or Dzagonur
Bastion (Mission)
Obtained From:
- Lieutenant Murunda in Dzagonur
Bastion
Destroy the
Harpies
Requirements:
- Dasha Vestibule (Mission) or Dzagonur
Bastion (Mission)
Obtained From:
- Lieutenant Murunda in Dzagonur
Bastion
The
Hanging Gardener
Requirements:
Obtained From:
- Gardener Pohsin in Vehtendi
Valley
Scorched Earth
Requirements:
Obtained From:
- Prince Bokka the Magnificent in the
Resplendent Makuun
Worst. Performance.
Ever.
Requirements:
Obtained From:
- Prince Bokka the Magnificent in the
Resplendent Makuun
The Show
Must Go On
Requirements:
- Norgu
- Worst. Performance. Ever.
Obtained From:
- Prince Bokka the Magnificent in the
Resplendent Makuun
Summertime for Bokka
Requirements:
- Norgu
- The Show Must Go On
Obtained From:
- Prince Bokka the Magnificent in the
Resplendent Makuun
 Valley of
the Rifts Valley of
the Rifts
Requirements:
Obtained From:
- Prince Bokka the Magnificent in the
Resplendent Makuun
In
Defense of Theatre [Difficulty: Master]
Requirements:
- Goren
- Valley of the Rifts
Obtained From:
- Royal Finance Minister Oloda in Honur
Hill
Botanical
Research
Requirements:
- Tahlkora [unless Abaddon's Gate mission
is complete]
- Garden of Seborhin
Obtained From:
- Librarian Kahnu in the Halls of
Chokhin
Plague of
Frogs
Requirements:
- Tahlkora [unless Abaddon's Gate mission
is complete]
- Garden of Seborhin
Obtained From:
- Horticulturist Hinon in Garden of
Seborhin
Which
Way Did He Go?
Requirements:
- Tahlkora [unless Abaddon's Gate mission
is complete]
- Garden of Seborhin
Obtained From:
- Horticulturist Hinon in Garden of
Seborhin
Gift Of The Djinn [2
awarded]
Requirements:
- Dasha Vestibule (Mission)
Obtained From:
- Library Envoy Chukeht in Mihanu
Township
Data Mining
Requirements:
Obtained From:
- Belgun the Quarry Master in the Vehjin
Mines [[Map]]
To The
Rescue
Requirements:
- Master of Whispers
- Data Mining
Obtained From:
- Belgun the Quarry Master in the Vehjin
Mines [[Map]]
Coffer of
Joko
Requirements:
- Master of Whispers
- To The Rescue
Obtained From:
- Belgun the Quarry Master in the Vehjin
Mines [[Map]]
Puzzling
Parchment
Requirements:
- Tahlkora
- Coffer of Joko
- Garden of Seborhin
Obtained From:
- Belgun the Quarry Master in the Vehjin
Mines [[Map]]
Garden Chores
Requirements:
- Tahlkora
- Puzzling Parchment
- Garden of Seborhin
Obtained From:
- Hedge Wizard Mabai in the Garden of
Seborhin [Harbinger of Nightfall location]
One Man's
Dream
Requirements:
- Tahlkora
- Garden Chores
- Garden of Seborhin
Obtained From:
- Hedge Wizard Mabai in the Garden of
Seborhin [Harbinger of Nightfall location]
Protect The Learned
Requirements:
Obtained From:
- Kachok in Halls of Chokhin
[edit] Individual Builds
These builds have been archived due to the impending build wipe.
I neither created nor laid out any of these builds.
[edit] A/E Green Farmer [PvE]
This build utilizes the elite Shadow Arts skill Shadow Form and the earth magic skill Sliver Armor to
quickly take down bosses that are accompanied by medium/large mobs
to efficiently farm their green items.
[edit] Attributes and skills
[edit] Equipment
[edit] Counters
- When Sliver Armor deals only half damage to bosses will also
end your run.
[edit] Variants
- When fighting Warrior bosses such as Sunreach
Warmaker, it helps to use Rust so that his Healing Signet takes 3 times as long to cast.
To do this, though, you will be required to take one or two points
off of Shadow
Arts and put them into Water Magic.
- Shock, Teinai's Wind, Aftershock, Rust, Teinai's
Crystals, Crystal Wave, Obsidian Flame and Shadow Refuge may
be switched out for other skills, depending on what you are
farming.
- Shock can be switched
for other knockdown spells such as Dragon's Stomp for a bit more
damage.
- For people who don't have Prophecies skills unlocked, remember
that you can always unlock them in PvP and then buy them at the
trainers in Lion's Arch or your Guild Hall, if you have bought a
skill trainer that is and assuming that you have a Guild Hall.
- Caltrops can be
useful against bosses who attempt to flee when heavily
damaged.
- Feigned Neutrality is useful against
groups which have mobs with touch skills, Signets, and AoE skills and that may penetrate
Shadow Form.
- Exchange Dash for Deadly
Paradox for a quicker Shadow Form recharge.
- Exchange Dash with Shadow of
Haste to warp back if necessary and retry the process.
- This build was originally posted at GuildWars Guru and GWOnline.
- Sometimes the skill Sliver Armor may start hitting other enemies
instead of the boss.
- Ranger bosses often cannot be killed because of their elemental
resistance.
[edit] List of soloable bosses
Total Number of Soloable Bosses: 107
- Please add info of the level of difficulty for each boss
(Very Easy, Easy, Medium, Hard and Very Hard) also add the location
where the boss is, for easier preview.
[edit] Prophecies
2 Current Bosses
- Crystal Desert
- Prophet's Path:
 Kepkhet
Marrowfeast - Medium Use the following skill combo to
take Kepkhet down: Glyph of Elemental Power, Shadow Form, Death's Charge,
Sliver Armor,
Obsidian
Flame, Teinai's Crystals, Crystal Wave. Bring
an interrupt such as Shock,
Dragon's
Stomp, and Gale to
prevent Kepkhet from activating Mark of Protection. Furthermore,
when you use Death's Charge to get to Kepkhet, be sure to bring Feigned
Neutrality or Shadow Refuge as there are trappers in and
around the vicinity of Kepkhet. If Sliver Armor targets another
thing, you will die as one of the nearby necromancers will use Well
of the Profane. Kepkhet
Marrowfeast - Medium Use the following skill combo to
take Kepkhet down: Glyph of Elemental Power, Shadow Form, Death's Charge,
Sliver Armor,
Obsidian
Flame, Teinai's Crystals, Crystal Wave. Bring
an interrupt such as Shock,
Dragon's
Stomp, and Gale to
prevent Kepkhet from activating Mark of Protection. Furthermore,
when you use Death's Charge to get to Kepkhet, be sure to bring Feigned
Neutrality or Shadow Refuge as there are trappers in and
around the vicinity of Kepkhet. If Sliver Armor targets another
thing, you will die as one of the nearby necromancers will use Well
of the Profane.
[edit] Factions
47 Current Bosses
- Kaineng
City
- Bukdek
Byway:
 Wing, Three
Blade - Medium (This may prove difficult because of the
high HP of the boss, lack of mobs and a Rt healing him) Wing, Three
Blade - Medium (This may prove difficult because of the
high HP of the boss, lack of mobs and a Rt healing him)
- Wajjun
Bazaar:
- The
Undercity:
 Chan the Dragon's Blood -
Easy/Very Easy (The run is easy if you have Feigned and just
use aftershock on him once and then use feigned to heal because of
the signets) Chan the Dragon's Blood -
Easy/Very Easy (The run is easy if you have Feigned and just
use aftershock on him once and then use feigned to heal because of
the signets) Mina Shatter
Storm - Easy/Very Easy (The run is easy if you have
Feigned and just use aftershock on her once and then use feigned to
heal because of the signets) Mina Shatter
Storm - Easy/Very Easy (The run is easy if you have
Feigned and just use aftershock on her once and then use feigned to
heal because of the signets) Chung, the
Attuned - Medium (The run is easy if you have Feigned
and just use aftershock on him once and then use feigned to heal
because of the signets) Chung, the
Attuned - Medium (The run is easy if you have Feigned
and just use aftershock on him once and then use feigned to heal
because of the signets)- Baubao
Wavewrath - Medium (The run is easy if you have Feigned
and just use aftershock on him once and then use feigned to heal
because of the signets)
- Shenzun Tunnels:
- Xaquang Skyway:
- Ghial
the Bone Dancer - Easy/very Easy (Feigned
Neutrality is NOT a neccessity for the run. Beware of the
mesmers for they will disrupt your sliver armor TIP: All mesmers
interrupt at once, so consider bringing a "scapegoat" spell with a
long activation time, such as Dragon Stomp or Obsidian Flame.)
 Shreader
Sharptongue - Very Easy/Easy (Exchange Shock or Aftershock with Shadow Refuge and
aggro as many groups as possible for most damage) Shreader
Sharptongue - Very Easy/Easy (Exchange Shock or Aftershock with Shadow Refuge and
aggro as many groups as possible for most damage)- Ziinfaun
Lifeforce - Easy/Medium (Hit Ziinfaun with your weapon
to interrupt Ethereal Light)
 Orosen, Tranquil Acolyte -
Hard/Very Hard (When he starts charging for you, use Shadow
Form. Run past him just close enough to aggro the group before the
next bridge. Death's charge back to him, and Sliver armor.) Orosen, Tranquil Acolyte -
Hard/Very Hard (When he starts charging for you, use Shadow
Form. Run past him just close enough to aggro the group before the
next bridge. Death's charge back to him, and Sliver armor.)
- Sunjiang District
(Explorable): (only after the mission)
- Raisu
Palace:
- Pongmei Valley
- Xuekao, the Deceptive-
Easy/Medium (Be sure to let the Knight Brotherhood kill the
Am Fah before you approach the boss, as how the Knights will attack
the surrounding Am Fah making for a quick kill with 1-3 possible
attackers) ~ The dagger that he drops is really really nice for
Assassins using the Vigor Build where you use enchants every 30
sec.
- Echovald Forest
- Ferndale:
- Warden
of Saprophytes - Hard (Warden of the Trunks must be
removed first, resurrection portal nearby to keep going at it,
possible at 60% dp.)
- Melandru's Hope:
- Morostav Trail:
- Falaharn
Mistwarden - Easy/Medium (Bring Shadow of Haste
should the attempt to kill fail and you must retreat).
- Sunreach
Warmaker - Easy/Medium (Bring Shadow of Haste
and Rust and if you feel the
need, Feigned Neutrality too. Go in first
without the boss in your mind, make Falaharn
Mistwarden appear. Warp back using a stance. Go in again and
aggro every mob, pull Sunreach with staff and cast glyph then
sliver then rust, he will go down quickly.)
- Strongroot Tanglebranch -
Medium/Hard (Go around the other way and aggro the nearby
kirin and dragon moss and use Rust and Caltrops to subdue him and
spam Obsidian Flame to kill him.)
- Kyril
Oathwarden - Medium/Hard (Hard to make sliver armor
target kyril; take feigned neutrality to survive traps.)
- Ritualist's Construct -
Easy/Medium (Very few mobs surrounding him, making it harder
to kill. Replacing run skills or Shock & Aftershock with
Obsidian Flame & Crystal Wave/Teinai's Wave can help overcome
this obstacle.)
- The Eternal Grove
(Explorable): (only after the mission)
- The Scar Eater -
Very Easy/Easy (Also a fairly easy boss to practice on, you
must follow the 1st group that comes near the shrine, when you get
near the boss aggro it and
jump near the boss, also a good idea can be to change shock and aftershock for gale and Obsidian
Flame)
- Jayne
Forestlight - Easy/Medium (Advisable to bring Shadow of
Haste, Watch out for warriors, as they can KD with "None Shall Pass!". If not
killed at first attempt, warp back with any stance and retry)
- Wiseroot Shatterstone - Medium
(Silver armor does not tend to stay on him,or will target
lately,must aggro both mobs before him and his mob to fully
kill)
- The Time Eater -
Easy/Medium (Add skills for more damage because very few
mobs are surrounding him.Time for his interruption
signet!!!!!)
- Bramble
Everthorn - Easy/Medium (need to aggro 1-2 warden or
plant groups to bypass his regen)
- Mourning Veil Falls:
- Darkroot Entrop
- Easy (Make sure to add some skills to cripple or
knockdown, such as Caltrops, as he tends to run at about half
health)
- Milefaun
Mindflayer - Easy/Medium (Aggro another group of wardens
near, may attract Rt wardens which increase difficulty)
- Foalcrest
Darkwish - Easy/Medium (Aggro the nearby group of
Mantises and die yourself; he will make Bone Fiends which give you
just enough damage for Sliver Armor.)
- Xisni Dream
Haunt - Easy/Medium (AddTeinai's
Crystals, Crystal Wave and Obsidian Flame. Use Shadow of Haste
for multiple tries.)
- Rahse
Windcatcher - Easy/Medium (Same build as with Xisni.
Walk to pick up the Warden group, hit Glyph of Ele Power, turn
around, hit Shadow Form outside his aggro and shadow step. If the
wardens follow, he should be dead)
[edit] Nightfall
57 Current Bosses
- Kourna
- Sunward Marches:(Consider getting the +1
earth magic blessing from the Melandru's shrine outside Dajkah
Inlet. Although it is not necessary.)
- Marga
Coast:
- Chor the Bladed
- Very Easy/Easy (Just aggro the group of Mirage Ibogas near
him and try not to be interrupted while casting shadow form. Cast
Sliver Armor
when he uses Frenzy)
- Lunto Sharpfoot
- Medium/Hard (You must pull him towards the mirage ilbogas
and then usually only 1 of his monks will come and then its easy.
but you want to be beside the monk when you activate sliver so when
he uses shadowmeld sliver armor is still targeting him. then it
will be Easy/Medium)
- Bosun Mohrti -
Medium/Hard (Aggro the insects nearby and Frigid skales and
snare with Caltrops.)
 Bubahl Icehands
- Medium (Aggro nearby insects, snare with Caltrops, and heal with Feigned
Neutrality) Bubahl Icehands
- Medium (Aggro nearby insects, snare with Caltrops, and heal with Feigned
Neutrality)- Chidehkir, Light of the Blind -
Easy/Medium (Aggro nearby Kournan patrol)
- Neoli the
Contagious - Hard/Very Hard (Clear out Kuskale lashers
first with sliver armour, this may take quite a few runs, high
dp.)
- The Floodplain of Mahnkelon:
- Arkjok
Ward:
- Onwan, Lord of the Ntouka -
Medium (Leave from command post and follow river into
lake),(bring fiegned nurality as a cover over slither armor and
shadow form)
- Modti
Darkflower - Easy/Medium (Killing him is Very Easy, but
the run is a bit heavy)
- Lieutenant
Kayin - Very Easy (Just aggro one other group, and he
goes down in roughly 10 seconds)
 Eshau Longspear
- Easy/Medium (You need to aggro the group of Mandragors
behind him. Rezone if that party has a Mandragor Imp in
it.) Eshau Longspear
- Easy/Medium (You need to aggro the group of Mandragors
behind him. Rezone if that party has a Mandragor Imp in
it.)- Captain Chichor
- Easy/Medium (Approach the small base from the north, and
wait for him to patrol outwards.)
- Dejarin Estate:
- Barbarous Shore:
- Lieutenant
Shagu: - Medium (You must aggro nearby enemies. If you
do this, and silver armor keep targeting him, he will be down in
few seconds.)
- Bahdok
Caverns:
- Wandalz the
Angry - Medium/Hard (The hardest part about this boss is
getting to him. You need to learn the hiding spots on the map, as
the spawns in this particular area are quite massive to be running
around by yourself. You'll want to keep the original build intact,
and use speed buffs across the bridge. Once across, glyph, death's
charge, and sliver armor, he goes down rather quick. Throw a shock
and aftershock in there to see it go a little faster.)
- Jahai
Bluffs:
- Turai's Procession:
- Korr,
Living Flame - Medium/Hard (Don't lure the nearby water
djinn, Sliver armor will target them instead)
- Chiossen, Soothing Breeze -
Medium/Hard (The Rampaging Ntouka make this hard, use Feigned
Neutrality as the Rampaging Ntouka run towards you and it will
strip Feign Neutrality instead of Sliver Armor or even worse,
Shadow Form. Aggro the nearby hekets to the north of Chiossen's
group. Pack Obsidian Flame and Aftershock to speed up the killing.)
- Realm of Torment - (Lightbringer title
in this area will alter effectiveness.)
- Nightfallen Jahai
- Domain
of Pain
- Fahralon
the Zealous - Easy/Medium (Before entering battle, try
using Dark Escape to minimize the damage taken from AoE and
Dreadful Pain.)
- Domain
of Fear
- Shrieker of
Dread - Hard (you'll need to aggro several (ideally 3)
patrols to take him down; wait for them to converge). Also watch
out for the Death Nova when killed.
- Storm of
Anguish - Medium (Difficult to get to, try to slip
between the two first mobs, lure another mob for easy kill)
- Depths of Madness
- Reaper of Agony
- Medium (Time your run when he has moved near the two
groups of Margonites)
- Ravager of
Dreams - Very Hard (Approach from the north, and pull
2-3 groups along with the boss group, 4+ Lightbringer rank
reccomended.)
- Topo the
Protector - Hard/Very Hard (Aggro once, run, and wait
for him to fully summon his army, (about a minute), then shadow
form in for a rather easy kill, due to the surronding groups of
graven monoliths.)
- Master of
Misery - Hard/Very Hard (Pull together groups, beware of
scythe attacks and death novas, armor of earth, obsidian flame,
feigned neutrality all are good to have.)
- Consort of Ruin
- Hard/Very Hard (Pull groups, and make sure it targets him
and it will be easy, minions and blades of torment make this
tough.)
[edit] See also
[edit]
A/Me Fever Outbreak [PvE, AB]
The Fever Outbreak assassin is built for dealing with a large
amount of targets. Likewise, it excels in a PvE and AB environment
where the sheer amount of players and NPCs usually make Sins
underpowered to deal with all the targets, so the Fever Outbreak
assassin attempts to solve this by the use of the Mesmer elite
Fevered Dreams to spread four potent conditions amid a large area
of targets, while also hitting the primary target very hard.
Likewise, it can also solo cap shrines, which sins also have
problems doing in a speedy manner. The initial build is aimed at
teams with a dedicated healer. If you do not have one, variants
exist to cope.
[edit] Attributes and Skills
- To fill in the Optional slots, look in the Variants section for
many different uses for this build.
- If you don't have a dedicated healer, drop Critical Strikes
down to 10 and put 8 points in Shadow Arts.
[edit] Equipment
- Armor: Radiant Armor with Runes of Attunement.
- Weapons: Poisonous PvP Dagger of Fortitude with a 15% Modifier
vs Hexed opponents. It is suggested however you bring along a
Cripple, Deepwound, and Zealous Dagger set as well, using them as
the situations call for it.
- Select a target, hopefully one in the center of a large
collection of foes. The area radius of Fevered Dreams is extremely
large, so you can even pick an outlining foe and still possibly
affect everyone. Now, hex your target with Fevered Dreams. Hit them
with Black Mantis Thrust to slow them down, followed with Black
Lotus Strike to give you energy for Black Spider Strike and
Twisting Fangs. Everyone in the area should now be crippled,
bleeding, poisoned, and suffering from a deep wound.
- Note, this build is very flexible in relation to combo attack
order. You can fire off all three of your attacks at any time
except Twisting Fangs, which HAS to follow an Off-Hand attack.
[edit] Counters
- Hex removal before the combo can be carried out. However,
Fevered Dreams only has a 10 second recharge.
- General other standard anti-melee counters can pose
problems.
[edit] Variants
- If you wish to have a consistent tanking ability in PvE, add in
Critical Eye
and Critical Defenses. You can even further
drop Black Lotus Strike, put 8 + 1 points in
Shadow Art by lowering Dagger Mastery to 10 and add in Way of
Perfection. The energy gain from Critical Eye should cover you. If you
decide you don't need crippling, you can always replace Black
Mantis Thrust for something else of use to you, such as Blinding
Powder, which can be shot off after your first off-hand attack
without disrupting Twisting Fangs.
- For Optional: Movement skills to close upon your target, such
as Dash, Dark Escape, Shadow of Haste
or Shadow Walk
which will allow you to automatically teleport back after
fulfilling your combo if you bring a secondary stance, like Deadly
Paradox which will cut down the recharge on a healing spell,
such as Feigned Neutrality.
- For Optional: Defensive skills, such as Signet of
Malice which will clear you of conditions given the sheer many
of them you'll spread around. Or Blinding Powder which can act in a
defensive capacity with Fevered Dreams, blinding everyone in the area
for 10 seconds with a 20 second recharge, which is considerably
useful. Heart of Shadow, Feigned
Neutrality, and Shadow Refuge will heal you.
- For Optional: Offensive skills, for even more of an edge in
killing your target. Interruptions such as Disrupting
Dagger or Web of Disruption which will also count as
a cover hex or all around hex so you can carry out your combo might
be useful. Expunge Enchantments is even possible to
deal with generally unkillable 'Mystic Regeneration' tanks which
are common in AB.
- If blocking foes become a problem consider using Way of the Fox to
hit with all of the combo (at 5 shadow arts your next 3 attacks are
unblockable and at 8 the next 4).
[edit] Fever Outbreak PvE
- This build is incredibly useful when used in conjunction with
other builds that utilize dangerous conditions, specifically
burning, daze, and blind. Teamed up with a Temple Strike sin
for example and a barrage ranger or dervish that will 'hit'
everyone while dazed, you can wipe out mobs very quickly if planned
correctly.
[edit]
A/any Critical Fox [PvE, AB, PvE
hero]
This PvE build is built around the Assassin's primary attribute,
Critical Strikes. Using Way of the Assassin and Critical Eye to raise
your chance of a critical hit to about a 77% chance per hit, and Critical
Defenses for a near-permanent 75% chance to block, nearly every
hit you land will net you +4 energy. Using a skill chain of
unblockable attack skills, you can be sure to consistently get your
damage through.
[edit] Attributes and Skills
- Your optional slot is quite flexible, but there are a few
especially good options, most of which will be based on your
setting (PvE or AB).
-
- Resurrection Signet is obviously an
important choice in PvE, but near-useless in AB.
- Way
of Perfection is useful as a long-term heal, and can serve to
keep Way of the Assassin active (the downside
is the short duration and small heals at lower levels of Shadow
Arts).
- Critical
Eye will grant a huge boost to energy-management, not to
mention the sizable extra Critical Hit chance.
- Siphon
Speed is a huge boon in AB especially, allowing you to chase
down other Assassins and force one-on-one fights (which is an
optimal situation for this build in many cases).
- Expunge Enchantments is a very useful
enchantment removal skill, which will serve well in AB (though not
so useful in PvE). Especially deadly against Elementalist Tanking builds and 55 Monks.
- If survival is an issue, you can go A/D and switch Shadow Arts
for Earth Prayers (see Variants, below). The A/D variant loses a
bit of the original build's flexibility, but more then makes up for
it in pure staying power.
[edit] Equipment
- Nightstalker's Armor is
recommended.
- Daggers with an "of Enchanting" mod is best, and preferably a
"+15% while enchanted" or "+15% while in a stance" mod. Daggers of
Xuekao may be the best green daggers for this build.
- The build's defense is high enough that you'll be able to
afford the HP loss from adding Superior runes to the build. A
Superior Daggery Mastery can increase both your damage output and
your critical hit chance by a small amount. You should always be
careful with having too many high-end runes on a single build
though, as the health loss might outweigh the offensive
boosts.
- The build centers around keeping three key skills up at all
times: Shroud of Distress, Critical Defenses, and Way of the
Assassin. In the heat of battle, you'll need to remember to check
your status bar often, and make sure to keep all your skills up as
much as possible.
- When first initiating battle, activate Shroud of Distress as
you charge. Right before you engage, activate Critical Defenses
(make sure not to activate this skill too soon, or you run the risk
of not getting a critical hit fast enough to recharge it). Once you
engage, activate Way of the Assassin. Be careful when first
starting this all, as you will lose a pretty sizable chunk of
energy. Once you get a few hits in, your energy should recharge
quite quickly.
- Make sure to use your attack chain often, as it will deal a
large amount of consistent, unblockable damage thanks to your high
critical chance. Keep an eye on your status at all times. When
anything starts to run out, make sure to re-activate it right away.
Pay special attention to Critical Defenses in particular. When your
target dies, make sure to switch to a new target as quickly as
possible to keep Critical Defenses up.
- Shroud of Distress serves two major purposes here; keeping Way
of the Assassin active, thanks to its long duration, and also
granting you a very sizable amount of evasion when your health gets
low. At seven Shadow Arts, it should last for 44 seconds (not
counting any bonus from Daggers of Enchanting). This should be more
then enough to last the duration of the battle, and the recharge
time is one second longer, in case you need to re-activate. With
your Enchanting Daggers, you can easily keep it up constantly.
- Keep in mind that you have an increased chance of a critical
hit when attacking lower-level monsters (this increased chance is
more easily noticeable when attacking creatures around level 10 or
below). Target a nearby spirit or a weaker monster if you're in
desperate need of a critical hit (Ritualist Spirits are normally easy to find in AB).
- When facing foes with Enchantment removal, keep in mind that
Critical Defenses will almost always be the first to go, regardless
of the order you activate your enchantments. This is because
whenever you land a critical hit, Critical Defenses will re-apply
itself, thus moving back to the top of the list. If you know that
you're going to be losing an enchantment, it's probably a bad idea
to get yourself in a fight with another melee character.
[edit] Counters
- There are a few counters, but most of them are too narrow to
consider a real threat. Your main worry is Enchantment removal and
the Blind condition. When Blinded, your best bet is to get out of
combat. Without a critical hit, you'll lose Critical Defenses and
be easy prey for most attacks. Enchantment removal can also get rid
of Critical Defenses, but this can normally be fixed by killing
whoever is wielding the enchantment removal.
[edit] Variants
- For superior self-healing and defense, consider going A/D and
switching all of your points from Shadow Arts into Earth Prayers.
This will allow you to use Vital Boon and Mystic Regeneration (replacing
Shadow Refuge and Shroud of Distress). The large Block chance
granted by Critical Defenses, in addition to the +9 Health
regeneration provided by Mystic Regeneration (at 8 Earth Prayers
and with all three enchantments active), should serve to keep you
alive for a much greater amount of time and especially against
other melee classes (don't forget the +72 maximum health bonus
you'll gain from Vital Boon). Your attribute points should be
re-ordered, like so:
| Attributes and Skills |
| Critical Strikes |
11 + 2 |
| Dagger Mastery |
11 + 1 + 2 |
| Earth Prayers |
8 |
|
|
- This variant works much better against melee foes than casters,
and the quick recharge times on the Dervish enchantments means you
don't suffer nearly as much against foes with enchantment removal,
as it's not a big deal to simply re-cast one of your cheaper
enchantments to keep Way of the Assassin active.
- With this setup, you can add yet another good choice for your
optional slot; Pious Restoration, which grants you a quick
and simple way to deal with Hex skills. Make sure to activate Vital
Boon just before though, so you can take full advantage of the
large health gain when you remove it. This also reduces the risk of
removing Critical Defenses by mistake.
- If a Dervish secondary isn't what you're looking for,
Assassin's Shadow Arts attribute has plenty of tricks to boost your
survival even higher. Drop your Critical Strikes attribute down to
11 and add a Major Rune of Critical Strikes (11 + 2), and drop
Dagger Mastery down to 10, keeping the current rune and headgear
setup (10 + 1 + 2). This will allow you to boost your Shadow Arts
attribute all the way up to 10.
- You'll need to switch out Shroud of Distress for Way of
Perfection, and switch Shadow Refuge for Critical Eye. With your
Shadow Arts all the way up at 11 (10 plus the minor rune), Way of
Perfection lasts 28 seconds out of the 30 second recharge, and
grants a 32-health heal every time you land a critical hit. With
Critical Eye as well, you'll gain tons of energy, and everything up
and running grants you a massive critical hit chance, which will
keep health and energy topped off during nearly any fight. The
optional slot can be anything, but preferably you'll want to bring
either a resurrection skill (when in a party), Shadow Refuge as an
out-of-battle self-heal (just in case), or even Sharpen Daggers
to add bleeding to the attack chain. If enemy casters are a
problem, you can bring Disrupting Stab or Disrupting
Dagger, both of which are nice, easy interrupts skills (D. Stab
can also help to start your attack chain, while D. Dagger won't
mess up the chain if used halfway through).
- Going A/E will allow you to replace a skill (preferably Shroud
of Distress) with Conjure Flame/Frost/Lightning, which will not only enable
Way of the Assassin (thanks to the fact that they're Enchantments
with a long duration), but grant an additional +1...17 damage per
attack. This of course will require a slight investment into the Fire/Water/Air Magic attribute, and
your Daggers will need the corresponding Elemental
damage modifier (Fiery/Icy/Shocking).
[edit] Templates
Below is the skills template for the A/D Variant:
[edit] A/any Death Blossom [PvE]
This is a build designed for fun, as well as PvE damage dealing.
It uses degeneration and area-of-effect attacks to take down foes
while making use of the Assassin's unique ability to Shadow Step to move in
and out of combat.
[edit] Attributes and Skills
- Users with Nightfall should replace Return with Death's
Retreat for added healing.
- As this is a PvE build, Rebirth would be a good way to fill the 8th slot but
non-Monk secondaries can use the Resurrection Signet just fine.
[edit] Equipment
- Nightstalker's Armor for extra protection.
- Any Daggers would work, but since Assassins tend to be fragile,
consider:
- For extra damage, you can use Vampiric or Sundering daggers. I prefer Sundering because I
don't like to deal with the pip of health degen, which can get
worrisome.
- The best Vigor rune you can afford, a Rune of Major Dagger
Mastery, a Rune of Major Critical Strikes, a Rune of Minor Shadow
Arts and any other rune you like. I use Vitae.
This is a fairly easy build to use. Early on, identify a party
member who will likely be staying away from melee (like a Ranger).
Remember his location on your party window, since he's going to be
the one you shadow step back to when things get nasty.
Let your warriors charge in first, since they're good at it and
it makes them happy. It also helps keep the heat off your much more
fragile self.
If possible, position yourself so that Death Blossom's AoE will
hit several foes. When you can, use Moebius Strike to hit a target
with Death Blossom several times.
Keep pressure off your monks by using Shadow Refuge
whenever your health begins to get low. You can also use Death's Charge
on a healthy foe for an emergency burst of healing.
You are not a tank. Don't be afraid to Return to the back line, heal yourself, and pop
right back into combat. Not only does this help keep you alive, but
it helps take the pressure off your monks. With practice, you can
be a fully self-sufficient damage dealer: use this to your
advantage, because if the Monk has to choose between healing you
and the tank, he will likely choose the tank.
If you want to be a little more creative and save Death's Charge
for when you need healing, you can wait for a Warrior to engage,
then use Return on him to enter melee. This lets you save Death's
Charge for when you need a quick heal, or for more critical
targets.
[edit] Counters
Blindness and spike damage can really hurt this build. A target
using a defensive Stance
such as Shield
Stance can make your attacks hard to chain. Also, keep a
watchful eye out for enemies who like to use spells that punish
melee attackers.
[edit] E/Me UW Tank [PvE]
This build is born to farm the Underworld with a SS necromancer. It represents a good alternative to the
55hp Invincible Monk because of the better
protection against spells, the better supply of energy and the
better defense against interruptions. This build uses Stone Striker to
convert damage received into Earth Damage, which trigger Mantra of Earth
to further reduce the damage and gain large amounts of energy. Kinetic Armor
is kept up using Aura of Restoration.
[edit] Attributes and Skills
[edit] Equipment
Be careful, before activating Obsidian Flesh a second time you have a
gap of 6 sec. during which you are not protected against their
spells.
[edit] Counters
- It is possible for Lingering Curse to remove all of these
enchantments and cause the InvinciTank to have a squishy nature and
be wiped out instantly. The only monsters that use Lingering Curse
are Keeper
of Souls, which spawn only if you take the Unwanted Guests
quest.
[edit]
N/Mo Aataxe/Grasping Darkness Farmer
[PvE]
This build is meant to solo farm the Bladed Aatxe in the
Underworld for ectos and to solo the Grasping
Darkness for gold drops and other rare items.
[edit] Attributes and Skills
[edit] Equipment
- Use cheap radiant armor, or cheap armor that gives you extra
energy, and 5 superior runes to bring your health down to 105.
- Use a sword, or axe with a 20% enchantment mod (this is
critical, because vigorous spirit's effect will activate slower
with a wand, scythe etc.)
- The -50 HP grim cesta is also needed for this.
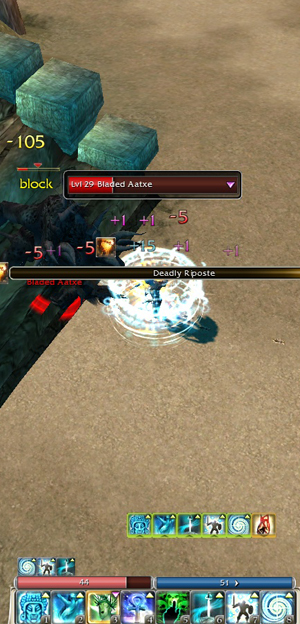
Fighting an Aatxe.
- Enter the Underworld
- Aggro the Bladed Aatxe group on the left, or right, and
run in the opposite direction to the opposite corner.
- The Bladed
Aatxe group should not follow you, but if there was a Dying Nightmare
near the Bladed
Aatxe group then it should have followed you, cast vigorous
spirit and wait for the Dying Nightmare to remove it with Rend
Enchantments, now use Protective Spirit and wand the Dying Nightmare
to death.
- Stand in a safe spot, and cast all of your maintained
enchantments. You should have at least 25 energy after the
enchantments before you begin to aggro the Bladed Aatxe
group.
- Cast Vigorous Spirit before you aggro the group of
Bladed Aatxe,
now use Protective Spirit, target a Bladed Aatxe and use
Spoil
Victor
- Begin attacking the Bladed Aatxe with your sword or axe. Health
gained from Vigorous Spirit should be enough for a group
of 2 Bladed
Aatxe.
- Maintain Protective Spirit and Vigorous Spirit
while fighting the group. If you have health problems, and your
health stays steady at half full, use Healing
Breeze.
- Apply Spoil
Victor to your target(s) when it recharges. Most of the time 1
cast of Spoil
Victor will fully kill a Bladed Aatxe or a Grasping
Darkness, but if not recast it.
- Repeat steps 2-9 for the second Bladed Aatxe group.
- Kill the Bladed Aatxe groups on the right and left, be
sure to also include the lone Bladed Aatxe that walks around to both groups
frequently (you can kill the middle group, but if there is a
nightmare spawn and you run, the entire group will follow
you).
- Take the quest after the Bladed Aatxe on the right and left are
killed.
- Use steps 2-9 for the Grasping Darkness
- If dazed use Plague Touch on a Grasping
Darkness.
- Continue on through the chamber with in the direction of the Smite Crawlers
and you will find more Bladed Aatxe and Grasping
Darkness to farm.
- Be sure not to aggro more than 2-4 groups at a time.
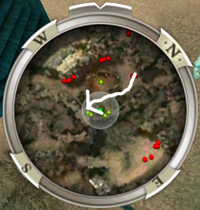
Path for aggroing.
[edit] Counters
[edit] Variants
- Live
Vicariously can replace Vigorous Spirit so that your main way of
healing can't be interrupted. Note that Live Vicariously
provides less hp than Vigorous Spirit.
[edit] N/any BiP [PvE]
The BiP necromancer (also
known as a battery) is
a powerful source of energy for the party using the skill Blood is Power.
The core of the build involves using BiP on party members, getting
healed (or self-healing) and doing the same over and over.
[edit] Attributes and Skills
[edit] Equipment
- Scar Pattern Armor is recommended for
energy. Adding Superior Runes to reduce health is an option.
- Any staff (or wand and focus item combination) that provides +5
Energy and fast recharge and cast time for Blood Magic is optimal.
An item which reduces health or one that lengthens enchantments
(for Blood Renewal and BiP) can help also.
- Keep Blood
Renewal on at all times.
- Use Blood
is Power on any party member you wish to give Energy to.
- Use Blood
Ritual as a cheaper and long-lasting alternative to Blood is
Power (as your Energy permits).
- A good Battery never waits for people to call their Energy. Instead, the
bipper should have a plan:
- Before a fight, the bipper should provide energy to "setup"
party members (such as trappers, bonders or ritualists)
- During a fight, the bipper should bip the healers, then other
casters, then frontline attackers in that order of priority.
- Use wells as Energy and
circumstances permit.
- Use Consume Corpse for energy, healing and/or
corpse denial.
- Having as little maximum health as possible allows the bipper
to be extremely effective in doing his/her job, however, this
should only be done if the bipper is very good at staying alive.
Dying does not really harm the bipper, but having to do without the
bipper in the middle of an intense fight is not a good thing for
the other party members.
[edit] Variants
The only essential skills of the build are BiP and Blood
Renewal. Therefore an endless number of variants (and combinations
with other tasks) can be imagined usually at the expense of the
attribute points in Death Magic. Some popular alternatives are:
- Choose Order of Pain to increase the physical damage
dealing.
- Choosing a monk secondary
and using Heal Area
for self-healing or spamming Heal Party to help with the healing and self heal
and also using Protective Spirit to account for the lack
of health if you decide to go with lower HP.
- Choosing an elementalist secondary and using wards to protect the backline of the
party.
- Replace Resurrection Signet with a hard
rez when situations/secondary professions permit.
[edit] Templates
[edit]
N/any Minion Master [PvE, Hero, AB,
CM]
There are many version of the Minion Master, however, this version
unlike many does not use Healing Prayers line, removing any
restriction on secondary class. This version is ideal for Sorrow's
Furnace farming, Alliance
Battles or PvE.
[edit] Attributes and Skills
[edit] Equipment
When starting out in a new area or low on minions:
- Use Rotting
Flesh on fleshy foes, preferably on large groups to spread the
Disease condition. This
is incredibly effective when used in PvE.
- Create a Flesh Golem with the first dead body to
start off.
- Create other minions
depending on your Energy pool.
Once you have a few minions:
- Create other minions, again, depending on remaining
Energy.
- Use Blood of the Master to keep your minions
alive.
- When without a monk on your team it is perfectly viable to use
Taste of
Death to keep yourself alive so long as you have Minions to
feed off of.
- When idle, spam Blood of the Master on your minion army and use
Taste of Death on a Flesh golem to regain the health lost. Don't
forget that it is usually easier to kill off an old Flesh Golem for
a new one instead of repeatedly healing one.
This build can happily stay alive by sacrificing a minion with
Taste of Death while other minions kill foes, while disease from Rotting Flesh
degenerates most foes in PvE when low on minions.
[edit] Variants
- For the optional slot:
- Aura
of the Lich can be used in place of Animate
Flesh Golem to allow more spamming of Blood of
the Master, although not advisable when anticipating health
degeneration effects. This also makes Blood Renewal
useful for self-healing if a higher level Blood Magic is
used.
- Skills such as Putrid Explosion, Deathly Swarm and
Bitter Chill
can be added to give the Minion Master some direct damage skills
that are linked to Death Magic.
- You can bring Death Nova to make one last final use of a minion
that's near death.
- For more self healing Animate Vampiric Horror can be
used in place of Animate Bone Fiend. This allows a more
meat-shield like role of the minion master protecting the back line
casters. If making this switch, it is a good idea to cast Animate
Bone Horror more often due to the recharge time of Animate Vampiric Horror and to
refresh your minions. Also great way to gain a positive health
gained to sacrificed ratio if enough are summoned.
- Bring Verata's Aura to reclaim your minions if you
die, or possibly to steal minions from monsters who create them.
Not many monsters can, however, and the ones that can do not create
them nearly as fast as the average Minion Master Necromancer. As
such, Verata's Gaze may be a better choice for
stealing minions.
- Infuse Condition in combination with Dark Bond is useful in
scenarios where you are being targeted instead of your
minions.
- Skills such as Putrid Explosion will exploit your corpses
rendering them useless to a Minion Master. Instead of using Animate
Bone Fiend and Dark
Bond, try Fetid Ground and Deathly Swarm for damage when you need to
kill enemies quickly without minions.
- You can use Animate Shambling Horror instead of
Animate Bone Horror if you have Guild
Wars Nightfall. The differences between a Shambling Horror and a
Bone Horror, except for the 'skin', include a different attack
range from Bone Minions and Vampiric Horrors, and the fact that
when a Shambling Horror dies they will immediatly turn into a
Jagged Horror, which will cause bleeding with its attacks. Those
using Shambling Horror will find a longer recharge time in return
for this fact, so faster-recharging summons are advised.
- Signet of Lost Souls may be an energy
management option.
- Verata's
Gaze and Verata's Aura Make excellent AB variant over
the Resurrect skills because they allow the Minion Master to steal
the enemy minions (Mostly other Flesh Golems or with aura all of
the enemy minions). WARNING: Once Verata's Aura is used, especially with
re-controlling your army MAINTAIN IT!
- Death of minions or foes creates a 13 energy gain which is usually more than enough to
create new minions.
[edit] Template
[edit] See Also
[edit]
P/W Party Support [PvE, Hero]
This support Paragon together with the two healer henchman can
cover all the defensive needs of the Nightfall campaign. The
core of this build can also be used as basis for a PvP motivation
Paragon/Warrior.
[edit] Attributes and Skills
[edit] Equipment
You should focus on defense with your gear, since energy is
easily managed by staying close to your team.
Armor:
- Insignias: Centurion's insignia on all armor pieces.
- Runes: Major Motivation, Major Leadership, Minor Spear Mastery,
Vigor (highest possible), and Vitae.
Weapon:
- Use a spear grip of Defense.
- Use the inscription "I have the power!" for +5 Energy.
- Use whichever spearhead will support your skills best -- Furious will allow you to
keep "Watch Yourself!" ready to use relatively well even with all
the chants and echos that you're casting.
Shield:
- Use a Shield that requires Motivation.
- Use a Shield Handle of Fortitude.
- Use either the inscription "Master of My Domain" for extra
Motivation or "Luck of the Draw" for damage reduction.
- This Paragon is very efficient in preventing and healing the
damage to the whole team (like AoE spells, generic pressure, and health degeneration of
the team). "Shields Up!" is also useful to
prevent spike from archers, which is very common in the Nightfall
campaign.
- Using "Watch Yourself!" for energy
management lets you easily spam all your other skills except Mending
Refrain. However, with your high number of shouts and chants
you are able to maintain Mending Refrain on all the members of the
team during long fights.
[edit] Counters
- If you can't acquire adrenaline you can't spam all your
skills.
- Necromancer's Anti-Paragon hexes totally shut down this
build.
[edit] Variants
- It was used to reach the title of Indomitable Survivor by
playing through all the Nightfall missions using only heroes and
henchman.
- Great against Abaddon itself: the damage he deals is the same
type this Paragon heals at best.
[edit]
Mo/any Holy Haste LoD healer
[PvE]
This PvE monk uses Holy Haste to quickly cast healing spells on party
members whenever needed. With Light of Deliverance, this monk
becomes more versatile as it can heal the whole party whenever
needed and it has the possibility to heal over a very long
range.
[edit] Attributes and Skills
- Signet of Rejuvenation can be used for
better energy management
- A Hex Removal such as Smite Hex can be brought if some or multiple
"critical" hexes are being used in the area
[edit] Equipment
- Any armor is usable, though for PvE Radiant armor may be
best
- A 20/20 +5energy +30hp healing staff is recommended
[edit] Counters
- Any spell caster counters (daze, backfire, etc.)
- Scourge Healing can do major damage when being careless with
Light of Deliverance
[edit] Variants
- Orison of Healing can be used instead of
Ethereal Light if you get interrupted a lot while using Ethereal
Light
- Words
of Comfort can be useful instead of Ethereal Light if many
conditions are used in that area
- Mend
Condition can be used instead of Dismiss Condition if you think
you don't get conditions yourself or if few enchantments are being
used
- If no conditions are being used in a certain area, consider
bringing another healing skill or another hex removal instead of
Dismiss Condition
- Any other hex removal skill such as Remove Hex or Inspired Hex (must become /Me) can be used
instead of Smite Hex
- If no hexes are being used in a certain area, consider bringing
another healing skill instead of Smite Hex
- Signet of Rejuvenation and possibly Signet
of Devotion can be used for a better energy management in this
build. Replace Dismiss Condition or Smite Hex by one of these
signets, depending on what you need most, anti condition or anti
hex
- Resurrection Chant instead of Restore Life
for a resurrect from some distance
[edit] Mo/any 55 HP [PvE]
This build can be used in many solo farming areas and does not
rely on healing prayers at all. This build can take on any number
of monsters as you like without worrying about your health dropping
below 55 health. Shield of Absorption reduces damage by
5, and this build has a maximum health of 55. With Protective
Spirit, this means that every attack against you will do zero
damage. This build will work with Death Penalty and with 1 health (unlike
previous Invincible Monk builds). This means that you
can tank as many monsters as
you want, similar to the old Spirit Bond monk. See the Invincible Monk
article for more information on both of these kinds of builds.
[edit] Attributes and Skills
- See the Variants section for some skills to use in the
optional slot.
[edit] Equipment
- Ascetic's Armor for a larger energy pool, with a +1 Protection
Prayers scalp design. You will need to upgrade your armor so as
to bring your health down to 55 hp (as seen on this section of the Invincible Monk
page).
- Any Sword or Axe of Enchanting. The bonus must be +20%.
Also, a +5 Energy modifier (or the inscription "I Have the Power") helps to
increase the energy pool even more. The Totem Axe and Rajazan's
Fervor are common choices for this. A two-handed weapon cannot
be used or your health will be more than 55.
- A 20/20 Insightful Protection Staff of Enchanting works just as
well. Unlike using a sword or axe, the staff will help mitigate an
enemy's death. Having 105hp doesn't adversely affect the builds
effectiveness.
- Consider bringing a scalp design that provides a bonus in Divine Favor
and/or a staff of
Mastery in Divine Favor.
- First cast Watchful Spirit and Balthazar's
Spirit. This will provide +2 health
regeneration (in case Shield of Absorption slips) and energy
management.
- Then cast Blessed Aura. If you are using a Divine Favor
headpiece and/or a staff of Mastery in Divine Favor, equip them now
to maximize its effect. Note that if you are using a staff of
Mastery, it may take multiple castings for the Divine Favor boost
to kick in. Be sure to re-equip the Protection Prayers scalp and
your sword/axe/offhand combo after you are satisfied with your
cast.
- Note: These three enchantments can be cast in any order
according to preference.
- After all of the enchantments are cast, head towards your
enemies (but see Choosing Enemies, below).
- Before entering battle cast Protective Spirit and Shield of
Absorption. (You should do this no more than two seconds before
you do the next step.)
- Aggro your enemies. You
must keep up Shield of Absorption (near-)continuously. Depending on
how high your Divine Favor attribute was when you cast Blessed
Aura, you can have as little as .5 seconds to recast it - or you
may have as many as 1.85 seconds. Note that if you miss a recast by
a few seconds, the health regeneration from Watchful Spirit
combined with the damage reduction from Protective Spirit will help
prevent death, but don't take your time about recasting it. (Be
aware that larger mobs mean faster death in this situation.)
- Use Shield of Judgment for damage. Your
enemies should kill themselves by attacking you.
- Use Blessed Signet for energy management - it can
even be used in battle if you have a few seconds to spare.
[edit] Choosing Enemies
Only certain enemies will be effectively damaged by this build.
Enemies that are knocked down by Shield of Judgment will scatter;
enemies such as hydras
cannot be knocked down and therefore will be damaged by this build.
Before you use this or any other build with Shield of Judgment to
farm monsters, do some
research to see if they can be knocked down or not before deciding
whether to bring Shield of Judgment.
Also, when considering choosing an area, try to find an area
with abundant ranged attackers, such as Ranger or Paragon, who do not flee from damage as melee
creatures do. Ice Imps
and Siege
Ice Golems are good enemies to farm outside Ice Caves
of Sorrow.
[edit] Counters
- Enchantment
removal can be deadly if it hits Protective Spirit and/or Shield of
Absorption. Because Necromancers and Mesmers have so many skills to do this, avoid
them.
- Major health degeneration will also kill you.
Watchful Spirit will counter minor health degeneration, but even
that inflicted by Bleeding or Faintheartedness can overwhelm it. Again,
avoid places with Necromancers or Mesmers. (Note that minor health
degeneration over Watchful Spirit may not necessarily be deadly as
you will heal yourself every time you cast a spell on yourself due
to the healing bonus from the Divine Favor attribute.)
- If Shield of Absorption is interrupted, you could be in
trouble. You will have to last ten seconds on the health
regeneration from Watchful Spirit and the healing boost from
casting Protective Spirit on yourself - although Protective Spirit
has a five second recharge.
[edit] Variants
- Watchful Spirit and Balthazar's Spirit can be easily replaced
by Mending and Essence Bond,
respectively, with absolutely no change in the way the build works.
Additionally, either one could fill the optional slot.
- Healing
Breeze or Watchful Healing is useful when killing foes
that cause -3 (or greater) health degeneration.
- Zealot's
Fire can provide relatively consistent AoE damage; you must be cautious as to how you time
your spells so that there is at least three seconds between each of
them, or you will cause your enemies to scatter.
- If your enemies will scatter from Shield of Judgment (see
below), consider bringing another elite or another damaging non-AoE
spell instead of it. Spell Breaker is a good choice for
defense.
- Having only 55 max health is not necessary to maintain a nearly
invulnerable monk - see the Mo/E SoA Sliver build, and look
at the Spirit Bond variant of that build. It can be used to counter
health degeneration, and to some extent, life stealing.
- You may want to ensure survival by using Shielding
Hands. Cast it before SoA wears off to stay invulnerable.
- Additional skills are recommended depending on your secondary
profession.
Warrior
Mesmer
Ranger
Necromancer
Dervish
Elementalist
- Like all invincimonk builds, this build will be easier with
practice.
- While this build will work if you are reduced to 1 hp,
it will require very quick reflexes to maintain constant coverage
from Shield of Absorption.
- Try not to cast Protective Spirit and Shield of Absorption at
about the same time; try to parse them so there is a one second lag
between the two so as to phase out the healing from Divine
Favor.
- This build will not make ranged monsters run from you, but
melee monsters in groups of 3 or more will run from you.
[edit] Templates
[edit] Mo/any WoH [PvE]
A basic healer build, commonly found and used in PvE. Using only five Energy cost healing spells, this build is able to heal
efficiently without having to manage Energy all the time, unlike Blessed Light
or Boon-Prot style builds. It is suitable and commonly found in 6
to 8 member pick-up groups. This build is extremely flexible, and
does not require any specific equipment or secondary class.
[edit] Attributes and Skills
[edit] Equipment
- Any armor is usable with this build, but you may wish to switch
to Ascetic's armor for maximum Energy if you're expecting to spam
your heals a lot.
- Any focus and offhand combination, or staff, can work with this
build. A 20/20 Focus and Offhand can prove to be valuable, but not
required.
- Orison of Healing, Word of
Healing, and Dwayna's Kiss are your main heals. Spam them if
necessary, but be aware that long periods of heavy healing without
pauses can drain you, although not immediately. Note each spell's
special effects.
- Orison of Healing is the most basic heal.
Use this one if the target is not affected by Hexes/Enchantments,
or if target is above 50% health.
- Dwayna's
Kiss is very efficient at healing targets with Hexes or
Enchantments on them. It is generally used on the main tank upon
aggroing the next group of enemies, providing Healing Seed has
expired or was removed.
- Word of
Healing is your main spike heal. A single cast of this can
easily bring a party member from below 50% health to near-full
health. Its 4 second recharge is comparitively longer than the
recharge of Orison of Healing, so don't waste casting
this on a party member above 50% health.
- Healing
Touch is an extremely useful self heal. Use it whenever you
think your health is low. If someone in your party has lost quite a
bit of health but is not in any particular danger, you may wish to
heal them with this skill as well.
- Use Remove
Hex to remove any Hexes that affect your party. But remember:
your main job is to keep your party alive. It is often better to
let the hex die off itself rather than taking the time and energy
to remove it. This should be used against serious hexes, rather
than easily spammable ones like Life Siphon
- Healing
Seed and Rebirth
are your only skills which cost more than 5 Energy to use, so use
them wisely.
- You should not be resurrecting in-battle with Rebirth. If you want to do so,
you may want to switch to Resurrect or Resurrection Chant, or even Restore Life.
- Healing
Seed should be placed on the main tank upon right before they
aggro the next group of monsters. It can also be used in-battle to
protect a party member under heavy attack/pressure.
[edit] Counters
- Energy Denial can pose a problem, but is not of immediate
threat to this build.
- Skills that increase recharge time such as Diversion and Distracting
Shot can be devastating if more than one primary healing skill
is struck by it.
- If facing large groups of enemies or high-damage dealing
enemies, the removal of Healing Seed can mean certain death for a
tank, if not covered. This is not a large problem in most areas,
though.
[edit] Variants
- Some skills to consider to place into the optional skill slot:
- Remove Hex
can be replaced by Holy
Veil, if you think you will need a cover Enchantment for Healing
Seed.
- Use Smite Hex
in place of Remove
Hex if you dislike the two-second cast time for Remove Hex, and
don't want the awkward double-click removal of Holy Veil.
- Ethereal
Light can be used in place of Orison of Healing if you don't think
you will be attacked.
- Replace Rebirth
with an alternate resurrection skill of your choice. You may even
want to eliminate Resurrection as a whole.
- Heal Party is
an excellent healing skill, and can be incorporated to this build.
However, spamming this can be dangerous to your energy pool. One or
two casts can heal your party effectively without putting too much
pressure on energy usage.
- Holy Haste
can be used to reduce the cast time of healing prayers if you don't
plan on using any enchantments like Healing Breeze.
- Vigorous Spirit is a good heal over time for
other party members, especially tanks. It also synergies well with
Dwayna's
Kiss.
- Replace Healing Touch with Signet of
Devotion so that you can continue to heal even if you are
getting low on energy.
[edit] Template
[edit] R/Mo Basic Runner [PvE]
This is a basic ranger running build, capable of completing all runs from Ascalon to the Crystal Desert,
some of the Southern Shiverpeaks runs, most runs in
Cantha, and even with a
variant for the Droknar's
Forge run. The build is also suited for mapping if you are
going for the Grand Master Cartographer title.
[edit] Attributes and Skills
[edit] Equipment
Note #1: It is possible to mix Druid's Armor for
energy with Sentry's Armor for higher armor. Note that the
armor bonus is location specific.
Note #2: If you use Sentry's Armor only, it is advised to
polish up your energy pool with weapons as explained below.
[edit] Weapons
- Any one-handed weapon that increases health, energy and/or
lengthens enchantments:
- Sword with +5 Energy and +30 hp or +20% Longer
Enchantments
- Rajazan's Fervor
- Totem Axe
- Any shield with either stance and/or health modifications:
- Emboldened Carapace Shield from Hagnon
Warblade [Health +60 (while hexed), Received damage -3 (while
hexed)] - for hex passages of specific runs.
- Grognar's Defender - the Runner's Best
Stance Shield Choice.
Note: Of course, you are free to use the collectors'
shield versions instead of the Green ones.
- Fires in the East staff with a +5 energy Staff Head (+18 energy),
and either a health or an enchantment lengthening mod.
[edit] General
The Running Sequence gives you a constant high speed boost and a
high chance to evade missiles, and attacks. Holy Veil against hexes and the healing skills
against conditions
and degeneration help you survive.
[edit] Running Sequence
- Use Dodge, Zojun's Haste and Escape for a constant speed
boost.
- Only Dodge and Zojun's Haste boost your speed to 33%, whereas
Escape only provides you with 25%.
- Use Escape to avoid mass damage as it provides a 75% chance to
avoid attacks. It also protects from knockdown from melee attackers.
Note #1: Dodge and Zojun's Haste only evade missile
attacks.
Note #2: Avoid knockdown if possible.
[edit] Healing
- Cast Mending when entering a new area.
- Use Restful Breeze before engaging large damage dealing mobs. Remember to activate run
skills first.
- Use Heal Area when taking large amounts of damage and when you
are in need of instant healing. Be aware of your energy level.
Note: There are enemies which strip enchantments such as
Stone Summit Heretics or Avicara Guile. You
have to decide then which enchantment (Holy Veil or Mending) you
want to use as cover, and which you do not want get stripped right
away. Cast the cover enchantment that you want to get stripped
last. Pay attention to Chilblains which mostly strips two
enchantments.
[edit] Variants
[edit] General
- Use Storm
Chaser to regain energy when running through elemental
damage dealing mobs.
- Use Troll
Unguent instead of Healing Breeze for lower energy cost.
Remember to set points into Wilderness Survival.
- Use Smite Hex
instead of Holy Veil.
- Use Smite Hex
instead of Purge Conditions or Heal Area for a second hex
remover.
[edit] Bold Forge Runner
The Bold Forge Runner variant can be used to solo-run
Droknar Forge. It is highly reliable and you will notice that it is
easier to run Lornar's Pass with, actually. Snake Dance and its
Tundra Giants need a bit practice, though. Below are specific
Ranger hints for this run:
Note #1: It is advised to use a weapon with 20% longer
enchantments for the sake of Healing Breeze.
Note #2: Mend Ailment can replace Purge Conditions for
countering two or more Barbed Traps. Crippled will always hit you last.
[edit] Worm Tunnel
- Cast Mending, and Holy Veil (in this order). You don't want the
Avicaras to strip Mending right away. Holy Veil represents a cover
enchantment here (unlike later).
- Use Healing Breeze before and during encountering dangerous
situation, such as a run-through.
- Use Zojun's Haste and Dodge to outrun the worm(s).
- Use Escape when expecting mass damage from attacks, especially
in melee by groups of Avicaras. It helps you survive grave danger
situation by evading most attacks.
[edit] Worm Path
- Use Healing Breeze after you got knocked-down by the worm(s)
and when he is just outside your aggro bubble. This helps to avoid
interruption again. Recast Mending on you between knockdowns, in
case it got stripped through Chilblains. Without Mending in coordination with
HB you might get into trouble regarding your health.
- Use Escape for running through the groups of Grawls and when
you get slowed down by hexes and take attack damage from
melee.
- Cast Holy Veil, and Mending (in this order). This time Mending
is the cover enchantment for Holy Veil due to the high risk of
encountering Heretics.
- Lose aggro and regenerate before encountering the Tundra
Giants.
- Use Healing Breeze and Escape before running through groups of
Giants. Make use of a Stance Shield here.
Note: When HB fades out, and after a Giant Stomp recast it
as often as needed. Mending and HB should keep you alive without
problems.
Attention: When Stone Summit Heretic(s) and
Ice Golem(s) get
spawned and you cannot avoid them, immediately run back and
rezone. Reasons: 1) Two different slow-down spells (Crippling
Anguish & Deep Freeze), 2) covered with different
hex-spells 3) accompanied by Gnashers & companions 4) with a
Tundra Giant group to be passed at full health with Healing Breeze,
and fully recharged Escape only. Smite Hex and Holy Veil will not
make you survive this - no matter how high your running level
is.
- Try to only aggro one group of Giants at a time.
- Aggro them before running through to make them stomp
before your run-through comes.
- Use Healing Breeze as often as possible between stomps. The
chances for an interrupt between two stomps are low.
[edit] SB Ranger Runner
The variant SB Ranger Runner is optimal for solo-running
Copperhammer Mines -> Iron
Mines of Moladune and vice versa as ranger. Spell Breaker lasts
long enough to overcome the Mesmer spawns at the hardest parts of
the run. The success rate with this build is very high.
Note: A weapon with 20% longer Enchantments is a
must.
- Activate Holy Veil as Mending coverage, and as additional hex
remover when Spell Breaker wears out.
- Follow the main ranger running principles listed above.
Note #1: It is known that bosses will still follow you,
especially when running the route in a reversed way. This is the
point where Holy Veil is of good use to get rid of the last
hex-spell being a slow-downer if a Mesmer boss, or Golem boss got
spawned.
Note #2: Mend Ailment can replace Purge
Conditions for countering multiple traps. Downside is the
longer casting time, and that you cannot clean up from all
conditions at a time.
[edit] Possible Routes
Listed below are all the possible high-level routes that this
build and its variants can be run with:
[edit] Prophecies
- Beacon's Perch -> Camp Rankor -> Droknar's
Forge
- Camp Rankor
-> Deldrimor War Camp -> Granite Citadel
-> Copperhammer Mines Using henchmen as
cannon fodder is important on most parts of this trip.
- Copperhammer Mines -> Iron
Mines of Moladune and reversed.
- Iron Mines of Moladune -> Marhan's
Grotto -> Thunderhead Keep
- Elona Reach (Mission) + bonus
[edit] R/any General Barrage [PvE]
This build is a basic barrage ranger that can be used and
modified for many situations and secondary professions, the main
goal is to use the common elite skill Barrage so as to synergize
with other skills for a better effect or at least other skills that
compliment it in its most common uses. This is most often used to
target groups of enemies as well as solo areas with increases to
damage output or other effects on each barrage.
[edit] Attributes and skills
The base is below but to give a more detailed description of the
attributes, the highest score is always in Marksmanship (often
maxed at 16 but other times it can be as low as 12 depending on the
secondary profession used - see below), 9 or 14 ranks in Expertise
to effect 10 energy skills primarily (or 8 or 13 if all
skills used are 5 energy), and Wilderness Survival is good at 8 or
10 for the use of Troll Unguent or to switch out for secondary
profession skill ranks.
- *The above attributes are a good baseline to work
with and can be adjusted as playstyle/preference
allows.
Common Core Barrage baseline:
[edit] Equipment
- Any armor can be used though Druid's is best if energy is
lacking. Scout's is a poor choice as preparations will not be used
in a Barrage build.
- A Flatbow is
commonly used in a barrage build provided Favorable Winds is
brought as well to lessen the large arrow arc from a Flatbow and to
help speed the arrows to their targets. Otherwise, each bow has
it's own ups and downs but can be used as preffered.
- Vampiric or Zealous bow strings are
used a lot in Barrage builds as you get multiple hits per shot
(provided the build doesn't call for an elemental string) though a
Sundering string is
a good stand by if you don't want to worry about the degen or makes
a good switch out weapon.
- The function of a barrage build varies slightly but the overall
effect is to do damage to a group of foes with each use. Therefore,
attacking the central most target in a group is desired for the
best effect rather than the closest.
- Placement of any spirits before hand is key as they usually
increase the damage and speed the arrows fly at. Be sure to place
them where they will be effective yet not attacked by enemies.
- Often, interrupt skills are brought along to take out any big
skills or those that might hurt you like Meteor Shower or Resurrect as examples
of big skills or Empathy and Spiteful Spirit as examples of skills that
can seriously hinder or hurt you. Be aware that you will have to
wait for the barrage animation to finish before the interrupt will
fire.
- Some sort of self heal, condition removal (primarily for
blindness), or defensive stance is popular as well though not
required.
[edit] Counters
- Any standard melee/ranger counters such as blindness, on
attack/hit hexes, and/or blocking.
- Energy denial.
[edit] Variants
- Support or damage enhancing skills often brought from the
ranger skill line may include but are not limited to:
-
Barrage/Pet Variant
- Adding a pet to the build with then turn you into what is
referred to as a B/P ranger. Pet attacks will not slow your rate of
fire as they are all shouts. Often, a team will consist mostly of these
creating a pet wall and multiple barragers, or just have one
around. Multiple variants can be found for this at Build:Team - Barrage/Pet
(Tomb Ruins).
[edit]
Variants with Secondary
Professions
[edit] R/Warrior
- Attributes
levels usually are in Tactics and at around 8-9 ranks should do it in most
cases.
- Shouts can be used
without interrupting the fire rate flow thus making them useful and
often charged with the high adrenaline gain from barrage if they
are adrenaline based.
-
- "Watch Yourself!" charges quickly
and can increase the party's AL
without any cast time. This also combines well with Soldier's
Defense.
- "Fear Me!" can be used repeatedly to
reduce the enemy's energy levels though this typically has a minor
effect if any on an enemy's seemingly limitless energy pool.
- "Shields Up!" can be used to reduce
the damage your party members take from projectiles.
- Healing
Signet can be used as an alternate, energy free, though risky
heal.
- Protector's Defense can be used to help
those near you as you often will not move while barraging.
[edit] R/Monk
Solo Vigorous Barrager
Use: Cast and maintain Live Vicariously. Before battle put up
Symbiosis to gain the extra health it offers from enchantments.
When entering a battle, cast Vigorous Spirit. When enemies start to pile
up, use Barrage to take full advantage of the healing provided by a
vampiric bow, Live Vicariously, and Vigorous Spirit.
Other skills:
- Attributes
levels usually are in Healing Prayers, Smiting
Prayers, Protection Prayers, or none at all
depending on what is taken/used and typically at around 8-9 ranks
in only one of those areas should do it in most cases. Ranks in Wilderness Survival are usually
sacrificed as healing from Trolls Unguent is often replaced with
other skills. If Symbiosis is used just use whatever remaining
ranks are left but no more than 8-9 ranks in Beastmastery at
most.
- Live
Vicariously will return health to you for every creature hit
which can be up to 6 per Barrage. Commonly used for soloing
areas.
- Vigorous Spirit will behave similar to Live
Vicariously but without the drain on energy regen.
- Single target heal spells or healing enchantments can
replace Troll Unguent as a self heal that can also be used on
others. Healing
Touch is an example skill that can be used as it's cost is
reduced with ranks of expertise though it gains no benefit from Divine Favor
with a Ranger primary.
- Judge's Insight to add Armor
penetration to each arrow and typically defeat masses of the undead or others weak to holy damage.
- Mending
Touch to remove blindness or other conditions.
- Watchful Spirit will sap your energy regen
but provide +2 health regen with no needed attribute points
spent.
- Renew Life
and Restore
Life's costs are reduced by ranks in expertise making them
decent resurrects to exchange for the Resurrect Signet. Otherwise,
there are plenty of reusable resurrection skills in the monks
repertoire.
- Balthazar's Spirit or Essence Bond are
usually used when soloing as you will be the sole recipient of
damage and will often return massive amounts of energy.
- Hex removal skills like Smite Hex or Holy Veil can help
eliminate damage from on attack/hit hexes like Spiteful
Spirit, Empathy, or
others.
- Symbiosis can
be useful if using multiple enchants on yourself or others in your
party.
[edit] R/Necromancer
- Attribute level
of Death Magic,
Blood Magic, or
Curses is usually at
around 8-9 ranks in most cases if at all.
- Many skills can be used to replace a self heal that either give
you health, steal health, or exploit a corpse for health.
- Order of
Pain will help add damage to every attack but for a very
limited time. This is best left to another party member (who can
also use Order of the Vampire) that can achieve
higher attribute levels as it will slow your rate of fire and eat
up your energy if you cast it.
- Mark of
Pain may cause scatter but can be most useful in narrow
passages.
- Plague
Touch's cost is reduced with ranks of expertise and can be used
to transfer any conditions from yourself with limited success as it
is restricted to touch range.
- Many Necromancer skills can benefit a Barrager but usually they
need to be cast by another party member that is dedicated to that
role.
[edit] R/Mesmer
[edit] R/Elementalist
Fiery Barrager
Use: Use the Glyph to reduce spell costs and cast Conjure
Flame on yourself and Mark of Rodgort on your central most target.
Fire a fiery bow using Barrage and you can keep the hexed targets
burning. Some may prefer to use Fire Attunement instead of the Glyph to
reduce energy costs.
Other Skills:
- Attribute level
of Fire Magic, Water Magic, or Earth Magic
usually start at around 8 to as high as 12 ranks in most cases if
at all.
- Any Conjure skill with the appropriate bow string can add
damage to each barrage.
- Stone
Striker should NOT be used, as it will convert your attacks to
earth damage,
which will mean that your attacks will no longer trigger Conjure Flame or Mark of
Rodgort, even if you have a fire bow, as Stone Striker
overrides the normal damage type.
- If you wish to still have the benefits of a Vampiric, Zealous, or Sundering bowstring, you
must bring Conflagration to convert your arrows to fire,
so they can still trigger Conjure Flame and Mark of
Rodgort.
- Multiple Earth
Magic or Water
Magic skills can be used for defensive options such as Stoneflesh
Aura, Armor of Frost, or many of the different Wards.
- Though less popular and very energy intensive, Glyph of Lesser
Energy and Meteor Shower (which causes exhaustion) can be
used together to add repeated damage and knock downs on your targets, preventing them
from escaping your Barrage area.
- Similar to the Meteor Shower combo, Deep Freeze can be used for a large slow
down effect on your foes and no exhaustion though this is uncommon
as well.
- If using 2 or more enchantments on yourself Symbiosis becomes a viable
option as listed under R/Mo above.
[edit] R/Assassin
- Attribute level
of Deadly Arts
or Shadow Arts
is usually at around 8-9 ranks in most cases if at all.
- Caltrops can be
used to slow your targets though it requires a closer range.
- Shadow
Refuge makes a good self heal.
- Viper's Defense and other stances can be used
for defensive options.
- Way
of Perfection can add healing with high ranks in Marksmanship
and a lot of targets with minimal energy spent (similar to Vigorous Spirit
as seen above but relies on criticals for health return) though it
performs best if there is a Paragon in your party using "Go for the Eyes!" to
drastically increase chances of critical hits.
[edit] R/Ritualist
Splinter Barrager
Use: Same as the usual barrage build but cast Splinter
Weapon on yourself (or allies as time allows) and be sure to target
a group of foes. Recast as needed and as foes are available.
Especially good in tight passages.
Other Skills:
- Attribute level
of Channeling Magic, Restoration
Magic, or Communing is usually at around 8 to as high as 12
ranks in most cases if at all and often means the reduction of
ranks in Marksmanship though only slightly.
- Nightmare Weapon can be useful for stealing
health on up to 3 enemies hit per casting.
- Wailing
Weapon can add interruption to a mass of attacking foes for the
entire duration.
- Warmonger's Weapon can add interruption to
a mass of non-attacking foes for the entire duration.
- Brutal
Weapon can add damage to every arrow provided they aren't
enchanted. This can be very tricky as many healers will enchant the
entire group or those damaged and may ruin this weapon spell
unintentionally.
- Guided
Weapon can make your Barrages unblockable.
- Vital
Weapon can add to your maximum health and others in the
party.
- Wielder's Boon can be a useful self heal if
under a Weapon
Spell effect.
- Spirit Rift
can be used as a spiking skill add-on if timed properly and
especially effective when combined with Splinter Weapon. Cast
Splinter Weapon, Spirit Rift, then Barrage and it all hits about
the same time. Drawbacks include energy cost, casting time, and the
enemy may move from where the Spirit Rift appears.
- Spirits: Often a R/Rt may also bring a spirit to add
more damage or healing as the case may allow (also taking advantage
of the cost reduction Expertise allows) though this rarely will
enhance Barrage in any way but simply takes advantage of the party
make-up. Expendable spirits (like Life or Destruction that give an
effect when they expire) tend to make a good defensive "shield" of
sorts to hide behind should you come under attack as well. The most
commonly brought are:
-
- Recuperation to add health regen in spirit range
to all things friendly - especially good for groups with multiple
pets, minions, and/or large groups of players and/or friendly
NPC's.
- Life to add cheap healing
in spirit range to all things friendly and a "shield".
- Destruction
to add cheap damage in spirit range to all things unfriendly and a
"shield".
- Bloodsong to
add a cheap attacker and possible "shield" that can steal health
though less common.
- Pain to add a cheap
attacker and possible "shield" that does a little more damage than
Bloodsong but can't heal itself though also less common.
[edit] R/Paragon
"Go for the Eyes!" Barrager
Use: Same as the usual barrage build but spam "Go for the
Eyes!" and "Find Their Weakness!" together as they charge to do critical hits to
your targets and deep
wound to one of your targets as well as add crits to the
targets of those in your party that are effected. "Find Their
Weakness!" only affects one ally and the first critical hit though
so it is usually the skill to change out for others listed
below.
Other Skills:
- Attribute level
of Command or Motivation is usually at
around 8-9 ranks in most cases if at all.
- Shouts can be used
without interrupting the fire rate flow thus making them useful and
often charged with the high adrenaline gain from barrage if they
are adrenaline based.
-
- Many motivation skills can be used for party health, energy,
defense and more though they don't benefit more from use with
barrage unless adrenal based.
- Anthem of
Envy can add some minor damage at the easy cost of
adrenaline.
- Bladeturn Refrain can be used to add
defense to yourself or others and last a long time if using other
chants or shouts allowing you to cover the party or at least
multiple members.
- Song of Concentration and Hexbreaker Aria
can both be charged quickly though will slow you down with the long
cast times. They will still benefit the group with less
interruption or hex removal though.
- Chorus of Restoration or Energizing
Chorus can be quickly charged and used for energy or health
management on yourself or others that meet the conditions.
- Remedy
Signet is a good condition removal skill.
[edit] R/Dervish
[edit]
Barrage in other primary
professions:
- Barrage isn't limited to Ranger primaries and other professions
can make good use of the skill. Many will make good use of their
primary attribute skill line in combination which Ranger's can't
(at least not as effectively with zero ranks).
[edit] R/any Needler [PvE]
The Prepared Needle Ranger uses Read the Wind and Prepared Shot to
increase damage per hit as well as supply an endless flow of energy
for Needling
Shot.
[edit] Attributes and Skills
[edit] Equipment
- Armor with Radiant Insignias and a max health rune and a Rune
of Attunement.
- Vampiric Recurve Bow of Fortitude and/or Vampiric Longbow of
Fortitude.
[edit] Counters
- Blind, if you can't see
you can't hit.
[edit] Variants
- A Vampiric bow is ideal for the increased damage per hit, but a
Sundering Bow is also sufficient.
- This build works well with a supporting Necromancer who uses Order of the Vampire, or a Paragon using
"Go for the Eyes!". If GFTE is
on you, be sure to use Marauder's Shot or Keen Arrow as your next shot.
- All skills in this build have low energy costs after the
effects of Expertise, and have fairly short recharge times;
this allows for no energy problems as well as increased
effectiveness.
- In PvE, this build can be extremely effective against bosses
with high health counts, as they often will not be able to heal
above 50% when they get to that point, allowing the Prepared
Needler to Needling Shot the boss to death.
[edit] Rt/Mo Burst Healer [PvE]
This build takes advantage of the fact that Weapon Spells and Ritualist Urns may not
be removed like Enchantments can, and uses that advantage to heal
allies.
[edit] Attributes and Skills
[edit] Equipment
- Full Halcyon armor set for Extra Energy.
- With Attuned was Songkai at High Spawning Power, the cost of
Heal Party and Extinguish is nearly halved. With 14 Spawning Power,
15 energy spells are only 8 energy, 10 energy spells cost 5, and 5
energy spells cost 3.
- Soothing Memories costs no energy if you have the Attuned was
Songkai.
- Heal Party should be used when everyone has a bit of damage but
has not been hurt enough to warrant a casting of Soothing
memories.
- Vengeful Weapon is basically Reversal of Damage with no means
of stripping it. It costs 3 energy when you have the Ashes.
- Weapon of Warding is used when there is a hazard of Warriors,
Assassins, and Rangers. It should be used sparingly because of the
cast time.
- Remove Hex and Resilient Weapon are used as safety skills for
when hexes come that are extremely harmful, such as Spiteful
Spirit, Backfire, Empathy, Diversion, etc.
[edit] Counters
- High levels of Degeneration.
- Lack of protection versus high-damage hits.
- Energy Denial.
- 15 second downtime when the spells are full cost, meaning heal
party and Extinguish cannot be used effectively during those
times.
[edit] Variants
If enchantment removal is not an issue:
[edit] Rt/any Ritual Lord [PvE, TA]
Through spamming
protective spirits, the Ritual Lord is designed to
greatly reduce damage dealt to the team.
[edit] Attributes and Skills
- Stand as far away from combat as your spirits can be and still
affect allies.
- Use Boon of Creation for Energy management. Cast it first,
then begin casting Shelter.
- Activate Ritual Lord during shelter. Like a stance, it has zero casting time
so it can be cast during other skills.
- Invoke Displacement then Union.
- Be sure to constantly refresh Boon of Creation and Ritual
Lord.
- Typically, Displacement will run out fairly quickly, at which
time Union will start eroding. Before Union runs out, your
Displacement should be recharged and ready. Invoke it as soon as it
becomes ready again.
- For the duration of the battle, try to balance Union and
Displacement so that at least one of them is in effect, while
always maintaining Shelter. This will make healing extremely
easy.
The end result of this build is that the party will almost
always take no more than 30-38 Damage Per Hit and will avoid
most attacks.
- In Alliance Battles and certain missions (Amatz Basin, etc.), the effects are
even better. All 3 spirits affect allies, as opposed to only party
members. Thus, even 1 Ritual Lord can turn the tide of battle.
[edit] Counters
- Removing Boon of Creation will greatly reduce the energy
management within this build.
- Likewise, any energy denial skills can greatly impact the
build's effectiveness.
- If targeted, the build will usually die quickly as it does not
have attack or healing skills.
- Interrupts while creating the spirits will force the player to
wait the full length of recharge time.
[edit] Variants
There are two optional slots in the skill bar. These can be
filled as follows:
- Suggested as a near must have for one of the optional slots.
This is not a universal opinion, but should be considered. It will
go a long way towards shutting down Adrenaline users.
- Pointless in PvE, excellent
in PvP. A flat-out damage
reduction to give more protection than any amount of Armor. Not
always effective.
- So-So in PvE, great in PvP. Can't go wrong with additional
Armor and Energy, although you lose any Fast Casting/Recharge mods on your
weapon.
- Overpowered in PvE, excellent in PvP. This far outstrips Heal Party. Chances
are, Shelter won't die before it recharges. Feast of Souls can
therefore be cast to give the party a strong heal. Used early it
will give the party a very strong Heal.
- Good in PvE, good in PvP. Gives Union and Displacement a
helping hand before they die.
- Protects caster and caster's spirits from melee attackers that
try to bring them down.
- By using two Superior Runes, one each of Communing and Spawning Power,
and a Minor Rune of Channeling Magic and putting Communing and Spawning Power at
14, you can put 11 into Channeling Magic and use this skill for much
more efficient energy management. Great for PvE, if you stay out of
aggro range. Dangerous in PvP because of much lower health.
- If your secondary class is Mesmer, put 3 into Inspiration. Not needed in PvE, but you may want
it for PvP. Binding Rituals are not spells, so there are
less interrupting skills to affect them, but interruptions will not
trigger Ritual Lord's Recharge reduction, thus, it's really bad to
be interrupted. Don't worry about the low Rank: There will be
Energy to spare if Boon of Creation is managed properly.
- A longer lasting, cheaper variant of Mantra of Resolve. Only
stops one interrupt per cast however.
- Many teams (most notably IWAY) prefer to have one Frozen Soil-spirit carried by
the Ritual Lord, to prevent enemies from reviving dead teammates.
This requires Ranger as
secondary profession.
[edit]
Rt/any Spiritual Assassin [AB, CM,
RA]
The Spirit of the Assassin build is a heavy pressure
build meant to combine the power of Spirit's
Strength with the speed and spammability of dagger attacks.
This build is primarily designed for the Random Arenas, but can be
adapted for other areas of PvP.
[edit] Attributes and Skills
[edit] Equipment
- Halcyon's Armor or armor with Radiant
Insignia to have additional energy for the combos. Alternatively, a
Blessed Insignia could be used for additional armor while
enchanted, or a Ghost Forge Insignia could be used for additional
armor with a weapon spell. The Ghost Forge Insignia has the
advantage of relying on weapon spells which can not be
removed.
- Zealous daggers of Enchanting
are preferred to help offset some of the costs of the skills.
- The best Vigor Rune
available to help offset the Superior Rune and increase overall
survival.
- Before engaging in combat, activate Spirit's Strength and
follow up with Vital Weapon.
- Proceed to attack your chosen target with your attack chain. As
long as you are enchanted these attacks should rarely miss (they
cannot be blocked or evaded).
- In between chains continue pressure with normal attacks. The
damage will still be notable, these attacks are susceptible to
evasion and blocking skills though.
- If you are ever blinded, activate Sight Beyond Sight to quickly
cancel the blind effect and prevent future applications for 20
seconds. Alternatively, if you suspect blinding from your target
apply the skill before engaging your target.
- When a target dies, or when you need to heal activate Feigned
Neutrality and proceed to move away from combat. At 7 seconds it
should be enough for a notable heal and the +80 armor should
minimize any incoming damage. Be careful not to use any other
skills or attack while this skill is active.
- The damage output is a respectable 38-48 base Damage per attack
with damage reaching closer to 80-100 during the attack chain or
crits.
- This build offsets most traditional counters to pressure builds
by removing, blocking, and blind from the mix.
[edit] Counters
- As this build is a pressure build, Weakness will lower the
overall damage, lessening the impact of the pressure. Though the
effect of this would be minimal as it would only affect base weapon
damage and lower attributes by 1.
- Relying on an enchantment for the additional damage, the build
is susceptible to enchantment removal. If such techniques are
suspected it is advisable to use sight beyond sight as a cover
enchantment. Alternately you could lay Feigned Neutrality on before
coming within casting range so that will get stripped instead.
- This build lacks speed boosts and snares making it extremely
susceptible to kiting. The Major Variant listed can overcome this
somewhat by adding a snare or speed boost to the optional
slot.
[edit] Major Variants
- This variation attempts to capture the strengths of the main
build while removing several weaknesses. The overall +Damage from
Spirits strength drops a bit in favor of a more variable combo.
Additionally the optional slot can be used on the ever popular Falling
Spider, OR a speed boost. This will allow for either a spike or
an increase in pressure.
- Consider using Deadly Paradox in the optional slot; this
would allow more frequent use of Feigned Neutrality.
- However by doing so you lose your unblockable attacks.
[edit] Minor Variants
- Other weapon skills can also be effective, more notable ones
are Resilient Weapon, and Weapon of
Warding, although the higher cost, and lower duration means you
are more susceptible to running out of energy.
- In Alliance Battle and Competitive
Mission battles, the Resurrection Signet can be removed and
replaced with another skill. Dark Escape is suggested as it can be used before
feigned neutrality to greatly increase the survivability of the
build.
- You can also put the 7 points from shadow arts into deadly
arts. Then you can use Impale as extra "unblockable" damage (and deep wound)
or Siphon
Speed to counter kiting. Both of these skills significantly
improve your offensive power. However this makes you reliant on
others to keep you alive.
[edit] W/N The Quiverer [PvE]
A Factions PvE sword build designed for lots of damage, without
the drawback of having to charge up lots of adrenaline as in Final Thrust based
builds. Quivering Blade allows you to deal lots of
damage without a huge adrenaline requirement, and Plague Touch takes
advantage of Quivering Blade's second function. This build works
well against casters, causing the Dazed condition and interrupting quickly with Distracting
Blow if needed.
[edit] Attributes and Skills
[edit] Equipment
- Upon entering battle, begin building adrenaline.
- Don't stay on a target if he gets enchanted by skills like Protective
Spirit or Guardian.
- Use Quivering Blade, Sever Artery and Gash.
- Use Plague
Touch to transfer any conditions you receive, including the
possible dazed from Quivering Blade.
- Weapons:
- Use your Vampiric weapon for general use.
- Use your Ebon weapon to bypass enemy warriors' resistance to
physical damage.
- Use your Zealous weapon when there are lots of incoming
conditions to keep up energy.
- Of course, use Resurrection Signet to resurrect dead
party members.
[edit] Variants
- For the optional slot use:
- Sprint for chasing
kiters.
- Flail for building
adrenaline faster.
- Tiger
Stance for building adrenaline faster, without loss of hit
strength.
[edit] Templates
[edit] W/Rt AoE Splinter [PvE]
The W/Rt AoE Splinter is a PvE build geared towards dealing
large amounts of AoE damage.
[edit] Attributes and Skills
[edit] Equipment
[edit] Counters
- General Anti-Melee
- General Anti-Spam
[edit] Variants
[edit] Sword Variant
[edit] Team Builds
These builds have been archived due to the impending build wipe.
I neither created nor laid out any of these builds.
[edit] Shadow Flame [PvE]
The Shadow Flame Build is designed primarily for fighting
in the Domain of Anguish. It uses the incredible
damage abilities of the PBAoE Fire Magic skills to do as much damage possible
over a short time, while Shadow Form is used to keep the casters
safe from harm.
[edit] Overview
This party consists of:
- 6 / Shadow Flames
- 1 / Shelter Lord
- 1 / LoD Support
[edit] Membership
[edit] E/A Shadow Flame
Cast Recall on the Monk. Then cast Deadly Paradox followed by
Shadow Form, and then rush your target. When attacking, rush your
target until you are adjacent to them. Start off with Inferno,
followed by Flame Burst and so on, spamming spells as they become
available. Using this order you are likely to get off 2 Infernos
and 2 Flame Bursts per attack, if not more. It is key that all
Elementalists focus on the same target, so someone should be
responsible for calling targets.
[edit] Special Note
You need to know your enemies. Some will carry spells that can
strip enchantments indirectly. For these targets it is
advised that you stay as far away from them as possible while using
Flare to indirectly spike them. Then move in to finish off the rest
of the mob when it is safe.
[edit] Equipment
You'll want the highest energy equipment available to you. A
sword with a +5 energy mod and a 20% enchant mod and an offhand
with a +12 energy mod are good choices, as the sword will
automatically cause you to move to adjacent range when you
attack.
[edit] Rt/A Shelter Lord
The one and only purpose of the Ritualist is to ensure that
Shelter stays up. Use Soul Twisting on your other spirits to ensure
that Shelter stays up. Shelter is the teams insurance policy
against PBAoE spells.
[edit] Mo/P LoD Support
The job of the Monk is to heal the team with Light of
Deliverance while staying far away from battle and acting as an
anchor for the rest of the team to Recall to. Upon return of the
team the monk can use the rest of his skills to quickly restore
everyone to full health and energy to get ready for an attack.
[edit] Entire Build Usage
All players cast Recall on the Monk. The Ritualist places
Shelter a proper distance from the intended mob and uses skills to
maintain Shelter continually. The Elementalist all cast Deadly
Paradox followed by Shadow Form and then rush the intended target.
Very few spells can penetrate Shadow Form and those that do will be
caught by Shelter. The Monk meanwhile uses Light of Deliverance to
heal his team while staying far away from battle.
[edit] Variants
In certain areas, mainly Stygian Veil, it is advisable for one or two of
the elementalists to bring Deep Freeze as a way to pin down PBAoE and touch
enemies so that the team can kill them at a distance without risk
of them getting too close.
[edit] DoA Balanced Team [PvE]
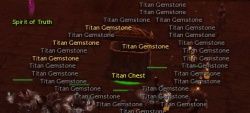
The grand prize of a 4 area run... 4 Titan Gemstones for every party
member.
The DoA Balanced team build is a build designed to
conquer all of the Domain of Anguish (DoA). It is a balanced
build that relies on the tried and true formula of a warrior tank, elementalists nuking and monks
keeping the team alive.
This build can complete all the 4 areas in the Domain of
Anguish: City of Torc'qua, Stygian Veil, Ravenheart
Gloom and The Foundry of Failed
Creations. The same concept build can be used to defeat Mallyx the Unyielding in the Ebony Citadel of Mallyx with
modifications to the damage dealers. The specific steps to use the
build in each area are discussed below.
Conquering the DoA in sequence is done in the order: City ->
Veil -> Gloom -> Foundry. This has the benefit that the
chests at the end of each area would increasingly yield more gems.
The City chest will yield one Margonite Gemstone for each party
member, the Stygian Chest would yield two Stygian
Gemstones, the Ravenheart Chest would yield three Torment
Gemstones and finally, the Foundry Chest would yield four Titan
Gemstones.
[edit] Build Concept
While there are different tactics for different situations
(explained below, in the tactics section), the general outline of
how this team works is as follows:
[edit] Build Details
[edit] The Obsidian Flesh Tank
The Obsidian Flesh tank can be done in many ways. This includes
a Warrior/Elementalist, Elementalist/Mesmer as well as other
builds. The warrior provides the safest approach as their
typical armor is 115 vs Physical and 95 vs Elemental damage without
using a single skill. That being said, any of the other builds can
be even more successful with enough skill and experience in the
Domain of Anguish. Find other proposed tanking builds in the
variants section.
Usage:
- The tank will be heavily bonded. As such he/she will only be
receiving partial damage at all times.
- The tank will have Balthazar's Spirit on which will allow for
constant casting of all Earth Magic spells.
- When going into a group of foes, it is best not to use Obsidian Flesh or
Dolyak
Signet as they will slow down your approach. Instead ask for
Spell Breaker from a monk.
- When pulling a group of foes, it is actually useful to invoke
Obsidian Flesh as you pull foes into the tanking spot as moving
slower than computer controlled foes will make them follow you as
far as they could as opposed to running at normal speed.
- Use Stoneflesh Aura as often as possible. It will
make you take zero damage from nearly all attacks and spells.
- Use Dolyak
Signet to buff up your armor when facing foes that deal large
amounts of damage such as the Tortureweb Dryders and the Stygian
Brutes.
- Use Glyph of Concentration to avoid having
any of your spells interrupted. Use Wary Stance to protect the glyph if you
expect physical interrupts from attack skills such as Savage Shot from the Spirit
Tormentors and Disrupting Throw from the Sanity
Tormentors.
- The optional slot can be:
Equipment:
- A sword/axe with +5 Energy and a 20% "of Enchanting" grip. This will give you extra
energy and make all the Earth spells last longer on you. Rajazan's
Fervor or the Totem
Axe make great weapons for this build.
- A Shield with either
+30 Health or +45 while
Enchanted is optimal. Also, having a secondary set of Earth Magic
based wand and Focus item is optimal for
energy. It can also be a 15/-1 set to provide an extra energy boost
in times of trouble.
- Gladiator's Armor or an armor set fully
equipped with Radiant
Insignia (for the extra energy) is ideal for this build.
[edit] The Searing Flames Nukers
The primary damage dealers of this build are two regular Searing
Flames nukers and one Freezer:
[edit] The Regular Nukers
These elementalists take out foes by spamming Searing Flames and with tactical usage of Meteor
Shower.
Usage:
- Wait until all enemy aggro has settled on the tank.
- Maintain Fire Attunement during a fight.
- If the foes contain casters you need to take out quickly (enemy
monks, mesmers, necromancers and/or elementalists) then use Glyph of
Sacrifice followed by Meteor Shower. Then proceed to spam Glyph
of Lesser Energy, Searing Flames and Glowing Gaze as they
become available.
- If the foes are mostly melee foes (like all Titans) then inverse the combo. Spam the first four
skills on your bar until foes are at half health, then use Meteor
Shower to finish them off. In fact, against pure melee foes
(Warriors, Dervishes
and Assassins), try
not to use Meteor Shower altogether.
- If an ally is killed during battle, use Glyph of Sacrifice and
then Resurrection Chant.
- If the tank gets hexed in
certain critical situations, then use Convert Hexes.
- It's possible to replace Fire Attunement with Essence Bond
maintained on the tank.
- May be good for one (only one needed) of the nukers to replace
Convert
Hexes or Glyph of Sacrifice with Mark of
Rodgort. So for 37 seconds all Searing Flames hits (except first one)
will cause damage AND reapply burning at the same time, instead of
one SF every 5 seconds doing no damage. Against spell casters, cast
Meteor
Shower first then Mark of Rodgort. The first and subsequent
meteors will apply burning, synergizing with Searing Flames
(but remember that meteor shower only has adjacent radius while SF
and Mark of Rodgort are "nearby").
Equipment:
- As elementalists have a large pool of energy, the only real
upgrade this build really needs is 20% HSR preferably on both the wand and the focus item. This
is to speed up the readiness of Meteor Shower. Using a 20% HCT+HSR wand and focus set will also significantly increase
the DPS by speeding up the casting and recharge times of Searing Flames
(normally 1 + 2 seconds).
- A variety of armor choices make sense:
- An armor set with Radiant Insignia will provide extra
energy.
- An armor set with Stalwart Insignia will provide extra protection
against any melee aggro that comes your way.
- Tempest
Armor would provide extra protection as the elementalist will
always have at least 2 enchantments on.
[edit] The Searing Flames Freezer
This elementalist freezes enemies piled around the tank so that
they do not disperse before they are killed.
Usage:
Equipment:
- As elementalists have a large pool of energy, the only real
upgrade this build really needs is 20% HSR preferably on both the wand and the focus item. This
is to speed up the readiness of Meteor Shower.
- A variety of armor choices make sense:
- An armor set with Radiant Insignia will provide extra
energy.
- An armor set with Stalwart Insignia will provide extra
protection against any melee aggro that comes your way.
- Tempest
Armor would provide extra protection as the elementalist will
always have at least 2 enchantments on.
[edit] The Spiteful Spirit Spammer
This high utility necromancer provides pressure by casting Spiteful
Spirit on enemies, maintianing useful spirits up during fights,
providing other casters with energy and bringing a pet for the
Foundry.
Usage:
- Lay down Edge of Extinction at the start of every
fight in a safe spot that keeps all foes in range.
- Pick your spots... Lay Spiteful Spirit on the foes most likely to
trigger it the most. Margonite Anur Vus, Fury Titans, Stygian Horrors
and so forth are prime candidates while foes that activate skills
slowly like Margonite Anur Tuks or Despair Titans
would be poor targets.
- Cover SS with Reckless Haste. It also enhances the
triggering of SS.
- Spam Desecrate Enchantments as it becomes
available. Enemy Dervishes are the best targets for these.
- Use Blood
Ritual on teammates as they need energy.
- Use Symbiosis
only in the Stygian Veil when the tank is pulling groups that may
contain Stygian Hungers. It is best when laying it
down to put it in a spot to the side of where the tank will hold
aggro, not behind. This way it will give the tank the furthest
possible coverage.
- In the Foundry, kill your pet (by moving around) before the
entrance to each chamber, and then resurrect it after the chamber
is cleared.
Equipment:
- A Necromancer staff or
wand and focus item that provide
extra energy as well as halving the spell recharge on Spitefull
Spirit are ideal.
- Cabalist's Armor or an armor set fully
equipped with Radiant Insignia (for the extra energy) is ideal for
this build.
[edit] The Healer's Boon Monk
Place spare points in death magic
Usage:
Equipment:
- A perfect Insightful Staff of Enchanting with 20/20 HSR and HCT for Healing Prayers is optimal.
- Ascetic's Armor or an armor set fully
equipped with Radiant Insignia (for the extra energy) is ideal for
this build.
[edit] The Spell Breaker Monk
Usage:
Equipment:
- A perfect Insightful Staff of Enchanting with 20/20 HSR and HCT for Healing Prayers is optimal.
- Ascetic's Armor or an armor set fully
equipped with Radiant Insignia (for the extra energy) is ideal for
this build.
[edit] The Bonder
Usage:
- Maintain all the bonds above on the tank in order from right
(Life Barrier
cast first) to left (Vital Blessing cast last).
- Maintain Balthazar's Spirit on yourself as
well.
- Maintain Life Barrier on the elementalists and (depending on
your skill and how comfortable you are with bonding) everyone
else.
- When the party gets to the Prisoners part in the Foundry (see
below), you will need to maintain Life Barrier, Life Bond and Vital
Blessing on each prisoner as he is being rescued. After the
prisoner is taken to safety, you can remove those bonds. Since no
fighting takes place during those sequences, you can drop the bonds
on the elementalists if you need to.
Equipment:
[edit] Tactics
This is a detailed area by area walkthrough:
[edit] The City
During the city, there are no major hurdles to be wary of other
than the annoying energy
denial setting. The environmental effect Repressive
Energy along with the skill set of the Margonites makes it harder
than usual to manage one's energy. The bonder may need to drop
bonds on one of the damage dealers (usually the necromancer).
Tanking and pulling in the City is straightforward and involves
pulling and using corners to pile foes in preparation to nuke them.
In general, after the tank has pulled foes to a spot, the
elementalists should apply Searing Flames pressure on the closest
foes until the Margonite Anur Ki steps up to heal them
(they like to use Healing Whisper). As soon as that happens,
the elementalists should unload a Meteor Shower or two on the Ki
until he dies.
After the city has been cleared, the groups that come with Lord Jadoth can
each be pulled to the city gate (with the party hiding inside) and
then dispatched (while the tank prevents them from coming in by
blocking the door way). If any of the groups that accompany Jadoth
(Shaunur the Divine's group, Turep, Maker of Orphans' group or
Jadoth's group itself) give the tank trouble while pulling them, an
elementalist can aggro them through the wall by casting on them.
This usually makes them want to go all the way into the city to get
to the elementalist.
[edit] The Veil
Conquering the Stygian Veil involves four stages:
- Clearing the initial mobs of monsters at the start of the Breaching the Stygian Veil
quest.
- Clearing the two hills north and south to defeat the two Stygian
Underlords and complete the Breaching quest.
- Killing the four Stygian Lords to complete Brood Wars and cause the
Dreadspawn
Maw to appear.
- Destroying the Dreadspawn Maw.
[edit] The Initial Assault
For the first part of Breaching the Stygian Veil, the party
should first clear the area south of the Acolyte who gives the
quest. There is a small bend there that the tank can use for
holding mobs. To use this spot, the party needs to clear any
casters or rangers in the patrol moving below in the trench. Then
they need to clear out the one patrol of Shadow Army that blocks
the path leading to the Whispers Acolyte.
The tank should take the quest and back up till all the mobs
reach the Acolyte. Spirits should be laid and then the tank should
pull all the mobs (by aggroing using his/her bubble, not a bow).
There will be three mobs jumbles up together, whenever you clear a
mob, another will come from the same hill that the first mob came
from, till you see a mixed group of foes. That will signal that
there will be no more mobs coming from that hill. If the party is
inexperienced, they may want to pull one group at a time using a
bow.
Depending on the type of mobs, the party should react
accordingly:
- Groups of Stygian Hungers should be pulled to tank, they
will pile themselves around him nicely. Nuke a middle target,
freeze them and then finish them off with Searing Flames. Use Spell
Breaker or Obsidian Flesh when they are below half health to
prevent them from using Grenth's Balance on the tank.
- Groups of Stygian Brutes or Stygian Horrors
do not require Spell Breaker. However, the tank should buff himself
up with the Dolyak Signet as soon as he/she gets to their spot as
their Physical damage can trickle to the bonder.
- Groups of Stygian Golems actually benefit from Symbiosis,
but not as much as the tank. They are handled like the Horrors and
Brutes.
- Groups of Stygian Fiends are very dangerous. The tank
should pull them back using a zig-zag motion till they form a tight
ball for the nukers to nuke them. Also, if the tank goes to them in
melee range and attacks, they will say on him.
- Mixed groups will usually have one Fiend and then the rest will
be melee. The melee foes should be nuked first and should the Fiend
go for the party , containing it should not be a problem.
[edit] The Two Hills
Starting with the southern hill, the technique should be the
same. Spirits get laid down, the tank goes in and gathers several
enemies, then brings them back within spirit range and tanks them.
The only thing to watch out for is that the Stygian Fiends can
cripple the tank and the Horrors can knock him/her down with Bull's
Strike. The Healer's Boon monk should use Heal Party to aid the
tank at a distance. When pulling the Underlord's group with Water
Tormentors, the tank should have Spell Breaker coverage.
The northern hill has pop-ups through out the first half of it.
As such, the spirits should be laid outside the hill, the tank
should go in till a group starts popping up (the tank should stand
still till they all come out of the ground, there is usually 6
monsters). The group will be mixed with at least one Stygian Fiend.
There are thre more pop-up groups past the first one. A group
around each of the Torment Claws that will spawn near the middle of
the hill.
Past those Torment Claws, there should be no hidden groups and
the tank should proceed like the first hill, gathering groups and
bringing them to spirit range until the other Underlord is killed.
The spirits should be constantly moved as the party makes its way
deeper into the hill.
[edit] The Stygian Lords
There are ways to skip over barriers and so on to get to the
Sytgian Lords. This guide will simply tackle the problem straight
on.
The party should choose one of the trenches to clear out, the
best candidates would be the second trench to the north or south.
Either of those trenches leads to a Stygian Lord, and from there on
the party can move in a circle to get to the remaining three. The
one to the north leads straight to the monk Lord and offers a quick
passage to the Gloom.
Each trench will spawn two melee groups as soon as someone is
half-way through it. The two groups will rush towards each other
(and kill anyone stuck inside) and then will camp on the opposite
end of where they spawned. In addition, some Tormentor demons will
spawn up top on one or both sides of the hills sandwiching the
trench. To avoid surprises, one party member can simply run into
the trench to trigger its spawns and then die half way through. The
party can then Rebirth that member from atop one of the two hill
overlooking the trench. If dying is such a big deal, one
Elementalist can go secondary Assassin and bring Recall and use it to leave the trench before the
pop-up groups close in on him/her. Also, if the tank is skilled and
familiar with the spawns, he/she can take SB, go into the trench
and pop up all the pop-ups then go back and tank them at the start
of the trench. Bonder must watch that the tank not lose bonds.
Once the trench's spawns are stationary the tank can tackle them
under spirit range and the party can destroy the closer melee group
then the further one as well as the spawns on top of the hills.
Once the trench is clear, the party can proceed to the Stygian
Lord, kill any patrols roaming around him, and destroy him. From
that point on, the party will simply circle around to kill the
other three lord (see the walkthrough for the quest Brood Wars for their
locations).
Note the following:
- The first Stygian Lord to the south is a necromancer, there is
a patrol that comes in front of him from the east and another from
the west. After clearing the eastern patrol, he can be pulled
without the western patrol. He is guarded by Tormentor demons.
- The next one to the east of him is a mesmer. There is a
stationary group of Tormentors around him as well as two spawns of
Torment Claws.
- The next one to the northeast is an elementalist. There are two
patrols on the way to him and then a large pop-up spawn inside the
alcove he is found in. The tank should hold them around the
entrance to the alcove so they cannot go around him to the rest of
the party. Casters should watch out for Chain Lightning
and Sandstorm from
the Stygian Lord.
- The final boss heading northwest from that spot is a smiting monk.
Again he is found in an alcove which he can be pulled out of using
a long bow. If anyone steps past the entrance of the alcove, a
spawn of Stygian Hungers will appear
at the entrance. The party should either pull carefully or trigger
them on purpose and take them out first.
[edit] The Dreadspawn Maw
After the party returns and cashes in the quest Brood Wars, the
Dreadspawn Maw will appear immediately behind them. Make sure
everyone is out of the center area and safely next to the Acolyte
before having ANY party member accept the reward. The Maw will
be comprised of six Smothering Tendrils. The objective is to
kill all six and their spawns.
For each Tendril, one elementalist should weaken it with Searing
Flames and finish him with Meteor Shower, when it is at half
health. This elementalist should have Protective Spirit on them by
the Spell Breaker monk. Everyone else should move back north where
the party originally killed the monsters of the initial
assault.
As soon as the Tendril is about to die, the SB monk should leave
and join the others. The elementalist should finish off the Tendril
and then pull back slowly. As soon as the Tendril dies, numerous
Torment Claws will spawn as will as several Stygian creatures. If
the Stygian creatures DID see the elementalist, he/she should just
pull back slowly and have them kill him/her midway to the party.
They should NOT bring them back to the party otherwise the
party can wipe after doing so much work. After they kill the
elementalist, someone can rebirth him/her and then the tank can
pull the spawned groups into spirit range and the party can destroy
them.
The party can then proceed to kill all the Torment Claws that
spawned (great wanding fun). The same steps should be repeated for
each Smothering Tendril.
[edit] The Gloom
The Ravenheart Gloom is comprised of three quests plus the final
fight against The Greater Darkness.
[edit] The Stand-off
The quest To the Rescue! invovles making a stand against
a massive horde of demons in the little nook that the whispers
followers will be located. The party can choose to run past the
first mobs as well as the wandering patrols outside that little
nook. Alternatively, the tank can round them up and bring them to
corners and the elementalists can nuke from behind the tank.
Once the group gets to the nook (fighting or running), the tank
should find the corner that leads outside the nook and hold aggro
there. Everyone else should stay behind the tank and hug the wall
so that foes need to go through him/her to get to them. The Spell
Breaker monk must have Blessed Aura on in this part as well as a weapon
of Enchanting. It is imperative that the monk and the tank be able
to chain Spell Breaker and Obsidian Flesh to prevent the tank from
being hexed. Currently, the skill Rending Sweep used by the Earth
Tormentors is glitched and will strip the tank of ALL
enchantments if the tank is hexed.
With careful and timely casting, constantly staying on the
closest target and stepping away when foes try to cast on them, the
party should be able to survive the onslaught. When the kills start
piling up, EoE will kick in and help out a great deal.
[edit] The Rift
After the Rescue is completed, the next quest, The Rifts
Between Us, invovles capturing a portal (a Chaos Rift guarded by two
Torment
Claws) northeast of that alcove. The party can head to the
quest marker and find the ridge south and a little east of the
quest marker. This ridge should be used by the tank to provide a
corner that he/she can hold monsters behind (the party should be
below the ridge not above it).
The tank should pull the roaming patrols around the rift and
then the stationary group at the rift (without entering the rift's
range). After they are cleared, the elementalists should take out
the claws.
Once the area is clear, 4 or 5 party members should go in and
capture the rift. As soon as they do, a group of Flesh
Tormentors will spawn to the west of them and rush to them.
They should stand fast until the rift is closed and the quest
updates and then start running back south and below the ridge.
Do NOT run above the ridge as a group of Earth Tormentors, who
can cripple their foes, will spawn there. The Flesh Tormentors
will not follow for long and the group can cash the quest and take
the next one.
The next quest is trivial compared to this. The tank can simply
walk up to the Deathbringer Company and the elementalists can nuke
them and freeze them so they don't scatter. With EoE they should
wipe fairly quickly.
[edit] ==The Greater Darkness
After the final quest, the Greater Darkness will spawn. The tank
should approach with Spell Breaker. This will cause two more of the Darknesses
to spawn. The tank should line them up and then the elementalists
should take them out. After those three die, a spawn of five more
Darknesses will appear. The party should back off and let the tank
pile them up into one nice nukable bunch. If they aggroed on some
party member in the back, it may be best to simply pull back
collectively, break aggro and then send the tank back in anew.
After they are piled up and nuked, all five must be killed at the
same time, so EoE must be used here.
If the tank had any hexes before they died, this hex needs to be
converted or the next spawn of Earth tormentors (30 in total) will
destroy the tank. Again, the party should step back and let all the
Earth Tormentors settle on the tank (with Buffs, the tank will take
0 damage from them). Once they are piled up, they should be nuked
and frozen until EoE takes its course and the whole lot just
dies.
[edit] The Foundry
[edit] 1st Chamber
This is the easiest of the four chambers and should be completed
without the party having to use the "Necrotic Traversal then
Rebirth" trick. However, just to be safe, the necromancer should
have his/her pet die outside the first gate. Everyone should take
the quest from Captain Jerzah. As soon as
everyone is sufficiently deep enough into the room, the gates will
lock and a group of Margonite Anurs will spawn at the end of the
room.
The Tank should be covered with Spell Breaker and should go in
just as the spawn of Margonites is collapsing so as to form a nice ball
for Meteor Shower. Remember not to cast anything on the tank while
he/she is in their aggro range until all aggro settles on him/her
(i.e. their melee attackers all start attacking). As soon as aggro
is set, the elementalists should proceed to nuke with Meteor Shower
first. When this group is about to die, make sure to save one
last Margonite and pull him back to the gate where party came
in, then finish him off there. This should ensure that the next
spawn of Titans does not
aggro the party, or at least aggro only on the tank. After the last
Margonite dies, 3 Rage Titans and 3 Despair Titans will show up.
If those Titans spawn ouside of everyone's aggro, then the tank
should take another Spell Breaker and go to them. If they spawn
within aggro range of the tank then he/she should use Obsidian
Flesh and walk to them (to ensure they do not walk to him/her and
see other party members behind). Whenever the tank is setting aggro
like this, Heal Party should be the only healing used.
These titans will not spawn more titans, however, because they
cannot be knocked down, Meteor Shower acts like Fire Storm making them
scatter rather quickly. So, try and stick with Searing Flames as
much as possible. Finish off the Rage Titans first as they can wipe out the whole
party with Earthquake followed by Churning Earth.
If things look grim, the Healer's Boon monk should always have
his/her finger on the Necrotic Traversal trigger. However, with
experience, this group should be easy to take out with no
deaths.
Revive the pet then move it to the door of the next chamber and
then let it die.
[edit] 2nd Chamber
This room is nigh impossible to fight in. It is very small and
the spawn that appears after the door closes has three Tortureweb
Dryders (which can wipe a tightly packed party in 2 spells). The
party should hug the left wall and proceed slowly until the spawn
appears. As soon as it does, the Spell Breaker monk should throw
Spell Breaker followed by Protective Spirit on the Healer's Boon
monk and that monk should Necrotic Traversal out of the room and
move away from the casting range of the Dryders.
If the spawn did not see them, the party should retreat to the
gate quickly, cast Spell Breaker on the tank and have him/her go in
and pile aggro on the Margonite monk. If they've been seen, the
party should try and take out the Margonite Anur Ki that spawns in
this group before wiping as well as any Dryders they can, however,
they should also try to die as close as they can to the gate. After
the fight is over and all members in the chamber have died, the
monk should proceed to rebirth them outside the room leaving the
tank.
After the casters have all been resurrected and bonded, one of
the elementalists should "Glyph-Sacc Rez" the tank inside the
chamber. The tank should come as close as possible to the gate and
the bonder should careully reapply bonds while the monk heal
him/her. The elementalists should be able to nuke the enemy from
across the gate and the wall. They should spread apart so that
Searing Flames does not damage all of them at the same time.
Sometimes, a foe or two will run off and get stuck on the
opposite side of the room. If the party waits for a few minutes,
that foe will come back within casting range.
When the chamber is almost cleared, the Spell Breaker monk
should cast Spell Breaker on the tank as the second spawn contains
a Greater Dream Rider. The second spawn
should be cleared in the same manner.
Revive the pet then move it to the door of the next chamber and
then let it die.
[edit] 3rd Chamber
This chamber will spawn all its creatures at the same time
(there will be no secondary spawn after the first groups are
wiped). There will be four patrols roaming the room (all of which
come near the gate, but not all the way). A patrol of 4 Misery Titans, a
patrol of 4 Anguish Titans, a patrol of 4 Rage Titans and a patrol
of 3 Dryders along with one Rider.
The Titans in this room will exhibit the usual Titan behavior of
spawning smaller Titans. There are two spawn chains:
The Healer's Boon monk should wait outside the gate using
Necrotic Traversal. The Tank can try and pull the Misery titans
(easiest to take out) and the party can wipe trying to finish them
off. After the party is rebirthed on the outside, the tank can
proceed to pull group after group, while the elementalists take
them out.
Revive the pet then move it to the door of the next chamber and
then let it die.
[edit] 4th Chamber
This chamber will again give the party room to operate. A spawn
of Dryders along with a Margonite Anur Ki will spawn at the middle
or back of the room. They can be taken out by a frontal assault
(tank charge in when they are balled up). Before the last foe dies,
the party should pull that foe back to the beginning of the room
and finish it off there to be safe. The next spawn will be a large
group of Dementia Titans. At this point, the Healer's Boon monks
should leave the room to be safe. The party can try and kill them
while they are on the tank. If aggro breaks, a wipe + rebirth maybe
necessary.
After this group there will be a mixed group with a Margonite
Anur Ki, a few Titans and a Dryder. One of the Titans is a special
Fury Titan that drops a unique item.
After this room is clear, you can proceed to take the quest
reward and the next quest from Tekliss. The pet will no longer be needed.
[edit] The Great Hall
The name of the game in the Foundry is pulling and aggro
control. Because the Foundry is spacious, kiting and breaking aggro
if things go bad is quite possible, so there will be no more need
for the pet.
As soon as the party goes in, they will see a large Vat to their
right with a small gap between it and the wall. That gap will be
the focus of all pulling and
tanking till that part of the Foundry is cleared. The tank will
simply aggro a group and tanks them at the gap so that they are
unable to get through the gap and then the nukers can cast on them
through the wall.
Past the gap, the party will see 4 large vates in the center of
the hall, they should always use those vats for groups that do not
pull all the way to the gap. The tank should pull the foes to the
vat, the casters should be behind him/her so that the enemies need
to go through the tank to get to them and then nuke. The Greater
Dream Riders always like to camp on the right side of
the tank, as such, if he/she pulls them around a corner where the
wall is to the right, they will pile on the tank perfectly.
After all patrols are cleared, the party can attempt to complete
the quest. For each prisoner, the bonder will place Life Bond and
Life Barrier on that prisoner, and the SB monk will place Spell
Breaker on the prisoner and immediately after that, the tank will
speak to the prisoner and advance the quest). Then everyone needs
to run far away and the prisoner will follow them. If the prisoner
is crippled, Dismiss Condition should be used, Heal Party should be
used for healing the party as they move. After aggro breaks,
everyone should stand still, and the one elementalist (codenamed,
the babysitter) should take the prisoner away till the names
in the party are all grayed out. This will ensure the prisoner does
not follow the party anymore.
The same procedure should be done with the other two prisoners.
Captain Valkyss' group should be taken out as they are in the way
of future fights. First, the party should run away till the mob
stops following. The Captain should be taken away to safety and
then the remaining party members should kill off the Dryders and
Riders.
After all three prisoners are safe, the tank should advance to
the gate to aggro the spawn of The Black Beast of Arrgh. With
bonds, the tank should be able to tank him even with 0 attribute
points. However, the Beast should first be pulled all the way to
where his patrol will follow no more and then fought there so that
they do not try and go for party members behind the tank.
After the Beast dies, the quest will be completed and the
prisoners will be removed from the party list. The babysitter
should cash in the quest to trigger the Fury and come help the
party finish off the Black Beast's group. The party can then take
on The Fury's group. The tank can keep pulling the Fury's Group
back and forth until they find the spot beyond which they will not
follow, and then nuke the monks from the side first then the Dryder
guardians and the Riders. The Fury is actually less of a threat
than those Dryders.
[edit] Variants
- One of the Searing Flames nukers can be replaced with Necromancers using Feast
of Corruption or a Mesmer using Spiritual Pain to spike. It's usually good to
have at least two elementalists with Meteor Shower in the
team.
- The SS Necro can be replaced with a BiP necro carrying the same spirits if the party has
energy issues.
- The tank does not necessarily need to be an Obsidian Flesh
warrior. Other tanking builds can be used, as well as non-warrior
tanking builds like a continual Shadow Form assassin or an Obsidian Dervish. One such variety
uses an elementalist as follows:
[edit] Elementalist Tank
This tank is more fragile in terms of vunerability to
enchantment removal. However, they have longer more powerful Earth
Magic enchantments as well as infinite energy.
Usage:
- Generally keep up Stone Striker + Mantra of Earth at all times except in
select situations. They will provide you with infinite energy.
- Before a pull, invoke Stoneflesh Aura to take 0 damage from most
attacks and go in with Spell Breaker on.
- While pulling, if met by strong physical damage (such as from
the Stygian
Brutes), invoke Armor of Earth. because of the lower base
armor, the bonder can take significantly more damage through Life
Bond than is customary with warrior tanks.
- If anticipating interruption, use Mantra of
Resolve.
- If dazed or facing
heaving interruption, use Glyph of Concentration while
under Mantra of Resolve and then cancel Mantra of Resolve with
Mantra of Earth.
- Use Obsidian Flesh when Spell Breaker is about to
run out.
- The optional slot can be:
Equipment:
- A sword/axe with +5 Energy and a 20% "of Enchanting" grip. This will give you extra
energy and make all the Earth spells last longer on you. Rajazan's
Fervor or the Totem
Axe make great weapons for this build.
- A Shield with either
+30 Health or +45 while
Enchanted helps. However, having an Earth Magic Focus item with 20%
chance of halving skill recharge is optimal. It can also be a 15/-1
set to provide an extra energy boost in times of trouble.
- Geomancer's Armor has great synergy with
Stone Striker.
- The monsters in the Stygian Veil have a bad habit of following
for a very long time. As such, it is important that the bonder
remain out of the aggro range of the party and that no one drags
any aggro back to the bonder for any reason (kite around, do not run). The bonder
will be the safety valve in case anything goes wrong.
- Should the inconceivable happen and the tank dies outside of
the range of Resurrect in the Foundry, a work around is for the
Healer's Boon monk to use Necrotic Traversal on a nearby corpse, if
there is one near the gate, and get the tank. The Dryders' corpses
never go away until exploited.
[edit] Steel Wall Deep [PvE]
This is a standard 12 member deep group focused on completing
the elite mission The
Deep safely.
[edit] Overview
This party consists of:
- 3 / Recall Warriors
- 3 / Heavy Nukers
- 2 / Utility Necromancers
- 4 /
 Heal party monk Heal party monk
[edit] Membership
[edit] W/A Recall Warriors
Variations:
[edit] E/Me Heavy Nuker
Variations:
See Build:E/Me Heavy Nuker for
additional variants. Elemental Attunement is preferred, since
it allows faster recovery and longer battles.
- Replace Resurrection Signet with Sunspear Rebirth Signet, for a
better Resurrection skill.
[edit] N/Me Utility Necromancers
This build is very carefully orchestrated; variations are not
suggested. When changing this build, be very careful to preserve
the full functionality.
Variations:
- Replace Resurrection Signet with Sunspear Rebirth Signet, for a
better Resurrection skill.
[edit] Mo/Any Heal Party Monk
Variations:
[edit]
Division of labor, the first 5
rooms
This section describes the division and methodology for the
first two rooms.
[edit] General Advice
The Darkened Irukandji and the Spirits of Restoration
they bind are particularly troublesome in these rooms. Target them
first, and attempt to interrupt Restoration if possible. Warriors
should be careful when pulling. Pull small groups, and attempt to
separate Ripper
Carp, as they are easier to kill alone.
Proceed normally. The Warrior should pull carefully and tank so
the Elementalist can bring their skills to bear.
Because of the healing penalty and the fact you can not retreat
from battle, this group should wait for the other teams to assist.
The monk should be casting heal party while the BR necromancer
should yield energy for the monk's spells. Heal party will affect
all party members in radar so it is possible to heal teammates in
rooms 1 and 3.
The Warrior should proceed first through the teleporter, and
make sure there are no foes near the teleport pad. All party
members should move to the extended platform to the rear of this
room and pull carefully.
Because of the large size of this room, the spawn should be
fairly spread out. The necromancer should place Spinal Shivers on
the Manta
and eliminate them first, then proceed slowly.
Once Clear, each group should attempt to pull small groups out
of this room and into the recently cleared room. Once the larger
center room is cleared, the gates into the prior room will open and
each group should fall back and assist the other teams.
Once all four teams are freed, approach the Kanaxai Aspect of Pain. Warriors
should surround the aspect and attempt to prevent the aspect from
moving, while Elementalist and necromancer assault him with damage
spells. Monks should cast Protective Spirit to reduce Kanaxai's
damage. Use this method to defeat all further aspects.
Warriors should line up at the gate to the next room, and block
the entrance. Casters should stand clear of the warrior wall.
One warrior should cast recall on a nearby Ally, and proceed
into the room and disable the fire flower. Once the flower has been
disabled, the warrior should aggro as much of the room as possible,
and proceed back to take his place on the wall. release recall if
your health drops below 25%, or the room is aggro'd early. Monks
should cast heal party as much as possible to heal the warrior
while he is gathering aggro. Necromancers should cast Blood Ritual on all
monks to counter the cost of heal party.
Once the Leviathans are assembled, warriors should body
block, using whatever defensive skills they can, as all casters
cast their damage spells. once the assembled leviathans are
defeated, proceed into the room and clear any remaining foes, then
use the same tactic from above to eliminate the aspect.
All recall warriors should cast recall on a single designated
Monk or Elementalist and stand on one of the three pads closest to
the gate, with both necromancers on the rear pads. The remaining
party should proceed through the now open gate. Warriors should
time recall to move together to the same character on the far side
of the gate. any warriors without recall should be replaced with
Elementalists, as Elementalist can tolerate Death penalty
easier then any other member. Once the gate is closed any remaining
characters should proceed to the gate and sacrifice or wait to die
so they can be rebirthed through the gate.
Corpse control and heal party are vital in this room, so
necromancers should switch from an offense role to a support roll,
casting Well of Blood and Blood Ritual as much as possible. Proceed
slowly and eliminate one group at a time. Before killing this
aspect, be sure to nuke the nightmares behind the gate to the
previous room, so they do not follow once the gate is opened.
Use the technique from above to eliminate the aspect.
Use the same "Warrior wall" technique as room 6. Heal Party is even more
vital. The warrior should attempt to pull all melee groups.
Once all melee groups are eliminated, all members should proceed
into the room. One warrior should take a position under the jade
outcropping to hold the attention of the ranger outcasts, while the
other party member proceed to the staircase at the end of this
room.
It is not necessary to kill this aspect to proceed
Use the same "Warrior wall" technique. warriors should position
themselves at the top left of the stairs. All casters should
assemble to the far left, out of the aspect from the previous room.
The rightmost warrior should proceed into the room and agitate as
many Oni as possible, then return to body
blocking.
Do not, under any circumstances, attack the Oni with weapons
or wands. Eliminate them with spells ONLY..
The "Warrior wall" should proceed as a unit along the left edge
of the room, being careful not to step into range of the Leviathan. Do
not kill the Reborn Irukandji, as they can be used as
additional body blocking. There are three more Oni spawns before
reaching the aspect. Use the same technique from above to eliminate
this aspect.
Continue along the edge of the room until you reach the stairs
into the next room. there are two additional Oni groups.
Use the "Warrior wall" technique at the top of the stairs near
the left corner. casters should stand behind the corner. Be careful
to avoid killing the Reborn Irukandji, as it can be used to
control teleporting under the aspect. Agitate as many Oni as
possible and eliminate them with spells only. Look to the
end of this room, you can clearly see the top of the gate to the
next room. this gate will open once all the Oni in this room are
defeated.
Once all Oni are defeated, pull as many outcast groups as
possible outside the aspect and eliminate them. Next, the entire
party should group together tightly and run as a group along the
edge to the right into the small haven outside the aspect at the
top of the stairs. Continue to pull outcast groups until you feel
safe to proceed to the gate at the end of this room.
use the same technique from above to kill this aspect.
All party members should run as a group into the room to the
corner at the bottom of the first set of stairs. Quickly position
the Monks on the inside, followed by the casters, and lastly the
warriors on the outside of the group. Clump together as tightly as
possible. Eliminate the nightmares and Oni that attack you, there
should be six groups, and it will be very clear when the spawn is
finished.
Proceed along this room, using the "Warrior wall" technique at
the end of each bridge to trap the Oni and eliminate them. Use the
same technique from above to kill this aspect.
Use the same "Warrior wall" technique at the narrow point
between rooms. This wall should be carefully adjusted, as the gap
is slightly too large for three warriors to block easily. Should a
large number of nightmares escape, fall back and use the bridge to
create a new barrier. Proceed around the right or left to the exit
of this room.
it is not necessary to kill this aspect to proceed
Proceed carefully through this room. the sweep with the "Warrior
wall" technique, as nightmare and Oni pop up groups are common, but
small. Eliminate them as quickly as possible. The largest threat
from this room is decay from the aspect and the the numerous
condition flowers. Monks should use Heal Party and extinguish. the entire
party should proceed either right or left. One warrior should go
down Each line, disabling condition flowers while the rest of the
party fights.
it is not necessary to kill this aspect to proceed
Proceed quickly, but carefully, keeping the warriors in front.
Nightmare pop up groups are common, but small, eliminate them as
quickly as possible. Use the same technique from above to kill this
aspect.
All three Warriors and one Monk should proceed into this room,
while the remaining party stays just outside the aspect. All Monks
remaining back should repeatedly cast heal party to ensure all the
aspect is countered. Necromancers should concentrate on blood
ritual.
Warriors should pull Kanaxai to one side, usually the left, and
surround him as far from the center of the chamber as possible. The
Monk should use protective spirit on whichever warrior Kanaxai
chooses to target. Two warriors should time knockdowns so Kanaxai
is knocked down twice in rapid succession. note: monsters are
immune to knockdowns while knocked down or standing from knock
down, be careful to wait for Kanaxai to stand fully.
Once Kanaxai has been knocked down twice, and two groups of
nightmares are spawned, all warriors should release recall and all
party members should run out of the room until the nightmares are
no longer following. Do not kill any nightmares.
Proceed back into the room to the opposite side, usually right,
and prepare to assault Kanaxai. Warriors should pull and surround
Kanaxai as far from the nightmares as possible. One Necromancer
should constantly use inspired enchantment to remove Kanaxai's
refuge, while the remaining necromancer casts blood ritual on the
Monks. Monks should be repeatedly casting heal party, and one monk
should maintain protective spirit on whichever target Kanaxai is
attacking. Once Kanaxai is surrounded, the Elementalists should
unleash fire. To return to the deep staging area enter your guild
hall then leave.
[edit]
Barrage/Pet Tomb of Primeval Kings
[PvE]
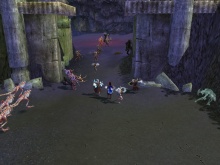
Barrage Pet Tombs group in action
Barrage/Pet (aka b/p,
barrageway, petway) is the general appellation of a class of
"speed" builds for the ruins of the Tomb of the
Primeval Kings.
[edit] Overview
This build utilizes the synergy between Barrage, Favorable Winds, and Winnowing to inflict high
damage on multiple foes, with a wall of pets and minions to defend the party. This
build requires only loose coordination between players, and a large
spectrum of variants are viable. Barrage/pet builds are resilient
to dropped players, as only two roles, the monk and the minion
master, can be said to be essential.
The most common barrage/pet team consists of:
[edit] Membership
This is one of many possible variations. The builds noted below
are suitable for pick up groups, but it is by no means definitive.
A more complex alternative can be found here.
[edit] Barrage Rangers
Variations:
- At least one ranger must carry Favorable Winds (FW). A FW Barrager
should replace Troll Unguent with Favorable Winds, and move all
points from Wilderness Survival into Expertise.
- At least one ranger must carry Winnowing (WW/Winn). A Winnowing Barrager should
replace Troll Unguent with Winnowing and can lessen ranks in Beast
Mastery for higher ranks in Wilderness Survival if they desire a
longer lasting spirit with more health.
- Winter can be used
against Terrorweb Dryders and Mark of Rodgort, efficiently preventing
it from triggering.
- Consider using Paragon as a secondary profession. Paragons
suffer no ill effects when struck by a foe using Fingers of
Chaos, and can carry Signet of Return, a repeatable resurrection
skill.
- Consider using Ritualist as a secondary profession. Splinter Weapon
can increase damage significantly without sacrificing orders
damage, and Flesh of My Flesh is an effective combat
resurrection.
The purpose of the pets is to tank for the group (at least until the minion master
raises a sizable army) and to provide an endless source of corpses
for the minion factory. A dead pet with an exploited corpse serves
no purpose, so it is important for the rangers to raise their pets
at every opportunity.
Note: Skill bar blackout time from pet death is reduced by
higher ranks in Beast Mastery.
For additional information, see Build:R/any General
Barrager.
[edit] Minion Master
The purpose of the minion master is to raise a large undead army
and keep the attention of the foes. Unlike many other minion
builds, the minions here are not intended for pure damage,
but rather to body-block the Grasps of Insanity from reaching the
ranger line.
Note that this build is not set in stone, and there are nearly
as many variants as there are Minion Masters. Keeping this in mind,
some minor variants include swapping the skills Rotting Flesh for
Dark Bond for a
more durable build, swapping Animate Flesh Golem for Jagged Bones for
"free" minions, and changing any of the animate skills.
For additional information please see the general minion mastery
guide.
[edit] Orders Necromancer
The Orders Necromancer doesn't deal direct damage, but
drastically increases the effectiveness of the barrage team due to
the guaranteed damage of the Order skills. This character should
stay well clear of combat; their low health and reliance on
enchantments makes them vulnerable targets.
Note: Well of Blood should only be used in the rare
cases where the minion master disconnects. This maybe so rare that
you may want to switch out Well of Blood for another
skill/spell.
Be careful of enchantments. Casting these to try to 'help'
the monk out in a pinch can harm a recipent who is down in HP if he
is close enough to a Banished Rider with Shatter
Enchantment.
For additional information please see N/Mo
Tombs OoV."
[edit] Healing Monk
Any pure healing Monk. Use of enchantments is generally discouraged, due
largely to the prevalence of Fingers of Chaos and Shatter
Enchantment.
[edit] Variants and Discussion
[edit] Critical Barrager
In this variant, any number of Rangers can be replaced by
Assassin/Rangers, as they can deal greater damage using Sharpen Daggers
to cause bleeding and the increased critical hits.
For additional information, See Build:A/R Critical
Barrager.
[edit] Six Barragers Variant
In this variant, the Orders Necromancer is replaced with a sixth
Barrager. All Barragers either use elemental bowstrings, or one
Ranger brings Greater Conflagration instead of Barrage. The foes in the
Tomb Ruins, being mostly of the Warrior and Mesmer classes, have no
additional defenses against elemental damage.
Analysis: An Orders Necromancer with maximum Blood Magic gives a
guaranteed damage bonus of 17 (or 19 if aided by Awaken the
Blood) per arrow that hits. In the worst case, with each of the
five barragers hitting just one target each, this translates to an
additional damage output of 85 (or 95) for the team. A sixth
Barrager with maximum Marksmanship will do around 40 damage per arrow
with an elemental string; he will thus have to hit at least three
targets every time to outperform the Orders Necromancer's worst
case damage output. In even a slightly better case, where each
barrager hits three targets each, the damage output of the Orders
Necromancer is 255 (or 285), which is more than the sixth barrager
can achieve even if all his six arrows connect. Without an orders
necromancer, the team is free to use elemental bowstrings, which
increases the damage output of every arrow by around 5-10
points.
It should be noted that Order of the Vampire offsets some
of the healing pressure from the Monk, and the Orders Necromancer
doubles as a battery
for the Monk.
[edit] Fevered Dreams Variant
In this variant, either a Ranger or the Monk brings Fevered Dreams
and coordinates with the conditioners in the team to spread
conditions around using very effective combinations. One possible
combination is Fevered Dreams + Enfeeble + Virulence: all foes in the area become weakened, poisoned and diseased. Another possible
combination is a ranger/mesmer using Fevered Dreams on a target, and then adding
conditions with Pin
Down, Apply
Poison and Throw
Dirt.
Analysis: While potent, this build takes some
coordination between the players, and so is most likely not
suitable for loosely organized PUGs.
[edit] Minionless Variant
In this variant, the minion master is replaced with a different
Death
Necromancer build. The plethora of corpses are used for Wells of
Suffering and Putrid Explosions instead of the minion
factory. This variant depends more heavily on the pets forming a
sturdy front line, so it is common to have all Barragers have 8 or
9 in Beast
Mastery and bring skills to aid the pets such as Otyugh's Cry, Call of
Protection and Symbiosis. The Monk in this variant also tries to
keep the pets alive for as long as possible.
Analysis: This variant requires very careful aggro management, and is therefore
most likely unusable by PUGs.
[edit] Monkless Variant
This variant replaces the healing Monk with a sixth damage
dealing character. All healing in the build is done by Predatory
Season and the Orders Necromancer who brings Heal Other and Heal Party for emergency
healing. Predatory Season makes minions more durable.
This variant is essentially a 100% damage-dealing build.
Analysis: This variant is risky, but when correctly
executed, can be among the speediest Barrage/Pet variants. Clearing
times of 40 minutes or lower are not unheard of.
[edit] Paragon Variant
In this variant, a paragon replaces the orders necromancer. Anthem of
Flame when combined "They're on Fire!" can
both increase damage output and reduce incomming damage. "Incoming!" can further reduce spike
damage common at the begining of an engagement, and Song of
Restoration can provide some additional healing. "Go for the Eyes!" and "Find Their Weakness!" are
especially effective with Critical Barragers.
[edit] Historical notes
Historically, the six barrager variant was one of the earliest
barrage/pet team compositions. Before Order of
the Vampire was modified to make it ineffective together with
Order of
Pain, the Orders Necromancer was always the clear winner in
terms of raw damage output, so the six barrager variant fell into
disuse. Its popularity has resurged after a March
2nd 2006 update changed Order of the Vampire, because a well
managed six barrager team can match or outperform an Orders
Necromancer.
|