User:Harry138/builds/team
From GuildWiki
[edit] Team "Steel Wall" Deep Group
This is a standard 12 member deep group focused on completing the elite mission The Deep safely.
[edit] Overview
This party consists of:
- 3
 /
/ Recall Warriors
 - 3
 /
/ Heavy Nukers
 - 2
 / Utility Necromancers
 - 4
 /
/ Heal party monk
[edit] Membership
[edit] W/A Recall Warriors
| Attribute Rank | |
|---|---|
| Strength | 11 + 1 + 1 |
| Swordsmanship | 10 + 1 |
| Tactics | 10 + 1 |
 |
 |
 |
 |
 |
 |
 |
 |
Variations:
- Replace Shove with any unconditional non-attack knockdown, such as Earth Shaker.
- For Elementalist secondary, replace Shove with Shock, freeing the elite slot for Gladiator's Defense instead of Recall. Note that this comes at the cost of some additional risk when pulling.
- Replace adrenaline skills with energy attack skills for an easier time in the Aspect of Soothing
- Replace Resurrection Signet with Sunspear Rebirth Signet, for a better Resurrection skill.
[edit] E/Me Heavy Nuker
| Attribute Rank | |
|---|---|
| Fire Magic | 12 + 3 + 1 |
| Energy Storage | 12 + 1 |
 |
 |
 |
 |
 |
 |
 |
|
Variations:
- Replace Meteor with Breath of Fire, Fire Storm or Searing Heat to keep aggro off back line casters.
See Build:E/Me Heavy Nuker for additional variants. Elemental Attunement is preferred, since it allows faster recovery and longer battles.
- Replace Resurrection Signet with Sunspear Rebirth Signet, for a better Resurrection skill.
[edit] N/Me Utility Necromancers
| Attribute Rank | |
|---|---|
| Curses | 12 + 3 + 1 |
| Blood Magic | 9 + 1 |
| Soul Reaping | 9 + 3 |
 |
|
 |
 |
 |
 |
 |
|
This build is very carefully orchestrated; variations are not suggested. When changing this build, be very careful to preserve the full functionality.
Variations:
- Replace Resurrection Signet with Sunspear Rebirth Signet, for a better Resurrection skill.
[edit] Mo/Any Heal Party Monk
| Attribute Rank | |
|---|---|
| Healing Prayers | 12 + 3 + 1 |
| Protection Prayers | 6 + 1 |
| Divine Favor | 11 + 3 |
 |
 |
 |
 |
 |
 |
 |
 |
Variations:
- Replace Word of Healing with Healing Light
- Replace Signet of Rejuvenation with Signet of Devotion
- Replace your rune of Minor Protection Prayers with a Rune Of Attunement
[edit] Usage
[edit] Division of labor, the first 5 rooms
This section describes the division and methodology for the first two rooms.
| Room and Aspect | Membership Assigned |
|---|---|
| Room 1 Aspect of Soothing |
|
| Room 2 Aspect of Death |
|
| Room 3 Aspect of Surrender |
|
| Room 4 Aspect of Exposure |
|
[edit] General Advice
The Darkened Irukandji and the Spirits of Restoration they bind are particularly troublesome in these rooms. Target them first, and attempt to interrupt Restoration if possible. Warriors should be careful when pulling. Pull small groups, and attempt to separate Ripper Carp, as they are easier to kill alone.
[edit] Room 1, Aspect of Soothing
Proceed normally. The Warrior should pull carefully and tank so the Elementalist can bring their skills to bear.
[edit] Room 2, Aspect of Death
Because of the healing penalty and the fact you can not retreat from battle, this group should wait for the other teams to assist. The monk should be casting heal party while the BR necromancer should yield energy for the monk's spells. Heal party will affect all party members in radar so it is possible to heal teammates in rooms 1 and 3.
[edit] Room 3, Aspect of Surrender
The Warrior should proceed first through the teleporter, and make sure there are no foes near the teleport pad. All party members should move to the extended platform to the rear of this room and pull carefully.
[edit] Room 4, Aspect of Exposure
Because of the large size of this room, the spawn should be fairly spread out. The necromancer should place Spinal Shivers on the Manta and eliminate them first, then proceed slowly.
[edit] Room 5, Aspect of Pain
Once Clear, each group should attempt to pull small groups out of this room and into the recently cleared room. Once the larger center room is cleared, the gates into the prior room will open and each group should fall back and assist the other teams.
Once all four teams are freed, approach the Kanaxai Aspect of Pain. Warriors should surround the aspect and attempt to prevent the aspect from moving, while Elementalist and necromancer assault him with damage spells. Monks should cast Protective Spirit to reduce Kanaxai's damage. Use this method to defeat all further aspects.
[edit] Room 6, Aspect of Lethargy
Warriors should line up at the gate to the next room, and block the entrance. Casters should stand clear of the warrior wall.
One warrior should cast recall on a nearby Ally, and proceed into the room and disable the fire flower. Once the flower has been disabled, the warrior should aggro as much of the room as possible, and proceed back to take his place on the wall. release recall if your health drops below 25%, or the room is aggro'd early. Monks should cast heal party as much as possible to heal the warrior while he is gathering aggro. Necromancers should cast Blood Ritual on all monks to counter the cost of heal party.
Once the Leviathans are assembled, warriors should body block, using whatever defensive skills they can, as all casters cast their damage spells. once the assembled leviathans are defeated, proceed into the room and clear any remaining foes, then use the same tactic from above to eliminate the aspect.
All recall warriors should cast recall on a single designated Monk or Elementalist and stand on one of the three pads closest to the gate, with both necromancers on the rear pads. The remaining party should proceed through the now open gate. Warriors should time recall to move together to the same character on the far side of the gate. any warriors without recall should be replaced with Elementalists, as Elementalist can tolerate Death penalty easier then any other member. Once the gate is closed any remaining characters should proceed to the gate and sacrifice or wait to die so they can be rebirthed through the gate.
[edit] Room 7, Aspect of Depletion
Corpse control and heal party are vital in this room, so necromancers should switch from an offense role to a support roll, casting Well of Blood and Blood Ritual as much as possible. Proceed slowly and eliminate one group at a time. Before killing this aspect, be sure to nuke the nightmares behind the gate to the previous room, so they do not follow once the gate is opened.
Use the technique from above to eliminate the aspect.
[edit] Room 8, Aspect of Failure
Use the same "Warrior wall" technique as room 6. Heal Party is even more vital. The warrior should attempt to pull all melee groups.
Once all melee groups are eliminated, all members should proceed into the room. One warrior should take a position under the jade outcropping to hold the attention of the ranger outcasts, while the other party member proceed to the staircase at the end of this room.
It is not necessary to kill this aspect to proceed
[edit] Room 9, Aspect of Shadows
Use the same "Warrior wall" technique. warriors should position themselves at the top left of the stairs. All casters should assemble to the far left, out of the aspect from the previous room. The rightmost warrior should proceed into the room and agitate as many Oni as possible, then return to body blocking.
Do not, under any circumstances, attack the Oni with weapons or wands. Eliminate them with spells ONLY..
The "Warrior wall" should proceed as a unit along the left edge of the room, being careful not to step into range of the Leviathan. Do not kill the Reborn Irukandji, as they can be used as additional body blocking. There are three more Oni spawns before reaching the aspect. Use the same technique from above to eliminate this aspect.
Continue along the edge of the room until you reach the stairs into the next room. there are two additional Oni groups.
[edit] Room 10, Scorpion Aspect
Use the "Warrior wall" technique at the top of the stairs near the left corner. casters should stand behind the corner. Be careful to avoid killing the Reborn Irukandji, as it can be used to control teleporting under the aspect. Agitate as many Oni as possible and eliminate them with spells only. Look to the end of this room, you can clearly see the top of the gate to the next room. this gate will open once all the Oni in this room are defeated.
Once all Oni are defeated, pull as many outcast groups as possible outside the aspect and eliminate them. Next, the entire party should group together tightly and run as a group along the edge to the right into the small haven outside the aspect at the top of the stairs. Continue to pull outcast groups until you feel safe to proceed to the gate at the end of this room.
use the same technique from above to kill this aspect.
[edit] Room 11, Aspect of Fear
All party members should run as a group into the room to the corner at the bottom of the first set of stairs. Quickly position the Monks on the inside, followed by the casters, and lastly the warriors on the outside of the group. Clump together as tightly as possible. Eliminate the nightmares and Oni that attack you, there should be six groups, and it will be very clear when the spawn is finished.
Proceed along this room, using the "Warrior wall" technique at the end of each bridge to trap the Oni and eliminate them. Use the same technique from above to kill this aspect.
[edit] Room 12, Aspect of Depletion
Use the same "Warrior wall" technique at the narrow point between rooms. This wall should be carefully adjusted, as the gap is slightly too large for three warriors to block easily. Should a large number of nightmares escape, fall back and use the bridge to create a new barrier. Proceed around the right or left to the exit of this room.
it is not necessary to kill this aspect to proceed
[edit] Room 13, Aspect of Decay
Proceed carefully through this room. the sweep with the "Warrior wall" technique, as nightmare and Oni pop up groups are common, but small. Eliminate them as quickly as possible. The largest threat from this room is decay from the aspect and the the numerous condition flowers. Monks should use Heal Party and extinguish. the entire party should proceed either right or left. One warrior should go down Each line, disabling condition flowers while the rest of the party fights.
it is not necessary to kill this aspect to proceed
[edit] Room 14, Aspect of Torment
Proceed quickly, but carefully, keeping the warriors in front. Nightmare pop up groups are common, but small, eliminate them as quickly as possible. Use the same technique from above to kill this aspect.
[edit] Kanaxai's Chamber
All three Warriors and one Monk should proceed into this room, while the remaining party stays just outside the aspect. All Monks remaining back should repeatedly cast heal party to ensure all the aspect is countered. Necromancers should concentrate on blood ritual.
Warriors should pull Kanaxai to one side, usually the left, and surround him as far from the center of the chamber as possible. The Monk should use protective spirit on whichever warrior Kanaxai chooses to target. Two warriors should time knockdowns so Kanaxai is knocked down twice in rapid succession. note: monsters are immune to knockdowns while knocked down or standing from knock down, be careful to wait for Kanaxai to stand fully.
Once Kanaxai has been knocked down twice, and two groups of nightmares are spawned, all warriors should release recall and all party members should run out of the room until the nightmares are no longer following. Do not kill any nightmares.
Proceed back into the room to the opposite side, usually right, and prepare to assault Kanaxai. Warriors should pull and surround Kanaxai as far from the nightmares as possible. One Necromancer should constantly use inspired enchantment to remove Kanaxai's refuge, while the remaining necromancer casts blood ritual on the Monks. Monks should be repeatedly casting heal party, and one monk should maintain protective spirit on whichever target Kanaxai is attacking. Once Kanaxai is surrounded, the Elementalists should unleash fire. To return to the deep staging area enter your guild hall then leave.
[edit] Team - 2 Monk Rotscale Farm
This build is fully capable of running to Majesty's Rest killing Rotscale and all his allies to obtain a Rotwing Recurve Bow then to keep rezoning to obtain more even with a 60% death penalty
[edit] Attributes and Skills
| Attribute Rank | |
|---|---|
| Beast Mastery | 9 |
| Smiting Prayers | 12 |
| Protection Prayers | 9 |
| Divine Favor | 3 |
 |
 |
 |
 |
 |
 |
 |
|
Note: Your stats can be modded to more once you get there by putting on superior runes such as superior smiting and superior protection to get 16 smite and 12 prot
| Attribute Rank | |
|---|---|
| Protection Prayers | 12 + 1 + 1 |
| Divine Favor | 12 + 1 |
|
|
 |
|
 |
 |
 |
 |
 |
[edit] Equipment
Monk/Ranger
- Any Armor as long as it 60AL
- A Weapon with Enchantments Last 20% longer
Monk/Necro
- Ascalon Armor 15AL with a prot +1 head piece 30AL
- A Weapon with Enchantments Last 20% longer
- Another option if you don't want to buy armor is strip off your Scalp Chest and Arm Armor but leave the legs and feet for energy Regeneration and to put runes on.
[edit] Usage
Monk/Ranger This position is responsible for
- Running to Majesty's Rest
- Bonding the other Monk
- Putting Smiting Prayer spells on him
- Keeping Symbiosis up at all times except when Rotscale is at 1/5 life or less and you are actively smiting him
- Staying away from all aggro
Monk/Necro This position is responsible for
- Taking all the damage without dying by using Protective Spirit and Spirit Bond effectively
- Using Grenth's Balance on Rotscale to lower his health and gain a mass amount of health for yourself
- Pulling back when Rotscale is at 1/5 life left and get in a position to where he is using a physical attack so Shield of Judgment, Retribution, and Holy Wrath will all trigger and do damage to him
[edit] The Theory behind the Monk/Necro
Spirit bond is based off of how much damage you were to take which is why its best to run a lower AL of Armor
Protective Spirit Controls the Damage Taken Because Desecrate Enchantments (Target foe and all nearby foes take 6...49+ shadow damage and 4...17+ shadow damage for each Enchantment on them.) equals 60 to 490 shadow damage + 40 to 170 damage
Grenths Balance steals life from Rotscale and gives it to you so the higher your health from symbo the faster it is to work him down to under 1/5th health
A thing I have noticed is if the Monk/Necro has 60 Dp Spirit bond + Protective Spirit on him will heal him for 10 health with symbiosis down and 1234 health but this is the only case when symbiosis is down that you will be healed from spirit bond When Rotscale is using his Breath Attack. Which is why if your under 60% DP You need to have it drop before you start letting Rotscale use his breath attack on you.
[edit] A Complete Guide
- The Monk/Ranger runs you to Majesty's Rest. Once you get to Majesty's Rest, Monk/Ranger is going to put Vital Blessing on both monks so you can run past the first group. So once everyone is past the group and doesn't have aggro, Monk/Ranger is going to take Vital Blessing off of Himself. Monk/Ranger is going to cast his enchantments on the Monk/Necro, and Monk/Necro is going to cast his enchantments on himself. Once Monk/Ranger has enough energy, he casts Shield of Judgment on Monk/Necro, and Monk/Necro runs into all the Wraiths and spams Protective Spirit and Spirit Bond, because Divine Favor will be his only source of healing right now.
- Once the wraiths are dead, they both move up onto the bridge. Monk/Ranger lays Symbiosis and will keep it up until Rotscale is down to 1/5th life. Monk/Necro runs just into aggro range of the Rotting Dragons and Rotscale. All of the Rotting Dragons and undead should die off pretty quickly but while they are dying you may lose health fast and get interrupted a bit (VERY IMPORTANT if anything up there is being obstructed by the terrain it is going to take forever to kill them and you may die. So you need to move around and communicate With the Monk/Ranger) If Nothing is obstructed it should just be you and Rotscale after about 20 seconds. If your health starts falling low just target rotscale and cast GB on him for a full heal. If you are getting interrupted a lot look to see if you're dazed if you are, you can always pull back they won't follow far. As far as the clerics go they will die slow but heal each other with Infuse Health and the way infuse health goes if they keep using it they will reduce to enough hit points where you can just wand them. Or you can opt to just leave them alone because they won't heal rot or the other dragons. Note: Some movement may be necessary in order to ensure the rotting dragons and other allies of Rotscale attacks aren't being obstructed by the terrain. And never go more than halfway up the stairs.
- After only Rotscale is left, the Monk/Ranger just keeps Symbiosis up all the time, and just sits there. Monk/Necro won't be using Spirit Bond now, to get his health lower faster by means of Rotscale's spells. Keep using Grenth's Balance on Rotscale to do A LOT of damage, and get a full heal.
- Repeat the above process until Rotscale is at about 1/5 health. From here on, Monk/Necro will have to back up so Rotscale is only attacking with his ranged attack and no spells. You need to be patient for this part, as it does take awhile. From this point on the Monk/Ranger will let Symbiosis run out. Once Symbiosis dies, Monk/Necro might die too. Just Rebirth him, and re-enchant him fully. Monk/Necro will then run in and aggro Rotscale again using Spirit Bond and not using Protective Spirit. The Monk Ranger strips off Holy Wrath to apply Shield of Judgment and keeps reapplying Holy Wrath as needed. Rotscale will eventually die. When this happens, run up the stairs together because Smoke Phantoms will pop up by the statue of Balthazar and go down the bridge to the stairs. Collect anything you want then run back to portal and rezone or map out.
[edit] Counters
No counters
[edit] Variants
Use 2 monks and 1 ranger, have the ranger be the runner and use symbiosis while the Monk/Ranger just bring more bonds for extra health in the ranger skill places.
Advantage to this: Beast Mastery can be set to 16 and give more health making it go a little faster
Disadvantage is: you have 3 people going for the same Green rather than 2 so you have to do more runs if your splitting them 3 ways. Also it isn't that much faster to where the Bows per hour increases.
[edit] Notes
For the Monk/Ranger When wanting to cast Shield of Judgment strip Holy Wrath use the skill blessed signet twice then apply Shield of Judgment then Holy Wrath in that order or another option is switch to a weapon set that gives you a higher amount of energy.
For the Monk/Ranger it makes it go quicker if you have higher points in smiting Prayers, but I left a superior rune off of the attributes because when running it you need as much health as you can get. Apply additional Superior Runes before you attack Rotscale because the Attributes above are just the minimum.
For the Monk/Necro A thing I have noticed is if the Monk/Necro has 60 Dp Spirit bond + Protective Spirit on him will heal him for 10 health with symbiosis down and 1234 health but this is the only case when symbiosis is down that you will be healed from spirit bond When Rotscale is using his Breath Attack. Which is why if your under 60% DP You need to have it drop before you start letting Rotscale use his breath attack on you.
For the Monk/Necro The Easiest Way I have found to keep from dying when symbiosis drops is have the Monk/Ranger tell you when it is recharged and you will know you have 42 seconds before it drops. Cast Grenths Balance on Rot for a full heal Pull back and get him set up so he is using the Breath Attack then keep casting Protective Spirit and Spirit Bond getting the additional health from Divine Favor and whatever you may be getting from Spirit bond. And when Symbiosis wears off your health may be low but you will live and it will heal fast with Spirit Bond Plus Life Attunement
In Extreme Cases such as when Rot is in the very corner and obstructed you can spawn the smoke phantoms run back and kill them and use the opposite corner at the top of the hill so he isn't obstructed but still far enough away to use his Breath Attack but this takes along time its better just to rezone for a better spawn.
[edit] Team 5 Man Farming (Tomb Ruins)
This is a team build designed for use in the ruins of the Tomb of the Primeval Kings. While not as fast as an 8 man barrage/pet group, clearing times of under 1:30 are easy and the addition of 15-20 minutes to the run is offset by the increased chance for drops be they ectoplasm or unique items. This build can be adjusted to include 6 or 4 people easily with no major tactical changes. This article will first describe the build idea in generalities and then present an example build.
[edit] General Idea
The primary concern, and what makes farming in this area of the PvE metagame unique, is the monster stance fingers of chaos which has varying effects on PC's depending on their class and subclass. This skill can, however, be exploited by carefully designing your team to avoid most of its ill effects which is what makes this team build workable.
The 5 man base team consists of:
- One wards tank or stance tank, W/E or W/Me respectively.
- One healing monk, usually Mo/N or Mo/Me.
- A minion master, N/Me.
- One SS necromancer N/Me.
- One Bonder monk with Life Barrier, Mo/Me.
Note - Under no circumstances is it acceptable to bring any character with a monk subclass as they are effectively unbondable. This is due to Fingers of Chaos.
[edit] Warrior
There are varying versions of a tanking warrior each with its own advantages and disadvantages, subclasses to avoid are necromancer, ranger and monk. These classes will provide no tangible benefit to a team’s tank and are consequently poor choices. The W/N will cause all foes with fingers of chaos active to lose a hex whenever they strike the tank which can, in some cases, render the spiteful spirit necromancer totally obsolete. The W/R will always be struck when attacked by fingers of chaos and therefore evasion is useless and since most ranger skills reduce damage via evasion this build is simply not feasible here. The W/Mo is completely useless in this area, they cannot enchant themselves reliably because of fingers of chaos so the primary self heals used by a W/Mo, mending and healing breeze, are totally useless. Furthermore the bonder will be unable to keep bonds active for very long on a W/Mo as well which will severely decrease the tanks longevity.
Good choices for the warrior's subclass are elementalist and mesmer. W/Es should bring wards such as ward against melee and ward against elements. As an elementalist you will be interrupted whenever struck by a monster with fingers of chaos so bringing glyph of concentration is a must as well. Mesmer warriors should bring mantra of flame to help handle the fire damage common in this area. Distortion is almost completely unworkable here as the combined energy loss from distortion and "Fear Me!" will be quite high. Physical resistance can be used to great effect, however, it will become less useful in the later stages of the run when fire damage and physical damage are encountered at the same time. Despite this draw back it is highly useful for levels one and two, where physical damage and elemental damage are encountered separately.
Lastly the warrior is the teams source of wurm siege interruption via distracting blow but this requires only an open skill slot and no specific secondary or attribute allotment. The recharge on distracting blow is fast enough a warrior can effectively shut down a single siege wurm making life easier on the rest of the party. Another prime target for this skill is meteor shower.
[edit] Healing Monk
The most common monk build is a pure spot healing monk, a Mo/Me or Mo/N.
There are two kinds of mesmer enemies in this area, interrupt/shatter and energy denial, and an ideal build would account for both. While the Mo/N has excellent energy management with offering of blood the Mo/Me can benefit from mantra of resolve and mantra of recall effectively ignoring both types of mesmer.
The primary healing target of the monk is the party's necromancers as they will be dealing the party's damage and are least able to defend themselves. The warrior is completely non-essential once a minion army has been formed but is still very useful in helping to manage aggro and should therefore be kept alive if possible but not at the expense of a necromancer. The bonder, who should be positioned just within spell range of the healing monk and a complete aggro circle away from any foes, is the lowest healing priority as they will be taking very little damage. If some enemies manage to break the front line and attack the bonder keeping the bonder over 50% hp is a must but this occurrence is a rarity. Since no member of the party will be attacking directly, for the most part, hex removal is largely optional. As a Mo/Me, however, inspired hex provides modest energy boosts and can be very useful when/if mantra of recall is shattered or rent unexpectedly.
[edit] Minion Master
The minion masters role in this party is to provide a wall of expendable allies that prevent monsters access to the party proper. Secondary roles include massive AoE damage and energy for the spiteful spirit necromancer. The best mix of blocking and damage is bone minions and death nova which provide AoE damage, poison damage over time, and vast numbers. As an added bonus minions spawn in pairs and die fairly quickly and will provided both necromancers with additional energy via soul reaping. Another perk of this build is that enemies will often cast rend enchantments or shatter enchantment on bone minions enchanted with death nova which means there are fewer bonds for the bonder to replace.
In other areas popular minion builds focus on fiends but these are a poor choice in this area as they afford the team no body blocking and are difficult to keep alive due to massive AoE spikes common in this area. By designing your minions to die you exploit this fact and in many cases the minion master can take out entire groups at once from a single enemy cast of energy surge, wurm siege, meteor shower, or fireball.
During combat the minion master will be animating bone minions and enchanting them with death nova non-stop so soul reaping of 10 is a near must. Mantra of resolve is also a near must due to the large number of interrupters present in this area; nothing is more annoying than watching 25 energy disappear when an animate spell is interrupted. Minion heals are used primarily at the onset of combat to help insure minions reach their targets alive and following combat to ensure they survive the trip to the next group of potential corpses.
The only draw back to this build is it contains no direct combat damage and when there are no bodies there is little the minion master can do to help the team. To help cover this weakness and to add a useful elite skill blood is power is added so that when no bodies are available the minion master can provided the spiteful spirit necromancer, healing monk, and bonder with energy. This can also be used mid-combat when not enough minions are dying to sustain the spiteful spirit necromancers energy reserves. Finally this skill also decreases the down time for the bonder when reapplying bonds between levels.
[edit] Spiteful Spirit Necromancer
The spiteful spirit necromancer is the group's main damage source and as such should have curses at 16 and use arcane echo with spiteful spirit followed by desecrate enchantments for AoE damage and extra damage boosts on the Terrorweb Dryders who use enchantments. Soul reaping is also essential but, due to the specific minion master build in use, 10 is enough. It can be adjusted to 11 or 12 depending on preference. It is essential that enough attribute points be left over to use awaken the blood and blood ritual with reasonable durations as well as mantra of resolve with a reasonable duration and manageable energy loss, probably 4 or 5 energy.
In addition to dealing direct damage the spiteful spirit necromancer provides defense and combat support. Enfeebling blood can be used to great effect against the mobs of grasps of insanity making them much easier to handle. Blood ritual is for use exclusively on the minion master immediately following combat. This helps insure that the minion army stays sizable and that no corpses go unused. If the monk requires energy mid combat it should be supplied by the minion master, not the spiteful spirit necromancer. There are a few reasons for this, blood is power makes for a much better mid combat energy boost than blood ritual, the spiteful spirit necromancer is likely to have awaken the blood active, and the minion master is better able to self heal via taste of death.
Common spiteful spirit builds include spinal shivers for interruption but this is largely unnecessary here. Spinal shivers is arguably the best single target shutdown in the game interrupting everything whenever cold damage is used. In this area, however, there are no monk bosses, or monks of any kind for that matter, and therefore shutting down a single target completely is not necessary. The only reason to consider it is to shutdown Chaos wurms and this can be done more efficiently by a warrior with distracting blow freeing up skill bar space for tasks that can only be accomplished by the necromancer.
On a side note, you should Arcane Echo Desecrate Enchantments while fighting the Siege Wurms, as they won't take any damage from Spiteful Spirit, since they shouldn't be attacking due to interruption.
[edit] Bonder
The bonding monk's primary job is to protect the party. Life Barrier, Life Bond, Balthazar's Spirit, Mantra of Inscriptions and Blessed Signet make up the core of the build and some variations exist on what additional skills to bring.
Playing a bonder is relatively simple, apply bonds, put the mantra on up, cast blessed signet every time it recharges, and repeat. While playing the most important thing to watch for is fallen bonds but determining which bond was removed can be difficult. Fortunately with practice it becomes easier and easier to determine whose bond was removed. Reapplying bonds can be risky mid-battle, approaching enemies has a funny way of making them attack you, so watch your step. Most of the bonder’s time will be spent on the extreme back line of the party, as far away from combat as possible, while still providing the healing monk with whatever healing support you can muster while maintaining bonds.
Life Barrier should be applied to the entire party to halve damage from Fireball spikes and Balthazar's Spirit should be used on the bonder. Life Bond should be applied with the following priority, tank, spiteful spirit necromancer, minion master, and finally healing monk until the bonders upkeep limit is reached, which will vary depending on the exact attribute set up and equipment in use.
If the bonder can keep more than these 9 enchantments up, which is entirely possible, other upkeep enchantments can be added to help provide healing for the group and as cover enchantments. Some options include using Balthazar's Spirit on the warrior as well as the bonder and adding Watchful Spirit on top of the other enchants to as many party members as possible. Life Attunement is also a possibility for the warrior as they will be dealing little to no damage in combat and for the monk for the same reason. Vital Blessing is another possibility and can provide team members with an extra 200+ hp in emergencies but Watchful Spirit provides a similar level of healing without the added complication of characters dying if the enchantment is stripped, rent, or simply removed.
[edit] Tactics Overview
In a 5 man group there is often little to no room for error which means that miscommunications between group members can often prove fatal. This may sound daunting but in practice this is easily accomplished, even in PUG's, with a few simple rules which I will outline here:
[edit] Rule #1
The warrior, and only the warrior, will engage groups with one exception, noted below. All other party members are to remain outside the warrior's aggro circle while the warrior moves into position and pulls enemy groups to the desired location. Once all monsters are targeting the warrior the rest of the party can move in and begin working, typically the minion master will move in next followed by the spiteful spirit necromancer with the healing monk coming in last. While pulling groups the warrior is left alone, during this critical stage Watchful Spirit is probably the best way to keep the warrior alive as it provides +2 regeneration as well as the opportunity to spike heal, should the need arise, and does this while safely outside of range.
[edit] Rule #2
The spiteful spirit echo iteration is extremely energy intensive which is why the minion master has been outfitted with Blood is Power. Typically the casting iteration will be Awaken the Blood and Mantra of Resolve right before combat, Enfeebling Blood first on the grasps that have formed around the warrior, then Arcane Echo, Spiteful Spirit x4. Arcane Echo should be ctrl cast to 'call' announce it to the rest of the party and the minion master should immediately hit the Spiteful Spirit necromancer with Blood is Power. This allows the Spiteful Spirit necromancer to complete this loop.
[edit] Rule #3
Whenever combat ends and there are unexploited corpses around the spiteful spirit necromancer should immediately use Blood Ritual on the minion master and continue to cast it until all corpses have been exploited or disappear. This ensures the party has a healthy group of minions with low degeneration and good HP levels
[edit] Rule #4
At the beginning of each level the minion master will have no corpses available to him, and for the first group in each area, should be standing with the bonder at the extreme backline of the group. This allows the minion master to keep Blood is Power up on the spiteful spirit necromancer and both monks without having to be terribly concerned with sacrifice loss. For the first groups of each level it is best to wait for all but one enemy in the group to fall and then begin animating minions. This ensures that at least 4 minions are available for the next group.
[edit] Exception to Rule #1
The only exception to Rule #1 is when approaching a group consisting only of casters, which only happens twice in the entire run. For these two groups the best strategy is to have the minion master prep the minions with death nova and then use the minions to aggro the group by standing just outside of aggro range. After a brief pause the minion army will break ranks and form a circle around the minion master which will put them just inside aggro range, while the master remains safely outside, and the minions will run off. At this point the master should take a few steps back, the warrior should move in followed by the spiteful spirit necromancer, and the rest of combat will proceed as normal.
[edit] Special Circumstances #1: Level #2 'The Hall'
'The Hall' is a section of the second level of the run where Terrorweb Dryders line all sides of a 'T' shaped valley formation. This area requires a unique approach and should be assaulted in the following manner
[edit] Step 1: Pull Pop-Up Groups
First, watch for the chained soul at the end of the hall to die. Then, have the warrior run in alone, attract some Grasps, and back up just past the arch. The rest of the group can move in at this point and eliminate this group fairly easily with no real danger. Repeat until all pop ups have been removed from the corridor.
[edit] Step 2: Kill Terrorweb Dryders on Either Side
Have the warrior approach, favoring one side, and drop a Ward Against Elements. The spiteful spirit necromancer can now move in and pick out a target to eliminate. Since the Terrorweb Dryders here are too far apart for the AoE Spiteful Spirit damage to work only one Spiteful Spirit should be used at a time here. Echo Desecrate Enchantments instead. The minion master should stay behind with the monks so the minions don't run off and attract any monsters. After the first Terrorweb dies the minion master can move in and spawn a pair of minions from the corpse, apply Death Nova, and then use Taste of Death on both to help take out the second Terroweb Dryder. Repeat this process for both sides.
[edit] Step 3: Pull Remaining Groups
At this point there will be a trio of Terrorweb Dryders left on the ridge at the end of the hall and two patrols moving around behind them. The warrior should move in again, pulling the group of Scythes and Grasps first. The group of Riders and Terrorweb Dryders should be pulled next after the minion master has formed an army from the bodies of the Grasps. After both groups have been eliminated all that remains is the trio of Terrorweb Dryders
[edit] Step 4: Take the Ridge
At this point the party can take the ridge on the left (west) side and begin assaulting the entrenched Terrorweb Dryders; the warrior can move into melee range now and begin using Distracting Blow to shut down meteor showers. This group should fall easily at this point just keep up the pressure until it does. The minion master should try and save at least four minions for the next group.
[ edit] Special Circumstances #2: Level #4 at the Beginning
At this point you will have no minions what so ever and there are no less than four groups, three patrols and a group of Grasps hiding under the surface of the depression immediately in front of the group. Pull the pop up group back the stairs when the patrols are gone, and take them out. Eliminate each patrol one at a time and you should not have a problem.
[edit] Special Circumstances #3: Level #4 'The Stairs'
After taking out the Siege Wurms at the top of the narrow corridor immediately following the first bridge there is a long stair case with a huge group of enemies at the bottom. Pull as many as possible, no really, go ahead and pull them all at once. The group will get choked up on the stairs and even with only four minions, and a good minion master will have around sixteen at this point, the stairs will be completely clogged and no monster will be able to make it through. With all the Grasps and Scythes at such a close proximity to each other Death Nova and Spiteful Spirit will easily take out this whole group in record time. In fact with a large enough starting army completely prepared with Death Nova the minion master can take out this entire group by themselves with only some help pulling from the tank.
[edit] Special Circumstances #4: Chaos Wurms
With bond and barrier active no Chaos Wurm, or even pair of Chaos Wurms, be they the siege or tunneling variants, will pose much of a threat to the party. They can, however, take some time to eliminate. When encountering a Chaos Wurm the easiest way to kill them is to stand still, preferably under a bridge or on a ridge. The Chaos Wurm will surface and stay up as long as you remain stationary and if the Chaos Wurm surfaces under a bridge or on a ridge they will not attack at all. For Siege Wurms encountered in pairs the warrior should interrupt the Siege Wurm you are not trying to kill. This will allow Spiteful Spirit to trigger making killing the Siege Wurm much easier. Whenever possible kill a Siege Wurm at range without engaging the foes around them. This can be difficult in practice, however, especially on level #3 so if this is not possible clear the area around the Siege Wurm first by pulling groups away from the Siege Wurm and then move in to attack the Siege Wurm directly.
[edit] Example Build
[edit] Tanking Warrior
One ![]() warrior/
warrior/![]() elementalist with the
following build.
elementalist with the
following build.
| Attribute Rank | |
|---|---|
| Strength | 12+1+1 |
| Earth Magic | 12 |
 |
|
 |
 |
 |
 |
 |
|
A fairly standard Strength and Earth Magic based defensive warrior. Take note that Dolyak Signet can be exachanged for Armor of Earth for extra defense. Armor of Earth is harder to keep active due to its energy cost, however, and is also easier to interrupt due to its cast time. Pre-cast the glyph before battle and use it to drop down a Ward Against Melee after the grasps of insanity approach. Next use Dolyak Signet and wait for Defy Pain to charge. Do your best to keep these three skills active at all times and try to time activiation so that you are never without at least two of them at any given moment. "I Will Survive!" is an awesome self heal in this area due to fingers of chaos, which causes random conditions on warriors. With the number of condition typically active on a warrior in this area this skill acts as a cheap 6-12 net regeneration. Against the Terrorweb Dryders use Ward Against Elements instead of Ward Against Melee.
Equipment Suggestion: A strength based shield is a must for this build, ideally one with -2 damage and hp +45, while enchanted is better than in a stance. The ideal primary weapon is a one-hand weapon with a perfect Furious hilt or haft, a number of grips and pommels are useful for this build including of Defense, of Warding, of Shelter, and of Fortitude. A secondary weapon should be held in reserve as well, an Earth Magic wand with "halves recharge time of earth magic spells (chance 20%)" which can be obtained from Collectors William Pennington, Cember Goreaxe, and John Verado. Switch to the wand to drop wards and back to the weapon to charge Defy Pain.
[edit] Healing Monk
| Attribute Rank | |
|---|---|
| Divine Favor | 9+1 |
| Healing Prayers | 12+3+1 |
| Inspiration Magic | 9 |
 |
 |
 |
 |
 |
 |
 |
 |
This is a fairly standard spot healer build with a lot of room for customization. The only skills that can be said to be essential are Dwayna's Kiss and Restore Life. Restore Life is definitely the preferred resurrection skill for the healing monk and it can be used on the party's necromancers in case of death mid combat without disabling the resurrected player or the monk for any longer than the spell's cast time. The bonder monk should be carrying Rebirth in case of total party wipes so equipping it on the healer as well is unecessary. Infuse Health will easily counter the occasional spike and can help cover party member if they lose one or more bonds. Healing Breeze and Dwayna's Kiss make for a very effective combination in any situation and the addition of two or more bonds triggering the extra healing from Dwayna's Kiss as well makes for some cheap heals that rival Heal Other in size. Mantra of Resolve is by no means essential and can be switched out for another healing skill if desired, simply be aware that you will be occasionally interrupted without it so positioning yourself properly will become much more essential.
Equipment Suggestions: This build works poorly with any item equipped that lengthens enchantment durations as this will increase the time that Mantra of Recall is active and, as a result, diminish its energy gain over time. The ideal off hand item for this build, and any spot healer, is probably The Stonehart, although this can be exchanged for a Collector healing ankh from Radamon or Mourn Drakespur. For the main weapon it would be ideal to have a holy rod with +5 energy while hp is above 50% or while enchanted and halves skill recharge of spells (chance 10%), this recharge chance will stack with the chance of fast recharge from the focus item. A cheap replacement for a +5 energy holy rod, which can be difficult to find, would be the quest reward holy rod that has +3 energy while health is above 50% and halves skill recharge of spells (chance: 10%). Another weapon option would be the Holy Staff available from Mag Ironwall upgraded with a perfect insightful staff head and a staff wrap of healing with +1 to healing prayers (chance: 20%).
[edit] Minion Master
| Attribute Rank | |
|---|---|
| Death Magic | 12+1+3 |
| Blood Magic | 3+1 |
| Soul Reaping | 9+1...3 |
| Inspiration Magic | 9 |
 |
 |
 |
 |
 |
 |
|
|
Death Nova should be used on all minions immediately before battle or as soon as they spawn in battle. It is useful to note that if you are casting death nova on one minion you can queue another casting of death nova after it by selecting a different minion and activating the skill again before the first has completed casting, just like you can when using two differnt skills in a row. Use Taste of Death to trigger Death Nova as soon as several monsters are in its range to deal damage and to start the poison damage. Taste of death does not require target selection to be used so once a large group of minions is in place just start spamming it and watch the group fall.
Equipment Suggestion: Lengthens enchantment duration is by far the best mod for this build as it increases the duration of death nova and blood is power. A Bone Staff obtained from: Collector Luven Underwood in Diviner's Ascent, or Collector Merin Trollsbane in Snake Dance upgraded with a perfect insightful staff head and staff wrapping of Enchanting would make for an effective weapon for this build.
The ideal weapon set is a Perfect Poisonous sword or axe Of Enchanting and either Bortak's Bone Cesta or Armind's Focus.
[edit] Spiteful Spirit Necromancer
| Attribute Rank | |
|---|---|
| Curses | 12+1+3 |
| Blood Magic | 5+1 |
| Soul Reaping | 9+1...3 |
| Inspiration Magic | 8 |
 |
 |
|
|
|
|
 |
|
Pre-cast Awaken the Blood before battle. Once a group of enemies has formed around the warrior and/or minions, cast Enfeebling Blood then use Arcane Echo with Spiteful Spirit, recast Spiteful Spirit as soon as it recharges, and toss in a Desecrate Enchantments whenever additional damage is necessary. Bear in mind that the minions will be exploding right next to melee enemies so the primary target should be casters and ranged units.
Equipment Suggestion: The ideal weapon for this build would be a wicked staff available from the Collectors Hoknil the Lesser and Mourn Drakespur upgraded with a +5 energy insightful staff head and either a staff wrap of enchanting with lengthens enchantment duration 20% or of Curses with +1 Curses (Chance: 20%).
[edit] Bonding Monk
| Attribute Rank | |
|---|---|
| Divine Favor | 10+3+1 |
| Protection Prayers | 12+3 |
| Inspiration Magic | 8 |
 |
 |
|
 |
|
 |
 |
|
This is a near exact copy of the standard Build:Mo/Me Barrier Bond Monk build. A few of these skills are not essential and the build should be tailored to suit the bonder’s tastes and play style. The focus should obviously be on maintaining as many bonds as possible and replacing any that happen to fall.
Equipment suggestion: The build shown here is designed for use with The Soulstone or a similar item with +1 to divine favor skills which provides the opportunity for 27 energy from blessed signet instead of 25. Any wand that adds energy will be good for this build, +5 energy while enchanted would be ideal. Items that decrease spell recharge or spell casting times will be of little use to this build as they will not effect blessed signet.
[edit] Variants and Discussion
[edit] Dedicated Interrupter Variant
In this variant, a mesmer or ranger is added that specializes in skill and spell interrupts for a total of 6 people. While useful this addition is largely unnecessary and does little, if anything, to cut down on the length of the total run. This group is arguably safer since it has a much more reliable source of meteor shower and wurm siege interrupts. The addition of a 6 man, however, adds bonding requirements for the bonder that, had they been used else where, would have covered whatever damage the interrupter would have prevented. Adding another party member also reduces the chance that each person will receive ectoplasms or unique items. This build is helpful as a 'training wheels' version of the 5 man build as it provides the group a greater margin for error but the interrupter can easily be dropped if each group member is fairly familiar with their role.
[edit] Nuker Variant
In this variant, an elementalist is added to the group for a total of 6 people. This is probably the best version for loosely organized PUG's as it provides a source of damage when the minion master is without corpses. The increase in damage and kill speed is offset here by the addition of another party member who, as in the dedicated interrupter variant, require additional bonding and also factors into drops. In general this variant is the easier to work with in PUG's than the dedicated interrupter variant because interrupting can require a degree of finesse not typically present in PUG members.
[edit] 4 Man Variant
A pair of variants, actually, in this variant the healing monk or the minion master is dropped from the group entirely. Each of these situations provides its own set of challenges to the remaining members of the party and therefore the group is more susceptible to party wipes than the standard 5 man version. Dropping the minion master will result in a significant damage reduction and dropping the monk will require the group to pull enemies in smaller groups and be much more efficient. In practice both situations require much more time be spent on a run, in some cases as much as doubling the clearing time. Since the build started as the interrupter variant and experimentation was done to drop the interrupter from the group successfully these builds represent an extension of this experimentation on what is needed and what isn't. Considering the clearing time this variant is useful only to provide group members with one of the harder PvE challenges available at the moment. As a build focused on maximizing drops it is inferior to the standard 5 man version even if you factor in the increased drop chances.
[edit] Team 55/Famine
The build is based on an Invincible Monk tank and a Famine-SV-AV ranger.
[edit] Build Concept
While there are a lot of differences that affect tactics, this team works in a very similar way to Build:Team - 55/SS;
- The 55 monk attracts a group of enemies, and tanks them.
- The ranger deals damage with the elite Nature Ritual - Famine, which hurts anyone whose energy reaches 0, and cast Sympathetic Visage and its duplicate Ancestor's Visage on the monk, to get the melee mobs attacking him down to 0 energy over and over again.
A major advantage of this build, is that it lets rangers, a profession which is less wanted as farmer, take a part in duo UW farming, make some money and gain xp. It could also be a nice way for a ranger to cap a Black Widow himself, with help from only one other player. Note that with groups bigger than 3, an AoE effect triggers, making some of the group to spread, while 3 will remain still fighting.
Famine now causes enemies to scatter, with careful aggro-management an SS is faster.
[edit] Build Details
[edit] Famine-AV-SV Ranger
| Attribute Rank | |
|---|---|
| Wilderness Survival | 12 + 1 + 3 |
| Marksmanship | 8 + 1 |
| Expertise | 5 + 1 |
| Illusion Magic | 9 |
 |
 |
 |
 |
 |
 |
 |
|
Usage:
- Patience and good timing are the most important aspects of success. Give the 55 monk room to operate and round up and gather aggro. Following closely will only result in breaking up aggro and making fights longer.
- Lay down Famine.
- While the monk is gathering the mobs, wield a bow and be ready to kill or interrupt any Dying Nightmares.
- Once the enemies are gathered around the monk, cast Sympathetic Visage on the monk. Once SV is half way through its recharge cycle, cast AV, and so on.
- While waiting, you can use Apply Poison, and fire an arrow at each enemy.
- As long as you have a group of enemies, do not hurt any of them in any way except through Famine and even poison spreading, since they all contribute to each other's downfall, and losing one will slow the killing of the rest.
- Casters can be carefully taken care of with Images of Remorse and poison.
Equipment:
- A sword or axe Of Enchanting. The Totem Axe and Rajazan's Fervor are ideal. Another option is Vokur's Cane for the fast recharge.
- a 20/20 Jeweled Chakram from Arliss Vaughn or Dauv Merishahl.
- A fast-shooting bow for Savage Shot and Apply Poison.
- Druid's Armor.
Variations:
- Replace one of the interrupts with EoE, Conjure Phantasm, or Charm Animal in case you plan to charm a pet spider.
Famine Ranger Template:
 |
OgUUEybh5MOiAPY5bwNbGdqGBAA |
[edit] The Invincible Monk (55)
| Attribute Rank | |
|---|---|
| Divine Favor | 11 +3 |
| Healing Prayers | 10 +3 |
| Protection Prayers | 10 +3 +1 |
|
|
|
|
 |
|
 |
|
|
Usage:
- Cast the 4 enchantments on the right of the skill bar at the beginning. Note that you will have 0 energy regeneration. Use Blessed Signet to recharge to at least above 25 so you can cast Protective Spirit and then Spell Breaker before Bladed Aatxes interrupt.
- In situations where there are no enemy mesmers, the approach is to put Protective Spirit on and engage. With 4 pips of health regeneration from Mending, you should not need Healing Breeze until you are tanking a lot of foes or are bleeding from the Bladed Aatxes.
- The Energy from Essence Bond and Balthazar's Spirit should be more than enough for all situations; use Blessed Signet to gain energy if needed.
- Use Spell Breaker to deflect enchantment removal, or prevent initial spells while you approach.
- The bigger the aggro (the rounded up enemy group) the better. If the monk is a secondary warrior, they can take up to 14/15 foes at a time.
- If there are ranged spell-casters (Terrorweb Dryders or Coldfire Nights), try and find a nearby group of melee attackers to take to them. This is much faster (and safer energy-wise) than having the ranger try to kill them off with just poison and degen.
Equipment:
- A sword or axe Of Enchanting. The Totem Axe and Rajazan's Fervor are ideal.
- A longbow/flatbow to pull Smite Crawlers from groups of Coldfire Nights.
- The Cities of Ascalon -50 Cesta.
- Any AL Ascetic's Armor, with 5 monk superior runes (one of each kind plus any other).
Variations:
- Replace Blessed Aura with "Fear Me!" to speed up the process or keep Blessed Aura for extra safety.
- Replace Essence bond with Bonetti's Defense (Balthazar's Spirit gives you adrenaline, or you can attack too)
[edit] Variations
- Change the 55 monk in ways described in Invincible Monk.
- Replace the R/Me with a Me/R. this would probably go a bit slower, but, as noted under Build Concept, it might be a good way for mesmers to take part in UW farming, and get XP and skillpoints.
- If the Mo/Me has an available slot on their skill bar, Spirit Shackles can be used to take down groups of Coldfire Nights without bunching a group of Smite Crawlers around them.
[edit] Team 55/Famine Redux
This is a dual farming build that uses a 55 monk to tank and a ranger for support and damage which is designed primarily for farming specific portions of the Underworld. This is a modification to the original 55/Famine build which overcomes AI changes from the Nightfall Update.
[edit] Bonder/Famine Ranger
| Attribute Rank | |
|---|---|
| Expertise | 8 + 1 |
| Wilderness Survival | 12 + 1 + 3 |
| Beast Mastery | 10 + 1 |
|
|
 |
 |
 |
|
|
 |
|
[edit] Ranger Equipment
- Any max armor will be sufficient. Druid's Armor is recommended
- Any weapon will be sufficient but a staff with +20 energy can be useful, as well as a zero or low requirement bow.
[edit] General Ranger Usage
At the beginning of the run, cast Essence Bond, Succor, and Balthazar's Spirit on the 55 monk. Let the monk draw aggro and Essence Bond will replenish your energy. Cast Famine and Edge of Extinction well outside of the monk's aggro circle (Spirit range is a little over twice the radius of your aggro circle). The best placement location is 2 times the radius of the aggro circle, as creatures will scatter off the monk into a circle about 3/4 of an aggro circle away from the monk. Be sure not to draw aggro from creatures the monk is tanking, the monk can die any number of times without ruining the run, but if the ranger dies, the run is over. If you do draw aggro, activate Whirling Defense and attempt to bring the enemies back to the monk or flee to break aggro.
If the 55 monk should die use rebirth to teleport their body out of danger. Since the 55 monk will now only have 1 hp, rebirth will not bring them back to life, it will only move their body. Once you have used rebirth to pull their body away from the monsters paths, use Resurrection Chant to bring them back to life and they can use another weapon/armor set to raise their health.
[edit] A Note on Ranger Experience Points
You are only eligible for experience points from a creature if that creature considers you a threat before it dies. That means that the ranger will get almost no XP for this run unless he deliberately takes steps to get XP. One method is by bringing the monk into your aggro circle briefly after the monk has obtained aggro but before famine is placed. Another method is by shooting 1 creature from each group with a longbow after the monk has obtained aggro. Either of these actions can result on the ranger obtaining aggro from the group, but this is only a risk with groups larger than three creatures. For groups larger than three creatures, it is usually better for the ranger to simply play safe and not let the monsters see him as an enemy.
Note that this does not effect drops- only XP.
[edit] AV/SV 55 Monk
| Attribute Rank | |
|---|---|
| Healing Prayers | 5 + 3 |
| Protection Prayers | 9 + 3 |
| Divine Favor | 7 + 1 + 3 |
| Inspiration Magic | 9 |
| Illusion Magic | 9 |
|
|
|
|
|
|
|
|
|
[edit] Monk Equipment
- A customized max damage wand.
- A +20% Enchantment weapon.
- The Cities of Ascalon -50 Cesta.
- Ascetic's Armor, with 5 monk superior runes
[edit] General Monk Usage
Cast Blessed Aura and Mending on yourself, ranger will cast Succor, Essence Bond, and Balthazar's Spirit. Cast Mantra of Resolve and Healing Breeze then aggro up to three enemies (any more than three and the build becomes slower). If any nightmares appear quickly cast Spell Breaker on yourself and then wand them. Cast Sympathetic Visage as soon as possible. When Sympathetic Visage begins to end cast Ancestor's Visage (alternate so you always have one or the other on you). Keep Protective Spirit up and use Healing Breeze as need applies. If you aggro more than one group at a time some of the enemies will periodically run away to heal- they will eventually return to your side. When fighting non-melee enemies aggro melee fighters next to them. Generally follow the advice of the 55 Monk Guide.
It helps to keep a +20% enchanting weapon selected when not dealing specifically with Dying Nightmares, switch off to your customized wand for Dying Nightmares.
[edit] Counters
Anything that can strip enchantments can result in a quick monk death. Taking too many hits at once can also result in the monk dying. Extremely strong Degen and interrupts can also be a problem. Note that the monk can get up to a full -60% DP with this build and not be in a position to end the run as long as they die in a location where the ranger can successfully Rebirth them to safety, and have non-55 armor they can switch into in slow stages to mitigate DP. Anything that kills the ranger ends the run.
[edit] Usage
The monk should engage groups of 3 or less Aatxes at a time, being mindful of Dying Nightmare popups. Casting AV or SV on yourself before engaging will deprive the Aatxes of their interrupt skill. Engaging more than 3 will make killing Aatxes harder due to them running away from the monk to heal. If a ranger obtains aggro from an Aatxe, the monk can help the ranger considerably by putting Protective Spirit on him.
Edge of Extinction is not necessary for small groups, but Apply Poison can shorten the length of combat for small groups.
Dying Nightmares will popup in somewhat predictable locations throughout the Underworld and will die in 1 to 3 hits from a customized max wand that does light damage (for which the requirement is met). These are best handled using Spell Breaker before an engagement, where interruption is not a problem. If not killed quickly, interrupted, or guarded against using Spell Breaker, a Dying Nightmare will strip the enchantments off the monk using Rend Enchantments.
Grasping Darknesses come in groups of 3 to 4, and will spam Distracting Blow on their first hit. Before engaging, a monk should have AV on them already, or should wait until all of the engaged Grasping Darknesses have used their interrupt. If not subdued with AV, these creatures will quickly drain their opponents energy using "Fear Me!" and will be effective at keeping the monk from using Protective Spirit to keep themselves alive. If properly subdued, and taken in groups of 3 or less, they are trivial. In larger groups, they will break off to heal, and Edge of Extinction works nicely to speed up the combat.
Generally, a group of Smites should be aggro'ed and then pulled to a group of coldfires so that the Smites attacks can trigger AV/SV and through that Famine. Using Spellbreaker before aggroing the Coldfires will shut them down in the crucial first moments while the Smites are causing the energy drain. They only represent a serious threat to the monk when multiple Maelstroms are hitting thus using up Spirit Bond or helping to out damage Healing Breeze. Edge of Extinction can be useful here, especially when the Coldfires are not all clustered together.
By themselves, Smite Crawlers have a hard time overpowering Healing Breeze and have no interrupts, so they can easily be tanked. They often come in groups as large as 5 though, and will run off to heal in those cases. Some care should be made with spirit placement. NOTE: When the monk has a death penalty, and health is above 55, their fast attack speed can overcome health regeneration when there are more than 3 crawlers.
Much like Coldfires, Terrorwebs are best handled with a small group of melee creatures to trigger AV/SV. They are found in groups of 3, but 1 will always run out of immediate range. Once the monk has aggroed the Aatxes to the group of Terrorwebs, and Famine is taking effect, the ranger can help by concentrating on the lone Terrorweb. Once the other 2 Terrorwebs are dead, the monk can bring the surviving Aatxes to the lone Terrorweb for a quick finish.
Groups larger than three (as found in the "Servants of Grenth") quest as given by the reaper of the Icy Veil are not recommended without additional help.
[edit] Variants
The ranger can speed up Aatxes by bringing Apply Poison instead of Whirling Defense, a +33% Poisoning bow, and making sure Aatxes stay poisoned. A ranger without such defensive skills should be extra careful about obtaining aggro from large groups.
Mantra of Resolve mitigates risk from interruption either from Bladed Aaxtes or Grasping Darknesss, but Protective Spirit and Healing Breeze may not be sufficient against a large enough group of Smite Crawlers. An experienced 55 will usually have more luck substituting Spirit Bond or Shield of Absorption for Mantra of Resolve, and learning how to time their casting so as to not be interrupted. Essentially the monk can be fully successful with any 55 build that keeps them alive and keeps SV/AV up all the time while they are in combat.
If the Ranger is afraid of aggroing, bringing Dodge, Zojun's Haste, or Natural Stride instead of Whirling Defense.
The Ranger can also be replaced by a Hero.
[edit] See also
[edit] Team 55/SS
A modern 55/SS pair for farming. The build is based on an Invincible Monk tank and a modified N/Me SS Nuker.
[edit] Build Concept
While there are different tactics for different situations (explained below, in the tactics section), the general outline of how this team works is very similar to most other 55/SS teams:
- The 55 monk attracts all aggro of the enemies. This includes the important step of taking melee attackers to spell casters and/or ranged attacker whenever possible to allow Spiteful Spirit to kill as many foes simultaneously as possible. Solid lining up of ranged attackers and then solid piling of melee attackers on them are the keys to making this team build effective and successful.
- The SS necromancer's job is to carefully administer Spiteful Spirit on foes so that as many foes as possible drop at the same time. If the 55 monk does a solid job piling up foes, then Spiteful Spirit placed on two of them can take out the entire group in a matter of seconds.
- The 55 monk's primary responsibility is to survive. He/she must be accustomed to playing the role of an invincible monk.
- The SS necromancer is in charge of killing, and must utilize his skills in the way that takes out the most dangerous foes first.
- In case of aggro breaks the 55 monk needs to cast protective and healing spells on the SS necromancer who then needs to gather the enemies together again.
[edit] Build Details
[edit] The Invincible Monk (55)
| Attribute Rank | |
|---|---|
| Divine Favor | 11 +3 |
| Healing Prayers | 10 +3 |
| Protection Prayers | 10 +3 +1 |
|
|
|
|
|
|
|
|
|
Usage:
- Cast Blessed Aura, Mending and Balthazar's Spirit at the beginning. Note that you will have low energy regeneration. Use Blessed Signet to recharge.
- In situations where there are no enemy mesmers or elementalists, use Protective Spirit and engage. With four pips of health regeneration from Mending you should not need Healing Breeze until you round all foes and they are all hitting you at the same time.
- The Energy from Balthazar's Spirit should be more than enough for all situations, but use Blessed Signet to fill when it has recharged.
- Use Spell Breaker to deflect enchantment removal, or prevent initial spells while you approach. When you see a Dying Nightmare pop up in your mini radar, use Spell Breaker immediately to avoid Rend Enchantments. If your enchantments are removed, cast Protective Spirit as fast as you can to avoid death.
- If the necromancer is attacked, cast Protective Spirit and Healing Breeze on him, so that he will survive when pulling the attackers to you.
Equipment:
- A sword or axe with an Of Enchanting upgrade. A Totem Axe or Rajazan's Fervor is ideal.
- The Cities of Ascalon quest reward -50hp Cesta.
- Ascetic's Armor, with 5 monk superior runes.
Variations:
If you are sure that the SS necro will stay out of harm's way and not die (not likely in a PUG), you can replace Rebirth with one of the following:
- Bonetti's Defense and use it when encountering large mobs or before using Healing Breeze to help interruption. (Note that it will end upon successful casting.)
- Essence Bond for better energy management.
[edit] Spiteful Spirit Necromancer (SS/SV)
| Attribute Rank | |
|---|---|
| Curses | 12 + 3 + 1 |
| Illusion Magic | 9 |
| Soul Reaping | 9 + 1 |
|
|
|
|
|
|
 |
|
 |
- Good choices for the Optional skill slots are Blood Ritual, Awaken the Blood, Leech Signet and Desecrate Enchantments/Defile Enchantments. Your monk will love you for the extra energy from Blood Ritual, the extra four damage from Awaken the Blood will add up quick, Leech Signet can be the difference between life and death if your monk misses Spell Breaker on a Dying Nightmare spawn, and Desecrate/Defile Enchantments are great for that last bit of damage needed to kill a group of Smite Crawlers, Coldfire Nights, or Terrorweb Dryders.
- Insidious Parasite is also useful, only use it to speed up the killing of one foe, and to kill escaping graspings/smites on your own (doing this with smites is pretty dangerous and needs practice. Don't make the monk come to you. You can kill it on your own, if you are in danger however (below 50% health) run to the monk to get breeze and PS.
- If you use Blood Magic skills move points from Soul Reaping to Blood Magic and take a Blood Magic rune, preferably a superior one.
- If you do not have access to the Sunspear Rebirth Signet, you can substitute a normal Resurrection Signet instead.
- A high Soul Reaping is not really needed, it only gives you (near) full energy after the mob is killed. So you can remove ALL points in Soul Reaping (you can keep the minor rune) and use the attribute points to raise your Illusion Magic to 12. This will give you a nine-seconds-lasting Sympathetic Visage or Ancestor's Visage. It will decrease the time that the tank doesn't have SV/AV on him. Now, this advantage might not look so great, but it can prevent the Smite Crawlers to gain energy. So that they won't use Smite Hex on your precious Spiteful Spirit. (This can save a lot of time.)
Usage:
- Patience and good timing are the most important aspects of success. Give the 55 monk room to operate and round up and gather aggro. Following closely will only result in breaking up aggro and making fights longer. Never move into the aggro range of enemies before they are concentrating on the monk. Most enemy types will also change their target to you if you go closer than the maximum spell casting range.
- Once the enemies are piled up into one nice pile, proceed to echo and apply Spiteful Spirit and its copy on different foes. Follow it up with Reckless Haste if you have it (which affects an area so you do not need to apply it to more than one foe in the same cluster before the duration wears off). Generally, Warriors and Assassins make the best targets as they attack fast and invoke stances while attacking which only serves to increase the damage SS deals.
- Maintain Sympathetic Visage or Ancestor's Visage (but rarely/never at the same time) on the monk, especially against Grasping Darknesses (otherwise they will interrupt the tank) and Smite Crawlers (otherwise they will use Smite Hex to remove Spiteful Spirit)
- Use other damage spells such as Desecrate Enchantments and Defile Enchantments to deal extra damage to speed up the killing. They might also be useful in situations where the enemies break aggro.
- If you are attacked, pull the attackers to the monk, who should cast Protective Spirit and Healing Breeze on you, so that all enemies will be damaged by the SS. If you act quickly, the enemies will die to the initial SS spells and you won't need to recast it.
- Bladed Aatxes are pretty easy to kill. Just make sure that any Dying Nightmares are killed as fast as possible, before the Spell Breaker of the 55-monk runs out.
- With the Grasping Darknesses, make sure that the tank has Sympathetic Visage or Ancestor's Visage on him when possible to prevent the Graspings from interrupting the monk.
- When fighting Smite Crawlers you need to be more careful and wait for the monk to finish the pull and let the Smites gather around him to prevent aggro change. Cast SV on the monk, wait 9 seconds to let SV lower the energy of the Smites, then cast in the following order: AV on the monk, Arcane Echo, Spiteful Spirit on target 1, Spiteful Spirit on target 2, SV on the monk again, and move away from aggro range if the mob has 4 or 5 smites (they'll come after you). If its a group of 4, cast Insidious Parasite (if you have it) then a cover hex like Reckless Haste or even SS. If it is a group of 5 smites, place two SS's (explained above) then run away until the smites lose aggro. When they are back at the monk, just restart the process.
- Coldfire Nights are easy to kill if the monk is able to keep them together and you stay out of their aggro when not casting SS on them.
Equipment:
- A 20/20 weapon set, Ideally, Villnar's Glove and the Wayward Wand of Curses from the Adept of Bone. A curses Wailing Wand is also very useful, it can be obtained from Telamon or Gertrud. This significantly reduces the average recharge time of Spiteful Spirit.
- High rated Scar or Cabalist's Armor with Runes of Attunement.
- The Stonereaper also works relatively well with this character.
[edit] Variations
- For Monk variations, see Invincible Monk
- For Necromancer variations, see Build:N/Me SS Nuker
[edit] See Also
- Build:Team - 55/SS FoW
- Build:Mo/any 55hp Solo Monk
- Build:N/Mo Solo SS Necromancer
- Build:Mo/any SoA Monk
[edit] Team 55/SS FoW
The FoW 55/SS team build is a 2-player farming build designed to conquer many parts of the the Fissure of Woe, one of the richest areas in the game. The build is based on an invincible monk (55 monk) doing all the tanking and gathering of targets and an Echo SS Nuker to dish out all the damage in the form of the elite hex, Spiteful Spirit.
This build can be used to farm the area outside the Tower of Courage, the Great Battle Field, the Fissure Shore and the Spider Cave quite efficiently.
[edit] Build Concept
While there are different tactics for different situations (explained below, in the tactics section), the general outline of how this team works is very similar to most other 55/SS teams:
- The 55 monk attracts all aggro of the enemies. This includes the important step of taking melee attackers to spell casters and/or ranged attacker whenever possible to allow Spiteful Spirit to kill as many foes simultaneously as possible. Solid lining up of ranged attackers and then solid piling of melee attackers on them are the keys to making this team build effective and successful.
- The SS necromancer's job is to carefully administer Spiteful Spirit on foes so that as many foes as possible drop at the same time. If the 55 monk does a solid job piling up foes, then Spiteful Spirit placed on two of them can take out the entire group in a matter of seconds.
- The 55 monk's primary responsibility is to survive. He/she must be accustomed to playing the role of invincible monks because 55ing in the Fissure is a more difficult breed of 55ing than, say, the Crystal Desert. Also, perfecting the timing of using Arcane Echo and Spell Breaker takes time.
- The SS necromancer is in charge of killing, and must utilize his/her skills in the way that takes out the most dangerous foes first.
[edit] Build Details
[edit] The Invincible Monk
| Attribute Rank | |
|---|---|
| Divine Favor | 12 + 3 + 1 |
| Healing Prayers | 10 + 3 |
| Protection Prayers | 8 + 3 |
|
|
|
|
|
|
|
|
|
Usage:
- Cast the 4 enchantments on the right of the skill bar at the beginning. Note that you will have 0 energy regen when you put all 4 on, so you will need Blood Ritual from the SS Necro when you are in need of energy.
- In situations where there are no enemy mesmers, the approach is to put Protective Spirit on and engage. With 4 pips health regeneration from Mending, you should not need Healing Breeze until you round all foes and they are all hitting you at the same time.
- The Energy from Essence Bond and Balthazar's Spirit should be more than enough for all situations.
- The combination of Blessed Aura, Arcane Echo, Spell Breaker and a special weapon with "of Enchanting" is to make Spell Breaker (SB) last for over 1 minute. This is needed for cases where spell casters (enemy mesmers and necromancers) can remove enchantments and kill you instantly.
- To invoke this combination, invoke Arcane Echo first, then Spell Breaker then Protective Spirit and go into the enemy. When Spell Breaker is about 1/3 of the way recharging, invoke the copy held in Arcane Echo's slot (you cannot wait till SB starts flashing because by then the copy in Arcane Echo will have expired). When the echoed SB is about to run out, invoke the original SB which would have recharged. This combination should allow for about 74 seconds of immunity to all spells.
- To cast the first three spells in the sequence above, the monk needs 40 energy to start. Then he/she needs to go into battle quick so that enemy hits can fill up there energy reserves fast enough so that there is enough energy for the echoed SB to be cast. Timing and measuring all of this takes practice.
Equipment:
- A sword/axe with at least an 18% enchantment lengthening upgrade on it. This is important to guarantee continuous Spell breaker coverage for over minute against foes that can remove enchantments. Ideally, a +5 energy mod in the sword would also help out a great deal. Rajazan's Fervor, the Totem Axe or the +5 energy Katana available in Divine Path (and upgraded) all make great weapons for this build.
- The off-hand is not by choice in this build. It has to be the -50 off hand (see Cities of Ascalon).
- Ascetic's Armor offers the most energy which is beneficial to this build.
[edit] SS Necromancer
| Attribute Rank | |
|---|---|
| Curses | 12 + 3 + 1 |
| Illusion Magic | 12 |
| Blood Magic | 2 + 1 |
| Soul Reaping | 2 + 1 |
|
|
|
|
|
|
|
|
|
Usage:
- Patience and good timing are the most important aspects of success. Give the 55 monk room to operate and round up and gather aggro. This is not like a run in the Underworld where the tanking is more or less straight forward. The monk will need space to move. Following closely will only result in breaking up aggro and making fights longer. Something that can endanger the monk in fights against mesmers/necromancers.
- Once the enemies are piled up into one nice pile, or as much as the 55 monk can pile them, invoke Awaken the Blood then proceed to echo and apply Spiteful Spirit on foes. Generally, warriors make the best targets as they attack the fastest and invoke stances while attacking which only serves to increase the damage SS deals.
- If the enemy group contains a monk or more, Sympathetic Visage (and if possible Ancestor's Visage) on the monk and the use of Desecrate Enchantments will facilitate taking them out.
Equipment:
- Ideally, Villnar's Glove as a focus item and the Wayward Wand (Curses) from the Adept of Bone as a weapon. These combine for a 36% chance to halve the recharge time of Curses (which includes a 4% chance of making it presumably 4 times faster but the recharge time is capped at half). This reduces the average recharge time of Spiteful Spirit to 8.1 seconds compared with 9 seconds with only one fast recharge item or the full 10 seconds with no fast recharge items.
- Scar Pattern Armor is best for energy.
[edit] Tactics
Much of the success of this build relies on reading and responding to certain situations:
- Shadow
Monks: If a group of Shadow Army forces includes Shadow Monks, they
can make things difficult with their powerful healing. Their
healing will cause mismatches in damage between foes, making Spiteful
Spirit less potent, they can also heal allies around them with
a powerful Heal
Area and worst of all, if a member falls they can resurrect
him. In addition, if there is more than one, they can virtually
keep their group alive infinitely.
Approach: The key to defeating them is to drain their energy with SV much like the Smite Crawlers of the Underworld. The 55 monk needs to pull enemies so that he/she is next to the monk(s) (easily done by simply attacking with the weapon described above) and also so that the other attackers are adjacent to the monk so that SS can work faster. - Shadow
Mesmers: The greatest threat they pose is Shatter
Enchantment which (if it hits Protective Spirit) will instantly
kill the 55 monk.
Approach: If there is more than one Shadow Mesmer, then it is best to go with the safe approach and echo SB. The monk should try and pile the mesmers, but (as was mentioned above), if the monk keeps moving around a lot to line up foes, he/she may not have enough energy to cast the echoed Spellbreaker.
If there is just one Shadow Mesmer, the 55 monk can protect the enchantments by covering Protective Spirit with Healing Breeze. If the Mesmer shatters Breeze, nothing will happen. - Skeletal Ether Breakers: They are much like Shadow Mesmers and the worst thing to be feared from them is Shatter Enchantments. When coupled with Skeletal Icehands, the echoed SB approach is the only way to avoid their spells and the Icehands' Maelstrom.
- Doubter's Dryders: They possess two enchantment removal skills, so Spell Breaker is a must if taking them on. However, an easier approach is for the 55 monk to cast Spell Breaker on the Necro and have him kill the dryder solo.
- Abyssals: Abyssals
are quite brutal for a 55 monk to take on, especially if more than
one is attacking. Their attacks can knockdown the monk frequently disrupting
Breeze or, worse, Protective Spirit.
Approach: The monk can first start off with one Abyssal at a time around the Tower of Courage. Slowly they will be able to time their casts so that they can go through after the knockdowns. If taking on more than one, it's best to move around a bit so that they are all hitting at the same time, this spares the monk the agony of being knocked down mercilessly because if two knockdown attacks hit at the same time, they only knockdown the monk once. - Ancient
Skales: These are basically a 55 monk's worst nightmare. Their
skill set includes the much dreaded Rend
Enchantments, health degeneration and life stealing. They will
also place a strain on the SS Necro because they will switch
targets and place their life draining hexes on him/her too.
Approach: Continued SB coverage is necessary to take them on. The Necromancer should always move away after casting on them so that they do not invoke Grenth's Balance on him/her and steal life (their AI is such that they will look for the target with the most health when using that skill, which will not be the 55 monk). Since these skales do not drop Obsidian Shards, perhaps the best approach would be to avoid them completely.
[edit] Team 6 Man Deep Team
A 6 Man Team Build for the Elite Mission The Deep
[edit] Overview
This team consists of:
- 2 / Tanks
- 1
 / Spirit Ritualist
 - 1 / Spiteful Spirit
Necromancer
- 2 / Healer Monks
[edit] Membership
[edit] W/A Tank
| Attribute Rank | |
|---|---|
| Strength | 10+2+1 |
| Swordsmanship | 10+1 |
| Tactics | 11+2 |
 |
 |
|
|
|
|
 |
|
Variations:
- Attribute points can be varied to preference.
- Nightfall Variation: Substitute Power Attack with Counterattack.
- Both attack skills can be exchanged for other attack skills.
Equipment:
- Must have a weapon that does cold damage to activate Spinal Shivers.
- Must have a longbow. Flatbows have the same range, but are less effective in certain areas due to low accuracy against moving targets.
[edit] Rt/X Spirit Ritualist
| Attribute Rank | |
|---|---|
| Communing | 11+2+1 |
| Channeling Magic | 10+1 |
| Spawning Power | 10+2 |
 |
 |
 |
 |
 |
 |
 |
 |
Variations:
- Attribute points can be varied to preference.
- Nightfall Variation: Disenchantment could be replaced with Anguish if the team is not concerned about rare Nightmare Refuges that slip through without being interrupted. Anguish does more damage, has a longer duration, and has a shorter casting time.
Equipment:
- HSR and HCT is not of great use for this build, as the Binding Rituals are not considered spells.
[edit] N/Me SS Necromancer
| Attribute Rank | |
|---|---|
| Curses | 12+3+1 |
| Blood Magic | 10+1 |
| Soul Reaping | 8+1 |
|
|
|
|
 |
|
|
|
|
Variations:
- Soul Reaping can be increased at the expense of Blood Magic, as per preference, to yield more energy from the Spirit Battery in Kanaxai's Chamber.
- Nightfall Variation: Substitute Defile Enchantments with Signet of Sorrow. If you go this route, you should adjust your attributes to increase Soul Reaping and decrease Blood Magic.
Equipment:
- A Wand and Focus Item with dual 20% HSR and 20% HCT works well. Alternatively, a 20/20 Wand and Villnar's Glove.
- It is useful to have a second weapon set consisting of a Wand and Focus with +15 energy / -1 Energy Regeneration attributes. During a battle, you can switch to this second weapon set to allow yourself to continue casting. Soul Reaping will then recharge your energy as creatures die.
- It is useful to have one piece of Bloodstained armor
[edit] Mo/X Heal Party Monk
| Attribute Rank | |
|---|---|
| Healing Prayers | 12+3+1 |
| Divine Favor | 12+1 |
|
|
|
|
|
|
|
|
|
Variations: The monk skill bar is very flexible. The only mandatory skills are Heal Party, Healing Seed, and Rebirth.
- Possibilities for the optional slot include another healing skill (such as Healing Whisper or Healing Breeze), Protective Spirit, a condition remover, a hex remover, or Recall. You may need to adjust your attributes to accommodate your optional skill.
- Nightfall Variation: Replace Word of Healing with Light of Deliverance. If you do this, you may consider exchanging Heal Party for a different skill.
Equipment:
- Equipment can be varied as per preference.
- Common Weapons: a 20/20 Wand or Caster Melee weapon with +5 energy and +20% Enchantment Duration modifications.
- Common Focus Items: 20/20 Healing Focus or The Stonehart.
- Nightfall Equipment: The release of Nightfall introduced the possibility of using Spears instead of Melee weapons by casters. An Icy Spear of Enchanting with +5 energy or 10% HSR inscriptions can be useful in rare instances to trigger Spinal Shivers.
[edit] General Concepts
- This team build emphasizes coordination and purpose over
specific builds. Many variations can be used as long as you can
fulfill your specific purposes.
- Warrior: Aggro management/Pulling, Damage mitigation, Knockdown, Secondary damage dealing, Interruption
- Ritualist: Damage, Conditions, Knockdown, Resurrection
- Necromancer: Primary damage dealer, Damage mitigation, Interruption, Corpse Disposal, Battery
- Monk: Healing, Resurrection
- Energy Management: There is no Blood is Power Necromancer in this team. Although the necromancer does carry Blood Ritual, it should not be necessary to use it through most of the run. Exceptions include the first Aspect of Depletion room and Kanaxai's Chamber.
- Solo Tank Aggro: At many spots, a single warrior should achieve aggro. During these times, the second warrior should stay back to pick up any strays. Nobody should be within the primary tank's aggro bubble until full aggro is established.
[edit] Walkthrough
Multiple screenshots are provided to illustrate the various pull points and techniques described in this walkthrough.
[edit] Room 1
[edit] Room 1a: Aspect of Soothing
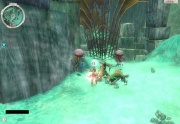
This room should include a Warrior, Monk, and the Necromancer. The Monk should place a Healing Seed on the Tank as the Tank runs up to and stands adjacent to the Darkened Irukandji (Jellies). It is important to switch focus between the Jellies and try to interrupt Restoration as much as possible. Running to the Jellies will also aggro the Ripper Carps and the Kanaxai Aspect of Soothing. Laying Spiteful Spirit on the Aspect will help kill the entire mob quickly. The Aspect is usually destroyed after everything else has perished. Alternatively, you can often aggro the Aspect alone using a longbow, kill it, and then kill the rest of the mob. This method is generally easier but slower.
[edit] Room 1b: Aspect of Death

This room should include a Warrior, Monk, and the Ritualist. The Ritualist should summon his spirits near the back right corner. The Monk stays behind the spirits and the Tank is positioned in front of the spirits. When Pain, Bloodsong, and Shadowsong are placed, the Tank can pull the Kanaxai Aspect of Death by itself using a longbow. As the Aspect approaches, the Tank should use Shove to knock it down and halt its progress. By now, the Ritualist should have placed Wanderlust and cast Painful Bond on the Aspect. The Aspect will go down quickly. The rest of the mob is easy to kill after the Aspect is dead. Occasionally, the location of the spawned creatures will not allow you to pull the Aspect by itself. In this case, you should first pull the mob. This way is slower and mildly more dangerous, but it works.
[edit] Room 1c: Aspect of Surrender
This room is not cleared.
[edit] Room 1d: Aspect of Exposure
This room is not cleared.
[edit] Room 2: Aspect of Pain

The Warrior, Monk, and Ritualist from Room 1b should wait for a break in the patrols and then run to Room 1a, usually bringing a mob behind them. The Warrior, Monk, and Necromancer from Room 1a should wait at the exit gate of Room 1a. The two Tanks will block the gate, and allow the Necromancer and Ritualist to destroy the mob. Again, interrupting Restoration is important. Once the first mob is destroyed, the remaining patrols of Room 2 can be destroyed in similar fashion.
The Blessed Manta and Kanaxai Aspect of Pain are then destroyed in turn.
[edit] Room 3: Aspect of Lethargy

Both Tanks should proceed up the left wall of the entrance to Room 3 and position themselves along the small outcropping. One Warrior should aggro the Leviathan Arms and Leviathan Minds in the left side of the room using a longbow. The Leviathan should be destroyed by the Warriors, spirits, and Necromancer spike damage. Hexes are typically quickly removed so Spiteful Spirit is less useful. The team should then proceed to destroy the nearby Leviathan Heads. Casters should be aware that the Leviathan Heads use Choking Gas.

The Tanks proceed towards the center of the room and line up between the wall and small jade outcropping near the fire flower. One Tank should disable the fire flower and then aggro one or both remaining groups of Leviathan using a longbow. The casters should stay close to the wall to prevent the Leviathan from moving around the jade outcropping and into the back lines. Of note, the small niche in the left wall in this area would appear to be a safe refuge for the casters, however, the ranged attacks of the Leviathan Minds can pass through this wall (as can the attacks of the spirits).
The team then proceeds to destroy the remaining Leviathan Heads and then the Kanaxai Aspect of Lethargy.
[edit] The Gate
The team should approach the gate to Room 4 and aggro the nearby Outcasts on the other side using a longbow. They should die easily. The Warriors then both cast Recall on the same Monk. The entire team except that Monk takes positions on the pads in Room 3. When the gate opens, the Monk runs through and counts down from 3 to 1. On 1, Recall is canceled and the Tanks will Shadow Step to the Monk as the gate closes. The rest of the team then comes back to the gate and the Necromancer sacrifices himself to death using Blood Ritual; subsequently being brought into Room 4 using Rebirth. The other Monk and the Ritualist stay behind the gate for now (unless the other Monk brought Recall as an optional skill).
[edit] Room 4: Aspect of Depletion
After the Necromancer is through the gate, and both the Necromancer and Monk have regenerated a reasonable amount of energy, one Warrior should advance down the right side of the hill and body block the Flesh Golem that is always present. Once aggro is established, the second Warrior should run to the pack of Outcasts behind the Golem and attack them. As the mob dies, Well of Blood should be used to dispose of corpses, preventing the further use of Flesh Golem and Putrid Explosion. This is where Bloodstained armor becomes useful.
When this mob is dead, the casters should retreat to a spot at the top of the hill where there is usually a dead spot in the Aspect of Depletion in order to regenerate energy. Be sure to stay out of aggro range of the gate. One of the Warriors advances to a point just outside of aggro range of the next mobs, which triggers the spawning of multiple Sapping Nightmares and Freezing Nightmares in Room 3. These Nightmares will attack and kill the Monk and Ritualist behind the gate, who are then brought into Room 4 using Rebirth. It is unnecessary to kill the Nightmares.
Again, some time should be allowed to regenerate energy. This next section is the first dangerous part of this run. The priority in this room is to destroy the Kanaxai Aspect of Depletion as soon as possible. This is usually difficult, as he tends to remain deep within the room. However, on occasion he will advance into the center of the room, within range of a longbow. If this occurs, at any time, the tank that triggered the Nightmare spawn should ping his attack, and aggro the Aspect. If the Aspect comes within aggro range, this takes priority over rebirthing the second Monk and the Ritualist.

If the Aspect does not come into range, then a lone Tank should aggro the group on the left by walking up to the corner and then advancing into position between the wall on the left, and a small nearby rock outcropping. The second Tank can join the first near the outcropping, or stay back and defend against the possibility of Flesh Golems. It is imperative at this point that the mob on the right and the mob at the far end of the room do not catch aggro. This part is tricky as the Aspect of Depletion will drain significant amounts of energy. The Necromancer has a lot of work to do, casting Spiteful Spirit, exploiting corpses with Well of Blood, and using Blood Ritual on the Monks and Ritualist as needed.
After this first mob is defeated, the Aspect should now be within range of a longbow and it should be pulled back to a safe position and destroyed. The remaining two mobs are straightforward, as long as you do not aggro them both at the same time. Usually, the far mob is destroyed next, and the mob on the right side is destroyed last.
[edit] Room 5: Aspect of Failure

One Warrior should take up position at the left side of the gate. The casters take position behind the gate and to the left. The Ritualist should place spirits a short distance behind the Tank. The other Tank should then enter Room 5 and attempt to aggro all three groups of patrolling Outcasts. This is done by advancing to a square jade outcropping just before you reach the stairs going up. When you have aggro, run back to the gate between Room 4 and Room 5. Endure Pain and Defensive Stance will help keep you alive. Both Monks should be alternating casts of Heal Party. Once back at the gate, the mobs can be easily destroyed. You can tell how many mobs were successfully pulled by the number of Outcast Ritualists present. Often, the Warrior will need to repeat the pull to get the third group.
- The pulling Warrior can cast Recall on the other Warrior as a safety measure, canceling it if they get in trouble on the way back to gate. If this is done, and the Tank gets back safely, Recall should be canceled near the top of the stairs as it will usually otherwise be stripped during the fight.
Once all three patrols are dead, one Warrior should advance back to the jade outcropping to distract the Outcast Raiders. Their arrows cannot hit you at this location. The rest of the team should run along the far edge of the room to the top of the stairs leading down. The Warrior then breaks off and joins the rest of the team. If there is no chest in this room, you may proceed without destroying the Kanaxai Aspect of Failure or the remaining Outcast Raiders.
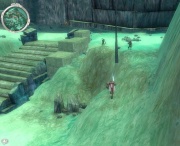
If there is a chest in this room, it can be easily reached. As you approach the top of the stairs down, there is often a dead spot in the Aspect of Failure which allows casting for a brief time. The Necromancer can cast Spiteful Spirit and Reckless Haste to destroy the nearest Outcast Raiders. The Tank climbs the rough jade face to the right of the stairs up (using keyboard movments), aggros the Aspect, and runs down the stairs to rejoin the party, trailing the Aspect behind him. Defensive Stance can protect from archery spike damage. The second Warrior and the Ritualist's spirits should be waiting at the top of the stairs leading down and the Aspect can be destroyed. The remaining Outcasts can be systematically destroyed.
- Any deaths that occur in this room can be raised by the Ritualist using Lively Was Naomei.
[edit] Room 6: Aspect of Shadows

One Tank should take position at the left side of the top of the stairs leading down into Room 6. If the Kanaxai Aspect of Failure is still alive, the casters need to stand in the far left corner in a place where there is a dead spot in the Aspect of Failure. The other Tank will run down the stairs and deactivate the fire flower, spawning two groups of Oni, and then run back up the stairs to take position beside the other Tank. The Oni are easily destroyed using Spiteful Spirit. Do not attack the Oni with melee weapons, bows, wands, staves, or spirits. This will cause them to teleport using Viper's Defense, often into the midst of the casters. It is sometimes advantageous to wand an Oni that breaks into the casters as it will sometimes teleport back in front of the Tank.

A Warrior should proceed along the left side of the room with the rest of the party trailing behind (outside of the warrior's aggro bubble). This is the first place where solo Tank aggro technique will be used. The Tank can use Reborn Irukandji and fire flowers to assist with body blocking. There will be two Oni spawns before you reach the Kanaxai Aspect of Shadows.

Destroying the Aspect is routine.

There will be another two spawns of Oni before you reach the stairs leading to Room 7.
- Try not to get within range of The Leviathan.
[edit] Room 7: Scorpion Aspect

The Warriors should take position at the left side of the top of the stairs. The casters should be safely around the corner, behind the wall. The Ritualist can place spirits behind the wall to the left. These spirits should not be able to hit the Reborn Irukandji due to being obstructed. They will also not be able to hit any Oni held by the Tanks, but will quickly eliminate any Oni that get around the corner. A Warrior will need to watch the room below and advance down the stairs as patrols of Oni come near. Aggro as many patrols of Oni as possible using a longbow and walk back to position at the top of the stairs. The Oni will quickly fall to Spiteful Spirit. Repeat this action until you see the gate to Room 8 is open. If there is a long break between Oni patrols, you may advance down the stairs to destroy the Outcasts at the base of the stairs. If you do this, the Warriors should continue watching for Oni patrols, with the team returning to the top of the stairs if more patrols come near.
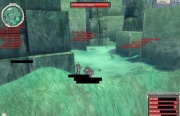
Once all the Oni patrols and the Outcasts at the bottom of the stairs are destroyed, the team may run to the right and then up the next set of stairs, avoiding catching aggro on the Outcast patrols. There is a small niche to the left of the stairs where the team can safely wait (without fear of aggro or teleportation) for the patrol at the base of the stairs to leave. One person should turn off the fire flower at the top of the stairs. When the patrol returns to the bottom of the stairs, it should be destroyed.
The next part can be tricky for 6 man teams due to the unpredictability of the Scorpion Aspect teleports. The team should advance along the right wall until it reaches a small wall of jade with a nearby Outcast patrol. The Warriors will attack the Outcasts while the casters run around the small jade wall. Usually, a second Outcast patrol will eventually join the fight. Destroy both patrols, and then proceed to destroy the nearby Kanaxai Aspect of Scorpion.
[edit] Room 8: Aspect of Fear

Proceed down the stairs and make a tight group in one of the corners at the base of the stairs. The Warriors should stand a very short distance away from the cluster of casters to maximize their ability to body block the Oni. Six groups of Oni and Nightmares will spawn in sequence and descend the stairs to attack. The Freezing Nightmares will Shadow Step into the caster group, but are fairly harmless and easily destroyed. It is important to body block the Oni to prevent the use of Temple Strike on the Necromancer. The Necromancer can quickly kill the groups using Spiteful Spirit and Well of Blood is useful to assist in healing. The Ritualist may or may not cast spirits during these battles as per preference of the party.

Solo Tank aggro technique should be used to aggro the next Oni spawn at the right corner of the end of the first bridge. Destroy the Oni. Dual Tank walls should be used at the ends of the next two bridges. The Ritualist should again cast spirits out of range of the main aggro, but within range to destroy any Oni that break through.

The Kanaxai Aspect of Fear can be pulled along with several groups of Oni at the end of the third bridge. The fast attack rate of the Aspect will help destroy the Oni using Spiteful Spirit.
[edit] Room 9: Aspect of Depletion

This is the next tricky part of the run. The entrance to Room 9, at its narrowest point, is still very wide. One Tank should set up slightly to the right of the middle of the narrowest point of the mouth to Room 9. The other Tank should position themselves halfway between the first tank and the right wall. The casters need to stay within the right half of the room, and should initially be very deep (well outside of the Warrior's aggro bubbles). The Ritualist should set up spirits (spaced wide enough so that only one can be affected by Chaos Storm), so that they are not within range of the main aggro, but within range of anything breaking behind the Tanks.
The left Tank will then advance slightly forward to spawn the Nightmares in Room 9, and then step back into place. The Nightmares will start patrolling in a counter-clockwise direction around the room. After they move to the right of the mouth of the cavern, the left Tank should aggro them using a longbow (the Tank should remain stationary as he does this). The Nightmares will advance towards the Warrior wall and, coming from the right side, should get stuck on the Tanks and ignore the large gap on the left. The left Tank can pull additional groups from his stationary position as necessary using the longbow. Any Nightmares that do go through the Warriors should be quickly destroyed by the spirits. The casters need to move in and out of casting range as necessary to try to avoid being targeted with Chaos Storm.
- Updated aggro rules implemented after the release of Nightfall cause this technique to be mildly less effective than previously. Mobs approaching the Warrior wall will now spread out along the wall and usually one Nightmare will end up positioned on the left side of the left Tank (near the large gap). As the casters advance into aggro range, this Nightmare usually breaks off the Tank and heads into the back line. One or two at a time are usually no threat and are finished off quickly by the Ritualist's spirits.
After all the Nightmares are destroyed, the party can progress along the right side of the chamber to Room 10. The Kanaxai Aspect of Depletion does not need to be killed unless there is a nearby chest.
[edit] Room 10: Aspect of Decay
A single Tank should enter Room 10 and proceed to turn off the closest flowers directly in front of the entrance to the room. In doing so, the Tank will spawn two groups of Oni. These Oni should be gathered up and brought back to a point in the middle of the entrance of Room 10. The Oni can then be destroyed.
It is usually easier and faster to clear the right side of the room, unless a chest is seen on the left. Both Warriors should cast Recall on a caster and proceed up opposite walls, turning off flowers as they go. When they reach the end of the flowers, cancel Recall to lose aggro and return to the casters. The Monks should heal using Heal Party and not chase after the Tanks for direct healing. The Outcast and Oni groups can then be destroyed using single Tank aggro technique. Additional groups of Oni will spawn near both exits to Room 10, as well as near the Kanaxai Aspect of Decay. The Aspect does not need to be destroyed unless there is a nearby chest.
[edit] Room 11: Aspect of Torment

If you went to the right in Room 10, several small groups of Oni will spawn. If you went to the left, you will spawn several small groups of Sapping Nightmares and Freezing Nightmares. All groups can be easily destroyed using Single Tank aggro technique.
Destroy the Kanaxai Aspect of Torment and the adjacent Outcasts in routine fashion.
[edit] Room 12: Kanaxai's Chamber
Both Warriors should cast Recall on the Necromancer. The Necromancer, Monk, and Ritualist should all advance a small distance into the room. The Monk will be casting Heal Party as often as possible. The Necromancer should keep Blood Ritual on the Monk. The Ritualist should cast spirits to provide the Necromancer with an energy battery.

Both Warriors and the other Monk should proceed along the left wall of the Chamber. Kanaxai should be pulled up the left wall to a spot just in front of the midline of the Chamber. Using Defensive Stance and Dolyak Signet as necessary to prevent being knocked down, the Warriors will use Shove in sequence to knock Kanaxai down twice. The second knockdown must occur after Kanaxai has stood back up in order to take effect. Upon the first knockdown, the Monk should retreat to the entrance of the room. If something goes wrong, it is quite possible (using Dolyak Signet, Endure Pain, and Defensive Stance with Heal Party) for a Tank to survive until Shove recharges in order to achieve the second knockdown. With each knockdown, a group of Sapping Nightmares will spawn. Once both knockdowns have been achieved, the Warriors will cancel Recall. The Nightmares generally remain near the knockdown point, and Kanaxai will reset to his default location. The Nightmares should not be attacked or destroyed.

The party then proceeds to the right side of the Chamber and pulls Kanaxai up to the midpoint of the right wall. Both Warriors should block his retreat by establishing position below him. There is no need to block the side facing the casters, as long as they do not get too close.
The primary damage to Kanaxai will come via the Ritualist's spirits with the Warriors causing secondary damage. The Necromancer should concentrate on maintaining Spinal Shivers on Kanaxai and casting Blood Ritual on the Monks (and Ritualist, as needed). Spiteful Spirit and Reckless Haste generally should not be used as the Necromancer's energy is limited and should be dedicated for Shivers and Blood Ritual. The deaths of the Ritualist's spirits provides battery for the Necromancer via Soul Reaping. The Warriors can help interrupt Nightmare Refuge using Distracting Blow. Both Distracting Blow and Nightmare Refuge have a recharge time of 10 seconds, making it easy to establish the correct timing.
- Two warriors attacking with Icy weapons should be sufficient to interrupt every casting of Nightmare Refuge. Monks and Ritualists with Icy Spears may assist with triggering Spinal Shivers when not casting (though this is infrequent). If a Nightmare Refuge slips through, it is often removed by Disenchantment.
- If the knockdown point was not in an optimal position, one of the Warriors can do a sweep by casting Recall on one of the casters, running through the Sapping Nightmares, and leading them to the opposite corner of the room before canceling Recall.
[edit] Notes

- As Kanaxai always
drops a Kanaxai's Edge, Kanaxai's Axe,
and Kanaxai's Mallet, there is a much better
chance of getting a Green drop in a 6 man team. For each person,
- the chance of getting 1 Green is 75/216 = 34.7%
- the chance of getting 2 Greens is 15/216 = 6.94%
- the chance of getting 3 Greens is 1/216 = 0.46%
- the overall chance of getting at least 1 Green is 91/216 = 42.1%
- the overall chance of getting no Greens is 125/216 = 57.9%
- the overall chance of getting at least 1 Green in a 12 man group is 397/1728 = 23.0%
- the overall chance of getting no Greens in a 12 man group is 1331/1728 = 77.0%
- In a coordinated group, this run can be performed in 75 minutes (including stops for out-of-the-way Chests)
- The 6 man Deep team was first discussed on a fan forum on 9/13/2006. [1]
[edit] Team Barrage/Pet (Tomb Ruins)
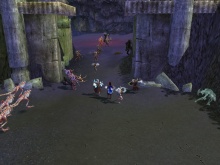
Barrage/Pet (aka b/p, barrageway, petway) is the general appellation of a class of "speed" builds for the ruins of the Tomb of the Primeval Kings.
[edit] Overview
This build utilizes the synergy between Barrage, Favorable Winds, and Winnowing to inflict high damage on multiple foes, with a wall of pets and minions to defend the party. This build requires only loose coordination between players, and a large spectrum of variants are viable. Barrage/pet builds are resilient to dropped players, as only two roles, the monk and the minion master, can be said to be essential.
The most common barrage/pet team consists of:
 5 Barrage rangers
- 1 Minion Master
- 1 Orders Necromancer
- 1 healing Monk
[edit] Membership
This is one of many possible variations. The builds noted below are suitable for pick up groups, but it is by no means definitive. A more complex alternative can be found here.
[edit] Barrage Rangers
| Attribute Rank | |
|---|---|
| Marksmanship | 12 + 1 + 3 |
| Beast Mastery | 8 + 1 |
| Expertise | 8 + 1 |
| Wilderness Survival | 7 + 1 |
 |
|
 |
 |
 |
 |
 |
|
Variations:
- At least one ranger must carry Favorable Winds (FW). A FW Barrager should replace Troll Unguent with Favorable Winds, and move all points from Wilderness Survival into Expertise.
- At least one ranger must carry Winnowing (WW/Winn). A Winnowing Barrager should replace Troll Unguent with Winnowing and can lessen ranks in Beast Mastery for higher ranks in Wilderness Survival if they desire a longer lasting spirit with more health.
- Winter can be used against Terrorweb Dryders and Mark of Rodgort, efficiently preventing it from triggering.
- Consider using Paragon as a secondary profession. Paragons suffer no ill effects when struck by a foe using Fingers of Chaos, and can carry Signet of Return, a repeatable resurrection skill.
- Consider using Ritualist as a secondary profession. Splinter Weapon can increase damage significantly without sacrificing orders damage, and Flesh of My Flesh is an effective combat resurrection.
The purpose of the pets is to tank for the group (at least until the minion master raises a sizable army) and to provide an endless source of corpses for the minion factory. A dead pet with an exploited corpse serves no purpose, so it is important for the rangers to raise their pets at every opportunity.
Note: Skill bar blackout time from pet death is reduced by higher ranks in Beast Mastery.
For additional information, see Build:R/any General Barrager.
[edit] Minion Master
| Attribute Rank | |
|---|---|
| Death Magic | 12 +3 +1 |
| Soul Reaping | 12 +1...3 |
| Protection Prayers | 3 |
|
|
|
 |
 |
 |
|
|
|
The purpose of the minion master is to raise a large undead army and keep the attention of the foes. Unlike many other minion builds, the minions here are not intended for pure damage, but rather to body-block the Grasps of Insanity from reaching the ranger line.
Note that this build is not set in stone, and there are nearly as many variants as there are Minion Masters. Keeping this in mind, some minor variants include swapping the skills Rotting Flesh for Dark Bond for a more durable build, swapping Animate Flesh Golem for Jagged Bones for "free" minions, and changing any of the animate skills.
For additional information please see the general minion mastery guide.
[edit] Orders Necromancer
| Attribute Rank | |
|---|---|
| Blood Magic | 12 + 3 + 1 |
| Soul Reaping | 10 + 3 |
| Healing Prayers | 8 |
|
|
 |
|
|
|
|
|
|
The Orders Necromancer doesn't deal direct damage, but drastically increases the effectiveness of the barrage team due to the guaranteed damage of the Order skills. This character should stay well clear of combat; their low health and reliance on enchantments makes them vulnerable targets.
Note: Well of Blood should only be used in the rare cases where the minion master disconnects. This maybe so rare that you may want to switch out Well of Blood for another skill/spell.
Be careful of enchantments. Casting these to try to 'help' the monk out in a pinch can harm a recipent who is down in HP if he is close enough to a Banished Rider with Shatter Enchantment.
For additional information please see N/Mo Tombs OoV."
[edit] Healing Monk
| Attribute Rank | |
|---|---|
| Healing Prayers | 12 +3 +1 |
| Divine Favor | 12 +3 |
| Protection Prayers | 3 +1 |
|
|
|
|
|
|
|
 |
|
Any pure healing Monk. Use of enchantments is generally discouraged, due largely to the prevalence of Fingers of Chaos and Shatter Enchantment.
[edit] Variants and Discussion
[edit] Critical Barrager
In this variant, any number of Rangers can be replaced by Assassin/Rangers, as they can deal greater damage using Sharpen Daggers to cause bleeding and the increased critical hits.
For additional information, See Build:A/R Critical Barrager.
[edit] Six Barragers Variant
In this variant, the Orders Necromancer is replaced with a sixth Barrager. All Barragers either use elemental bowstrings, or one Ranger brings Greater Conflagration instead of Barrage. The foes in the Tomb Ruins, being mostly of the Warrior and Mesmer classes, have no additional defenses against elemental damage.
Analysis: An Orders Necromancer with maximum Blood Magic gives a guaranteed damage bonus of 17 (or 19 if aided by Awaken the Blood) per arrow that hits. In the worst case, with each of the five barragers hitting just one target each, this translates to an additional damage output of 85 (or 95) for the team. A sixth Barrager with maximum Marksmanship will do around 40 damage per arrow with an elemental string; he will thus have to hit at least three targets every time to outperform the Orders Necromancer's worst case damage output. In even a slightly better case, where each barrager hits three targets each, the damage output of the Orders Necromancer is 255 (or 285), which is more than the sixth barrager can achieve even if all his six arrows connect. Without an orders necromancer, the team is free to use elemental bowstrings, which increases the damage output of every arrow by around 5-10 points.
It should be noted that Order of the Vampire offsets some of the healing pressure from the Monk, and the Orders Necromancer doubles as a battery for the Monk.
[edit] Fevered Dreams Variant
In this variant, either a Ranger or the Monk brings Fevered Dreams and coordinates with the conditioners in the team to spread conditions around using very effective combinations. One possible combination is Fevered Dreams + Enfeeble + Virulence: all foes in the area become weakened, poisoned and diseased. Another possible combination is a ranger/mesmer using Fevered Dreams on a target, and then adding conditions with Pin Down, Apply Poison and Throw Dirt.
Analysis: While potent, this build takes some coordination between the players, and so is most likely not suitable for loosely organized PUGs.
[edit] Minionless Variant
In this variant, the minion master is replaced with a different Death Necromancer build. The plethora of corpses are used for Wells of Suffering and Putrid Explosions instead of the minion factory. This variant depends more heavily on the pets forming a sturdy front line, so it is common to have all Barragers have 8 or 9 in Beast Mastery and bring skills to aid the pets such as Otyugh's Cry, Call of Protection and Symbiosis. The Monk in this variant also tries to keep the pets alive for as long as possible.
Analysis: This variant requires very careful aggro management, and is therefore most likely unusable by PUGs.
[edit] Monkless Variant
This variant replaces the healing Monk with a sixth damage dealing character. All healing in the build is done by Predatory Season and the Orders Necromancer who brings Heal Other and Heal Party for emergency healing. Predatory Season makes minions more durable. This variant is essentially a 100% damage-dealing build.
Analysis: This variant is risky, but when correctly executed, can be among the speediest Barrage/Pet variants. Clearing times of 40 minutes or lower are not unheard of.
[edit] Paragon Variant
In this variant, a paragon replaces the orders necromancer. Anthem of Flame when combined "They're on Fire!" can both increase damage output and reduce incomming damage. "Incoming!" can further reduce spike damage common at the begining of an engagement, and Song of Restoration can provide some additional healing. "Go for the Eyes!" and "Find Their Weakness!" are especially effective with Critical Barragers.
[edit] Historical notes
Historically, the six barrager variant was one of the earliest barrage/pet team compositions. Before Order of the Vampire was modified to make it ineffective together with Order of Pain, the Orders Necromancer was always the clear winner in terms of raw damage output, so the six barrager variant fell into disuse. Its popularity has resurged after a March 2nd 2006 update changed Order of the Vampire, because a well managed six barrager team can match or outperform an Orders Necromancer.
[edit] Team DoA Balanced

The DoA Balanced team build is a build designed to conquer all of the Domain of Anguish (DoA). It is a balanced build that relies on the tried and true formula of a warrior tank, elementalists nuking and monks keeping the team alive.
This build can complete all the 4 areas in the Domain of Anguish: City of Torc'qua, Stygian Veil, Ravenheart Gloom and The Foundry of Failed Creations. The same concept build can be used to defeat Mallyx the Unyielding in the Ebony Citadel of Mallyx with modifications to the damage dealers. The specific steps to use the build in each area are discussed below.
Conquering the DoA in sequence is done in the order: City -> Veil -> Gloom -> Foundry. This has the benefit that the chests at the end of each area would increasingly yield more gems. The City chest will yield one Margonite Gemstone for each party member, the Stygian Chest would yield two Stygian Gemstones, the Ravenheart Chest would yield three Torment Gemstones and finally, the Foundry Chest would yield four Titan Gemstones.
[edit] Build Concept
While there are different tactics for different situations (explained below, in the tactics section), the general outline of how this team works is as follows:
- An Obsidian Flesh tank draws aggro and tries to hold it.
- Three Searing Flames nukers take out the targets.
- A Necromancer-Ranger provides an added punch with Spiteful Spirit and maintains two helpful ranger spirits.
- Two healer monks keep the tank alive and catch any damage that strays towards the elementalists.
- One bonder maintains all bonds on the tank and some bonds on the nukers to prevent massive spikes.
[edit] Build Details
[edit] The Obsidian Flesh Tank
The Obsidian Flesh tank can be done in many ways. This includes a Warrior/Elementalist, Elementalist/Mesmer as well as other builds. The warrior provides the safest approach as their typical armor is 115 vs Physical and 95 vs Elemental damage without using a single skill. That being said, any of the other builds can be even more successful with enough skill and experience in the Domain of Anguish. Find other proposed tanking builds in the variants section.
| Attribute Rank | |
|---|---|
| Earth Magic | 12 |
| Strength | 12 + 3 + 1 |
| Tactics | 3 + 1 |
 |
|
 |
|
 |
 |
|
|
Usage:
- The tank will be heavily bonded. As such he/she will only be receiving partial damage at all times.
- The tank will have Balthazar's Spirit on which will allow for constant casting of all Earth Magic spells.
- When going into a group of foes, it is best not to use Obsidian Flesh or Dolyak Signet as they will slow down your approach. Instead ask for Spell Breaker from a monk.
- When pulling a group of foes, it is actually useful to invoke Obsidian Flesh as you pull foes into the tanking spot as moving slower than computer controlled foes will make them follow you as far as they could as opposed to running at normal speed.
- Use Stoneflesh Aura as often as possible. It will make you take zero damage from nearly all attacks and spells.
- Use Dolyak Signet to buff up your armor when facing foes that deal large amounts of damage such as the Tortureweb Dryders and the Stygian Brutes.
- Use Glyph of Concentration to avoid having any of your spells interrupted. Use Wary Stance to protect the glyph if you expect physical interrupts from attack skills such as Savage Shot from the Spirit Tormentors and Disrupting Throw from the Sanity Tormentors.
- The optional slot can be:
- Ward Against Foes or Grasping Earth when the elementalists start dropping their nukes to snare foes long enough to take them out before aggro breaks.
- Lightbringer's Gaze: To add some offensive punch to this very defensive build and provide an interrupt.
Equipment:
- A sword/axe with +5 Energy and a 20% "of Enchanting" grip. This will give you extra energy and make all the Earth spells last longer on you. Rajazan's Fervor or the Totem Axe make great weapons for this build.
- A Shield with either +30 Health or +45 while Enchanted is optimal. Also, having a secondary set of Earth Magic based wand and Focus item is optimal for energy. It can also be a 15/-1 set to provide an extra energy boost in times of trouble.
- Gladiator's Armor or an armor set fully equipped with Radiant Insignia (for the extra energy) is ideal for this build.
[edit] The Searing Flames Nukers
The primary damage dealers of this build are two regular Searing Flames nukers and one Freezer:
[edit] The Regular Nukers
These elementalists take out foes by spamming Searing Flames and with tactical usage of Meteor Shower.
| Attribute Rank | |
|---|---|
| Energy Storage | 12 + 1 |
| Fire Magic | 12 + 3 + 1 |
| Healing Prayers | 3 |
 |
 |
 |
|
 |
 |
|
|
Usage:
- Wait until all enemy aggro has settled on the tank.
- Maintain Fire Attunement during a fight.
- If the foes contain casters you need to take out quickly (enemy monks, mesmers, necromancers and/or elementalists) then use Glyph of Sacrifice followed by Meteor Shower. Then proceed to spam Glyph of Lesser Energy, Searing Flames and Glowing Gaze as they become available.
- If the foes are mostly melee foes (like all Titans) then inverse the combo. Spam the first four skills on your bar until foes are at half health, then use Meteor Shower to finish them off. In fact, against pure melee foes (Warriors, Dervishes and Assassins), try not to use Meteor Shower altogether.
- If an ally is killed during battle, use Glyph of Sacrifice and then Resurrection Chant.
- If the tank gets hexed in certain critical situations, then use Convert Hexes.
- It's possible to replace Fire Attunement with Essence Bond maintained on the tank.
- May be good for one (only one needed) of the nukers to replace Convert Hexes or Glyph of Sacrifice with Mark of Rodgort. So for 37 seconds all Searing Flames hits (except first one) will cause damage AND reapply burning at the same time, instead of one SF every 5 seconds doing no damage. Against spell casters, cast Meteor Shower first then Mark of Rodgort. The first and subsequent meteors will apply burning, synergizing with Searing Flames (but remember that meteor shower only has adjacent radius while SF and Mark of Rodgort are "nearby").
Equipment:
- As elementalists have a large pool of energy, the only real upgrade this build really needs is 20% HSR preferably on both the wand and the focus item. This is to speed up the readiness of Meteor Shower. Using a 20% HCT+HSR wand and focus set will also significantly increase the DPS by speeding up the casting and recharge times of Searing Flames (normally 1 + 2 seconds).
- A variety of armor choices make sense:
- An armor set with Radiant Insignia will provide extra energy.
- An armor set with Stalwart Insignia will provide extra protection against any melee aggro that comes your way.
- Tempest Armor would provide extra protection as the elementalist will always have at least 2 enchantments on.
[edit] The Searing Flames Freezer
This elementalist freezes enemies piled around the tank so that they do not disperse before they are killed.
| Attribute Rank | |
|---|---|
| Energy Storage | 12 + 1 |
| Fire Magic | 12 + 3 + 1 |
| Water Magic | 3 |
 |
|
|
|
|
|
|
 |
Usage:
- Wait until all enemy aggro has settled on the tank.
- Maintain Fire Attunement during a fight.
- If the foes contain casters you need to take out quickly (enemy monks, mesmers, necromancers and/or elementalists) then use Glyph of Sacrifice followed by Meteor Shower. Then proceed to spam Glyph of Lesser Energy, Searing Flames and Glowing Gaze as they become available.
- If the foes are mostly melee foes (like all Titans) then inverse the combo. Spam the first four skills on your bar until foes are at half health, then use Metoer Shower to finish them off. In fact, against pure melee foes (Warriors, Dervishes and Assassins), try not to use Meteor Shower altogether.
- Cast Deep Freeze to hamper enemy movement until they are taken down. If you drop Meteor Shower on foes, Deep Freeze would be ideal immediately afterwards.
- It's possible to replace Fire Attunement with Essence Bond maintained on the tank.
Equipment:
- As elementalists have a large pool of energy, the only real upgrade this build really needs is 20% HSR preferably on both the wand and the focus item. This is to speed up the readiness of Meteor Shower.
- A variety of armor choices make sense:
- An armor set with Radiant Insignia will provide extra energy.
- An armor set with Stalwart Insignia will provide extra protection against any melee aggro that comes your way.
- Tempest Armor would provide extra protection as the elementalist will always have at least 2 enchantments on.
[edit] The Spiteful Spirit Spammer
This high utility necromancer provides pressure by casting Spiteful Spirit on enemies, maintianing useful spirits up during fights, providing other casters with energy and bringing a pet for the Foundry.
| Attribute Rank | |
|---|---|
| Beast Mastery | 10 |
| Blood Magic | 2 + 1 |
| Curses | 12 + 3 + 1 |
| Soul Reaping | 8 + 1 |
|
|
|
|
|
|
|
|
|
Usage:
- Lay down Edge of Extinction at the start of every fight in a safe spot that keeps all foes in range.
- Pick your spots... Lay Spiteful Spirit on the foes most likely to trigger it the most. Margonite Anur Vus, Fury Titans, Stygian Horrors and so forth are prime candidates while foes that activate skills slowly like Margonite Anur Tuks or Despair Titans would be poor targets.
- Cover SS with Reckless Haste. It also enhances the triggering of SS.
- Spam Desecrate Enchantments as it becomes available. Enemy Dervishes are the best targets for these.
- Use Blood Ritual on teammates as they need energy.
- Use Symbiosis only in the Stygian Veil when the tank is pulling groups that may contain Stygian Hungers. It is best when laying it down to put it in a spot to the side of where the tank will hold aggro, not behind. This way it will give the tank the furthest possible coverage.
- In the Foundry, kill your pet (by moving around) before the entrance to each chamber, and then resurrect it after the chamber is cleared.
Equipment:
- A Necromancer staff or wand and focus item that provide extra energy as well as halving the spell recharge on Spitefull Spirit are ideal.
- Cabalist's Armor or an armor set fully equipped with Radiant Insignia (for the extra energy) is ideal for this build.
[edit] The Healer's Boon Monk
| Attribute Rank | |
|---|---|
| Divine Favor | 12 + 1 |
| Healing Prayers | 12 + 3 + 1 |
Place spare points in death magic
|
|
|
|
 |
 |
 |
|
|
Usage:
- Maintain Healer's Boon on at all times during a battle.
- Maintain Essence Bond on the tank.
- Dwayna's Kiss and Ethereal Light are the primary healing skills.
- Use Heal Party to heal the tank at a distance, or when the party is collectively moving and taking damage from Enduring Torment.
- Use Healing Seed on the tank and alternate it with the other monk.
- Use Necrotic Traversal or Consume Corpse to jump outside of rooms as a saftey measure in the Foundry, see the walkthrough below.
Equipment:
- A perfect Insightful Staff of Enchanting with 20/20 HSR and HCT for Healing Prayers is optimal.
- Ascetic's Armor or an armor set fully equipped with Radiant Insignia (for the extra energy) is ideal for this build.
[edit] The Spell Breaker Monk
| Attribute Rank | |
|---|---|
| Divine Favor | 12 + 3 + 1 |
| Healing Prayers | 10 + 1 |
| Protection Prayers | 8 + 1 |
|
|
|
|
|
 |
|
|
|
Usage:
- Maintain Essence Bond on the tank and Blessed Aura on yourself.
- Dwayna's Kiss is the primary healing skill.
- Use Protective Spirit on any party member other than the tank who begins to draw the attention of foes.
- Dismiss Condition is primarily for the Prisoners of the Foundry Breakout quest so that they do not become crippled, however, there is disease, Poison, Bleeding and Deep Wound along the way, so feel free to use it as needed. It is also useful as a moderate heal.
- Cascade Healing Seed on the tank with the other monk.
- Use Spell Breaker on the tank as he goes in to gather aggro. This will allow the tank to move freely without being slowed by Obsidian Flesh. In any fight that includes spell casters that can jeopardize the tank's enchantments (Margonites, Greater Dream Riders, Anguish Titans, ...) make sure to renew Spell Breaker on the tank every time it recharges.
Equipment:
- A perfect Insightful Staff of Enchanting with 20/20 HSR and HCT for Healing Prayers is optimal.
- Ascetic's Armor or an armor set fully equipped with Radiant Insignia (for the extra energy) is ideal for this build.
[edit] The Bonder
| Attribute Rank | |
|---|---|
| Divine Favor | 10 + 3 |
| Inspiration Magic | 10 |
| Protection Prayers | 11 + 3 + 1 |
|
|
|
|
|
|
|
|
|
Usage:
- Maintain all the bonds above on the tank in order from right (Life Barrier cast first) to left (Vital Blessing cast last).
- Maintain Balthazar's Spirit on yourself as well.
- Maintain Life Barrier on the elementalists and (depending on your skill and how comfortable you are with bonding) everyone else.
- When the party gets to the Prisoners part in the Foundry (see below), you will need to maintain Life Barrier, Life Bond and Vital Blessing on each prisoner as he is being rescued. After the prisoner is taken to safety, you can remove those bonds. Since no fighting takes place during those sequences, you can drop the bonds on the elementalists if you need to.
Equipment:
- A perfect Insightful Staff of Fortitude with +5 Energy while health is above 50% ("Hale and Hearty" inscription) is optimal.
- Ascetic's Armor or an armor set fully equipped with Radiant Insignia (for the extra energy) is ideal for this build.
- Two head pieces, a Defender's head piece with a superior Protection Prayers rune to cast the bonds and then a Prophet's head piece with a superior Divine Favor rune to maintain them.
[edit] Tactics
This is a detailed area by area walkthrough:
[edit] The City
During the city, there are no major hurdles to be wary of other than the annoying energy denial setting. The environmental effect Repressive Energy along with the skill set of the Margonites makes it harder than usual to manage one's energy. The bonder may need to drop bonds on one of the damage dealers (usually the necromancer).
Tanking and pulling in the City is straightforward and involves pulling and using corners to pile foes in preparation to nuke them. In general, after the tank has pulled foes to a spot, the elementalists should apply Searing Flames pressure on the closest foes until the Margonite Anur Ki steps up to heal them (they like to use Healing Whisper). As soon as that happens, the elementalists should unload a Meteor Shower or two on the Ki until he dies.
After the city has been cleared, the groups that come with Lord Jadoth can each be pulled to the city gate (with the party hiding inside) and then dispatched (while the tank prevents them from coming in by blocking the door way). If any of the groups that accompany Jadoth (Shaunur the Divine's group, Turep, Maker of Orphans' group or Jadoth's group itself) give the tank trouble while pulling them, an elementalist can aggro them through the wall by casting on them. This usually makes them want to go all the way into the city to get to the elementalist.
[edit] The Veil
Conquering the Stygian Veil involves four stages:
- Clearing the initial mobs of monsters at the start of the Breaching the Stygian Veil quest.
- Clearing the two hills north and south to defeat the two Stygian Underlords and complete the Breaching quest.
- Killing the four Stygian Lords to complete Brood Wars and cause the Dreadspawn Maw to appear.
- Destroying the Dreadspawn Maw.
[edit] The Initial Assault
For the first part of Breaching the Stygian Veil, the party should first clear the area south of the Acolyte who gives the quest. There is a small bend there that the tank can use for holding mobs. To use this spot, the party needs to clear any casters or rangers in the patrol moving below in the trench. Then they need to clear out the one patrol of Shadow Army that blocks the path leading to the Whispers Acolyte.
The tank should take the quest and back up till all the mobs reach the Acolyte. Spirits should be laid and then the tank should pull all the mobs (by aggroing using his/her bubble, not a bow). There will be three mobs jumbles up together, whenever you clear a mob, another will come from the same hill that the first mob came from, till you see a mixed group of foes. That will signal that there will be no more mobs coming from that hill. If the party is inexperienced, they may want to pull one group at a time using a bow.
Depending on the type of mobs, the party should react accordingly:
- Groups of Stygian Hungers should be pulled to tank, they will pile themselves around him nicely. Nuke a middle target, freeze them and then finish them off with Searing Flames. Use Spell Breaker or Obsidian Flesh when they are below half health to prevent them from using Grenth's Balance on the tank.
- Groups of Stygian Brutes or Stygian Horrors do not require Spell Breaker. However, the tank should buff himself up with the Dolyak Signet as soon as he/she gets to their spot as their Physical damage can trickle to the bonder.
- Groups of Stygian Golems actually benefit from Symbiosis, but not as much as the tank. They are handled like the Horrors and Brutes.
- Groups of Stygian Fiends are very dangerous. The tank should pull them back using a zig-zag motion till they form a tight ball for the nukers to nuke them. Also, if the tank goes to them in melee range and attacks, they will say on him.
- Mixed groups will usually have one Fiend and then the rest will be melee. The melee foes should be nuked first and should the Fiend go for the party , containing it should not be a problem.
[edit] The Two Hills
Starting with the southern hill, the technique should be the same. Spirits get laid down, the tank goes in and gathers several enemies, then brings them back within spirit range and tanks them. The only thing to watch out for is that the Stygian Fiends can cripple the tank and the Horrors can knock him/her down with Bull's Strike. The Healer's Boon monk should use Heal Party to aid the tank at a distance. When pulling the Underlord's group with Water Tormentors, the tank should have Spell Breaker coverage.
The northern hill has pop-ups through out the first half of it. As such, the spirits should be laid outside the hill, the tank should go in till a group starts popping up (the tank should stand still till they all come out of the ground, there is usually 6 monsters). The group will be mixed with at least one Stygian Fiend. There are thre more pop-up groups past the first one. A group around each of the Torment Claws that will spawn near the middle of the hill.
Past those Torment Claws, there should be no hidden groups and the tank should proceed like the first hill, gathering groups and bringing them to spirit range until the other Underlord is killed. The spirits should be constantly moved as the party makes its way deeper into the hill.
[edit] The Stygian Lords
There are ways to skip over barriers and so on to get to the Stygian Lords. This guide will simply tackle the problem straight on.
The party should choose one of the trenches to clear out, the best candidates would be the second trench to the north or south. Either of those trenches leads to a Stygian Lord, and from there on the party can move in a circle to get to the remaining three. The one to the north leads straight to the monk Lord and offers a quick passage to the Gloom.
Each trench will spawn two melee groups as soon as someone is half-way through it. The two groups will rush towards each other (and kill anyone stuck inside) and then will camp on the opposite end of where they spawned. In addition, some Tormentor demons will spawn up top on one or both sides of the hills sandwiching the trench. To avoid surprises, one party member can simply run into the trench to trigger its spawns and then die half way through. The party can then Rebirth that member from atop one of the two hill overlooking the trench. If dying is such a big deal, one Elementalist can go secondary Assassin and bring Recall and use it to leave the trench before the pop-up groups close in on him/her. Also, if the tank is skilled and familiar with the spawns, he/she can take SB, go into the trench and pop up all the pop-ups then go back and tank them at the start of the trench. Bonder must watch that the tank not lose bonds.
Once the trench's spawns are stationary the tank can tackle them under spirit range and the party can destroy the closer melee group then the further one as well as the spawns on top of the hills. Once the trench is clear, the party can proceed to the Stygian Lord, kill any patrols roaming around him, and destroy him. From that point on, the party will simply circle around to kill the other three lord (see the walkthrough for the quest Brood Wars for their locations).
Note the following:
- The first Stygian Lord to the south is a necromancer, there is a patrol that comes in front of him from the east and another from the west. After clearing the eastern patrol, he can be pulled without the western patrol. He is guarded by Tormentor demons.
- The next one to the east of him is a mesmer. There is a stationary group of Tormentors around him as well as two spawns of Torment Claws.
- The next one to the northeast is an elementalist. There are two patrols on the way to him and then a large pop-up spawn inside the alcove he is found in. The tank should hold them around the entrance to the alcove so they cannot go around him to the rest of the party. Casters should watch out for Chain Lightning and Sandstorm from the Stygian Lord.
- The final boss heading northwest from that spot is a smiting monk. Again he is found in an alcove which he can be pulled out of using a long bow. If anyone steps past the entrance of the alcove, a spawn of Stygian Hungers will appear at the entrance. The party should either pull carefully or trigger them on purpose and take them out first.
[edit] The Dreadspawn Maw
After the party returns and cashes in the quest Brood Wars, the Dreadspawn Maw will appear immediately behind them. Make sure everyone is out of the center area and safely next to the Acolyte before having ANY party member accept the reward. The Maw will be comprised of six Smothering Tendrils. The objective is to kill all six and their spawns.
For each Tendril, one elementalist should weaken it with Searing Flames and finish him with Meteor Shower, when it is at half health. This elementalist should have Protective Spirit on them by the Spell Breaker monk. Everyone else should move back north where the party originally killed the monsters of the initial assault.
As soon as the Tendril is about to die, the SB monk should leave and join the others. The elementalist should finish off the Tendril and then pull back slowly. As soon as the Tendril dies, numerous Torment Claws will spawn as will as several Stygian creatures. If the Stygian creatures DID see the elementalist, he/she should just pull back slowly and have them kill him/her midway to the party. They should NOT bring them back to the party otherwise the party can wipe after doing so much work. After they kill the elementalist, someone can rebirth him/her and then the tank can pull the spawned groups into spirit range and the party can destroy them.
The party can then proceed to kill all the Torment Claws that spawned (great wanding fun). The same steps should be repeated for each Smothering Tendril.
[edit] The Gloom
The Ravenheart Gloom is comprised of three quests plus the final fight against The Greater Darkness.
[edit] The Stand-off
The quest To the Rescue! invovles making a stand against a massive horde of demons in the little nook that the whispers followers will be located. The party can choose to run past the first mobs as well as the wandering patrols outside that little nook. Alternatively, the tank can round them up and bring them to corners and the elementalists can nuke from behind the tank.
Once the group gets to the nook (fighting or running), the tank should find the corner that leads outside the nook and hold aggro there. Everyone else should stay behind the tank and hug the wall so that foes need to go through him/her to get to them. The Spell Breaker monk must have Blessed Aura on in this part as well as a weapon of Enchanting. It is imperative that the monk and the tank be able to chain Spell Breaker and Obsidian Flesh to prevent the tank from being hexed. Currently, the skill Rending Sweep used by the Earth Tormentors is glitched and will strip the tank of ALL enchantments if the tank is hexed.
With careful and timely casting, constantly staying on the closest target and stepping away when foes try to cast on them, the party should be able to survive the onslaught. When the kills start piling up, EoE will kick in and help out a great deal.
[edit] The Rift
After the Rescue is completed, the next quest, The Rifts Between Us, invovles capturing a portal (a Chaos Rift guarded by two Torment Claws) northeast of that alcove. The party can head to the quest marker and find the ridge south and a little east of the quest marker. This ridge should be used by the tank to provide a corner that he/she can hold monsters behind (the party should be below the ridge not above it).
The tank should pull the roaming patrols around the rift and then the stationary group at the rift (without entering the rift's range). After they are cleared, the elementalists should take out the claws.
Once the area is clear, 4 or 5 party members should go in and capture the rift. As soon as they do, a group of Flesh Tormentors will spawn to the west of them and rush to them. They should stand fast until the rift is closed and the quest updates and then start running back south and below the ridge. Do NOT run above the ridge as a group of Earth Tormentors, who can cripple their foes, will spawn there. The Flesh Tormentors will not follow for long and the group can cash the quest and take the next one.
The next quest is trivial compared to this. The tank can simply walk up to the Deathbringer Company and the elementalists can nuke them and freeze them so they don't scatter. With EoE they should wipe fairly quickly.
[edit] The Greater Darkness
After the final quest, the Greater Darkness will spawn. The tank should approach with Spell Breaker. This will cause two more of the Darknesses to spawn. The tank should line them up and then the elementalists should take them out. After those three die, a spawn of five more Darknesses will appear. The party should back off and let the tank pile them up into one nice nukable bunch. If they aggroed on some party member in the back, it may be best to simply pull back collectively, break aggro and then send the tank back in anew. After they are piled up and nuked, all five must be killed at the same time, so EoE must be used here.
If the tank had any hexes before they died, this hex needs to be converted or the next spawn of Earth tormentors (30 in total) will destroy the tank. Again, the party should step back and let all the Earth Tormentors settle on the tank (with Buffs, the tank will take 0 damage from them). Once they are piled up, they should be nuked and frozen until EoE takes its course and the whole lot just dies.
[edit] The Foundry
[edit] 1st Chamber
This is the easiest of the four chambers and should be completed without the party having to use the "Necrotic Traversal then Rebirth" trick. However, just to be safe, the necromancer should have his/her pet die outside the first gate. Everyone should take the quest from Captain Jerzah. As soon as everyone is sufficiently deep enough into the room, the gates will lock and a group of Margonite Anurs will spawn at the end of the room.
The Tank should be covered with Spell Breaker and should go in just as the spawn of Margonites is collapsing so as to form a nice ball for Meteor Shower. Remember not to cast anything on the tank while he/she is in their aggro range until all aggro settles on him/her (i.e. their melee attackers all start attacking). As soon as aggro is set, the elementalists should proceed to nuke with Meteor Shower first. When this group is about to die, make sure to save one last Margonite and pull him back to the gate where party came in, then finish him off there. This should ensure that the next spawn of Titans does not aggro the party, or at least aggro only on the tank. After the last Margonite dies, 3 Rage Titans and 3 Despair Titans will show up.
If those Titans spawn ouside of everyone's aggro, then the tank should take another Spell Breaker and go to them. If they spawn within aggro range of the tank then he/she should use Obsidian Flesh and walk to them (to ensure they do not walk to him/her and see other party members behind). Whenever the tank is setting aggro like this, Heal Party should be the only healing used.
These titans will not spawn more titans, however, because they cannot be knocked down, Meteor Shower acts like Fire Storm making them scatter rather quickly. So, try and stick with Searing Flames as much as possible. Finish off the Rage Titans first as they can wipe out the whole party with Earthquake followed by Churning Earth. If things look grim, the Healer's Boon monk should always have his/her finger on the Necrotic Traversal trigger. However, with experience, this group should be easy to take out with no deaths.
Revive the pet then move it to the door of the next chamber and then let it die.
[edit] 2nd Chamber
This room is nigh impossible to fight in. It is very small and the spawn that appears after the door closes has three Tortureweb Dryders (which can wipe a tightly packed party in 2 spells). The party should hug the left wall and proceed slowly until the spawn appears. As soon as it does, the Spell Breaker monk should throw Spell Breaker followed by Protective Spirit on the Healer's Boon monk and that monk should Necrotic Traversal out of the room and move away from the casting range of the Dryders.
If the spawn did not see them, the party should retreat to the gate quickly, cast Spell Breaker on the tank and have him/her go in and pile aggro on the Margonite monk. If they've been seen, the party should try and take out the Margonite Anur Ki that spawns in this group before wiping as well as any Dryders they can, however, they should also try to die as close as they can to the gate. After the fight is over and all members in the chamber have died, the monk should proceed to rebirth them outside the room leaving the tank.
After the casters have all been resurrected and bonded, one of the elementalists should "Glyph-Sacc Rez" the tank inside the chamber. The tank should come as close as possible to the gate and the bonder should careully reapply bonds while the monk heal him/her. The elementalists should be able to nuke the enemy from across the gate and the wall. They should spread apart so that Searing Flames does not damage all of them at the same time.
Sometimes, a foe or two will run off and get stuck on the opposite side of the room. If the party waits for a few minutes, that foe will come back within casting range.
When the chamber is almost cleared, the Spell Breaker monk should cast Spell Breaker on the tank as the second spawn contains a Greater Dream Rider. The second spawn should be cleared in the same manner.
Revive the pet then move it to the door of the next chamber and then let it die.
[edit] 3rd Chamber
This chamber will spawn all its creatures at the same time (there will be no secondary spawn after the first groups are wiped). There will be four patrols roaming the room (all of which come near the gate, but not all the way). A patrol of 4 Misery Titans, a patrol of 4 Anguish Titans, a patrol of 4 Rage Titans and a patrol of 3 Dryders along with one Rider.
The Titans in this room will exhibit the usual Titan behavior of spawning smaller Titans. There are two spawn chains:
The Healer's Boon monk should wait outside the gate using Necrotic Traversal. The Tank can try and pull the Misery titans (easiest to take out) and the party can wipe trying to finish them off. After the party is rebirthed on the outside, the tank can proceed to pull group after group, while the elementalists take them out.
Revive the pet then move it to the door of the next chamber and then let it die.
[edit] 4th Chamber
This chamber will again give the party room to operate. A spawn of Dryders along with a Margonite Anur Ki will spawn at the middle or back of the room. They can be taken out by a frontal assault (tank charge in when they are balled up). Before the last foe dies, the party should pull that foe back to the beginning of the room and finish it off there to be safe. The next spawn will be a large group of Dementia Titans. At this point, the Healer's Boon monks should leave the room to be safe. The party can try and kill them while they are on the tank. If aggro breaks, a wipe + rebirth maybe necessary.
After this group there will be a mixed group with a Margonite Anur Ki, a few Titans and a Dryder. One of the Titans is a special Fury Titan that drops a unique item.
After this room is clear, you can proceed to take the quest reward and the next quest from Tekliss. The pet will no longer be needed.
[edit] The Great Hall
The name of the game in the Foundry is pulling and aggro control. Because the Foundry is spacious, kiting and breaking aggro if things go bad is quite possible, so there will be no more need for the pet.
As soon as the party goes in, they will see a large Vat to their right with a small gap between it and the wall. That gap will be the focus of all pulling and tanking till that part of the Foundry is cleared. The tank will simply aggro a group and tanks them at the gap so that they are unable to get through the gap and then the nukers can cast on them through the wall.
Past the gap, the party will see 4 large vates in the center of the hall, they should always use those vats for groups that do not pull all the way to the gap. The tank should pull the foes to the vat, the casters should be behind him/her so that the enemies need to go through the tank to get to them and then nuke. The Greater Dream Riders always like to camp on the right side of the tank, as such, if he/she pulls them around a corner where the wall is to the right, they will pile on the tank perfectly.
After all patrols are cleared, the party can attempt to complete the quest. For each prisoner, the bonder will place Life Bond and Life Barrier on that prisoner, and the SB monk will place Spell Breaker on the prisoner and immediately after that, the tank will speak to the prisoner and advance the quest). Then everyone needs to run far away and the prisoner will follow them. If the prisoner is crippled, Dismiss Condition should be used, Heal Party should be used for healing the party as they move. After aggro breaks, everyone should stand still, and the one elementalist (codenamed, the babysitter) should take the prisoner away till the names in the party are all grayed out. This will ensure the prisoner does not follow the party anymore.
The same procedure should be done with the other two prisoners. Captain Valkyss' group should be taken out as they are in the way of future fights. First, the party should run away till the mob stops following. The Captain should be taken away to safety and then the remaining party members should kill off the Dryders and Riders.
After all three prisoners are safe, the tank should advance to the gate to aggro the spawn of The Black Beast of Arrgh. With bonds, the tank should be able to tank him even with 0 attribute points. However, the Beast should first be pulled all the way to where his patrol will follow no more and then fought there so that they do not try and go for party members behind the tank.
After the Beast dies, the quest will be completed and the prisoners will be removed from the party list. The babysitter should cash in the quest to trigger the Fury and come help the party finish off the Black Beast's group. The party can then take on The Fury's group. The tank can keep pulling the Fury's Group back and forth until they find the spot beyond which they will not follow, and then nuke the monks from the side first then the Dryder guardians and the Riders. The Fury is actually less of a threat than those Dryders.
[edit] Variants
- One of the Searing Flames nukers can be replaced with Necromancers using Feast of Corruption or a Mesmer using Spiritual Pain to spike. It's usually good to have at least two elementalists with Meteor Shower in the team.
- The SS Necro can be replaced with a BiP necro carrying the same spirits if the party has energy issues.
- The tank does not necessarily need to be an Obsidian Flesh warrior. Other tanking builds can be used, as well as non-warrior tanking builds like a continual Shadow Form assassin or an Obsidian Dervish. One such variety uses an elementalist as follows:
[edit] Elementalist Tank
This tank is more fragile in terms of vunerability to enchantment removal. However, they have longer more powerful Earth Magic enchantments as well as infinite energy.
| Attribute Rank | |
|---|---|
| Earth Magic | 12 + 3 + 1 |
| Energy Storage | 3 + 1 |
| Inspiration Magic | 12 |
 |
 |
|
|
|
 |
|
|
Usage:
- Generally keep up Stone Striker + Mantra of Earth at all times except in select situations. They will provide you with infinite energy.
- Before a pull, invoke Stoneflesh Aura to take 0 damage from most attacks and go in with Spell Breaker on.
- While pulling, if met by strong physical damage (such as from the Stygian Brutes), invoke Armor of Earth. because of the lower base armor, the bonder can take significantly more damage through Life Bond than is customary with warrior tanks.
- If anticipating interruption, use Mantra of Resolve.
- If dazed or facing heaving interruption, use Glyph of Concentration while under Mantra of Resolve and then cancel Mantra of Resolve with Mantra of Earth.
- Use Obsidian Flesh when Spell Breaker is about to run out.
- The optional slot can be:
- Ward Against Foes or Grasping Earth when the elementalists start dropping their nukes to snare foes long enough to take them out before aggro breaks.
- Lightbringer's Gaze: To add some offensive punch.
- Sliver Armor: To help block physical interrupts as well as deal out considerable damage.
Equipment:
- A sword/axe with +5 Energy and a 20% "of Enchanting" grip. This will give you extra energy and make all the Earth spells last longer on you. Rajazan's Fervor or the Totem Axe make great weapons for this build.
- A Shield with either +30 Health or +45 while Enchanted helps. However, having an Earth Magic Focus item with 20% chance of halving skill recharge is optimal. It can also be a 15/-1 set to provide an extra energy boost in times of trouble.
- Geomancer's Armor has great synergy with Stone Striker.
[edit] Notes
- The monsters in the Stygian Veil have a bad habit of following for a very long time. As such, it is important that the bonder remain out of the aggro range of the party and that no one drags any aggro back to the bonder for any reason (kite around, do not run). The bonder will be the safety valve in case anything goes wrong.
- Should the inconceivable happen and the tank dies outside of the range of Resurrect in the Foundry, a work around is for the Healer's Boon monk to use Necrotic Traversal on a nearby corpse, if there is one near the gate, and get the tank. The Dryders' corpses never go away until exploited.

